SKU 94443
For technical questions, please call 1-800-444-3353
Page 9
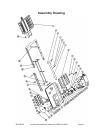
Bearing Block
Oil Port
Nuts (20)
Brass Bearing
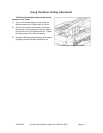
5) Be sure that the Blade remains wet during the cutting operation. If the Motor (22) slows down
appreciably, slow down your feed rate or pull the tile smoothly back from the Blade. If the Blade runs
dry, pull the tile smoothly back from the blade until the blade picks up water from the tank.
6) Do not use this saw over 30 minutes each hour, or longer than 20 minutes continuously. This will help
prevent overheating of the saw, and extend saw life.
7) When done cutting, move the Power Switch (6) to the OFF position. Allow the Cutting Blade to come
to a stop on its own. Do not manually stop the Cutting Blade by grabbing it or holding an object
against it. Stopping the Cutting Blade causes stress and possible damage to the gears and belts.
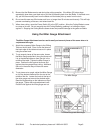
Using the Miter Gauge Attachment
The Miter Gauge Attachment can be used to easily cut several pieces of the same size or to
cut pieces at an angle.
1) Attach the accessory Miter Gauge to the Sliding
Table on the left side. Place it onto the fence at
the back edge of the table and secure it in place
using the screw knob.
2) To cut several pieces of the same size, loosen
the Miter Gauge and slide it along the fence until
it is at the desired distance from the slot in the
middle of the table. Tighten the Miter Gauge in
place. Position the tile against the fence and
against the miter gauge when cutting. Additional
tiles cut in the same way will have the same
dimension.
3) To cut pieces at an angle, adjust the Miter Gauge
so it is the desired distance from the slot at the
middle of the tile. Loosen the knob at the top of
the miter gauge and move to the desired angle.
Read the angle setting on the indicator on top of
the gauge. Tighten the angle adjustment knob.
Place the tile against the miter gauge and cut.
The Miter Gauge
The Miter Gauge set at an angle


