


307-830 15
Connecting
Rod and Bearing Housing
WARNING
INJECTION
HAZARD
T
o reduce the risk of serious bodily
injury
, follow the
Pressure Relief Proce
-
dure W
arning
on page 1
1 before check
-
ing or repairing any part of the spray system.
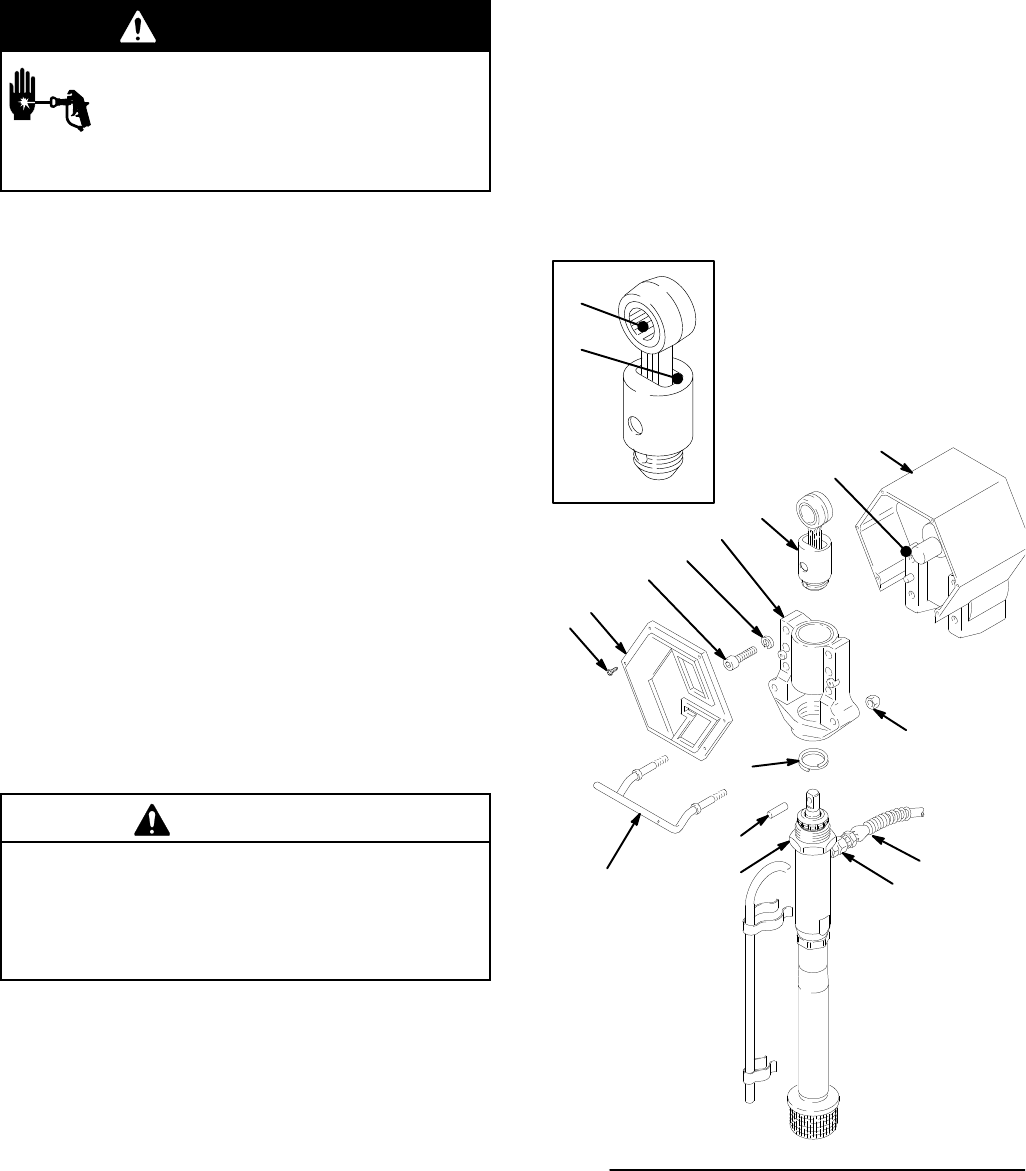
NOTE:
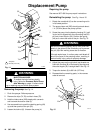
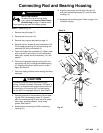
Refer to Fig. 16.
1.
Remove the pail hanger (7).
2.
Remove the front cover (12).
3.
Remove the pump as described on page 14.
4.
Remove the four screws (9) and lockwashers (10).
Pull the bearing housing (51) and connecting rod
assembly (52) of
f the crankshaft (C).
5.
Clean and inspect the crankshaft (C). Wipe it clean
with a rag (don’t use solvent). If the crankshaft is
badly worn, replace the drive assembly (14). See
page 21.
6.
Clean and inspect the bearing housing (51) and
connecting rod (52), including the needle bearing
(A). Replace both parts if either is worn or dam
-
aged. See Detail A.
7.
Clean the mating surfaces of the bearing and drive
housings.
CAUTION
T
o extend the service life of the connecting rod
bearing, lubricate it properly
. After every 100 hours of
operation, or whenever servicing the pump (whichev
-
er comes first), fill the cavity (B) in the connecting
rod with SAE non-detergent motor oil. See Detail A.
8.
Coat the surfaces of the connecting rod and bear
-
ing with SAE non-detergent motor oil. Liberally
pack the needle bearing (A) with industrial grade,
heavy duty
, extreme pressure, lithium soap
grease. See Detail A.
9.
Assemble the connecting rod (52) and bearing
housing (51).
10.
Align the connecting rod (52) with the crank (C)
and push the bearing housing (51) onto the drive
housing (14).
11.
Assemble the remaining parts. Refer to page 14 to
reinstall the pump.
01750B
Fig. 16
30
32
C
9
10
52
51
12
49
7
50
6
A
14
B
13
5
Detail A