


16 307-830
Drive
Housing
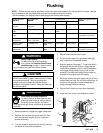
WARNING
INJECTION
HAZARD
T
o reduce the risk of serious bodily
injury
, follow the
Pressure Relief Proce
-
dure W
arning
on page 1
1 before check
-
ing or repairing any part of the spray system.
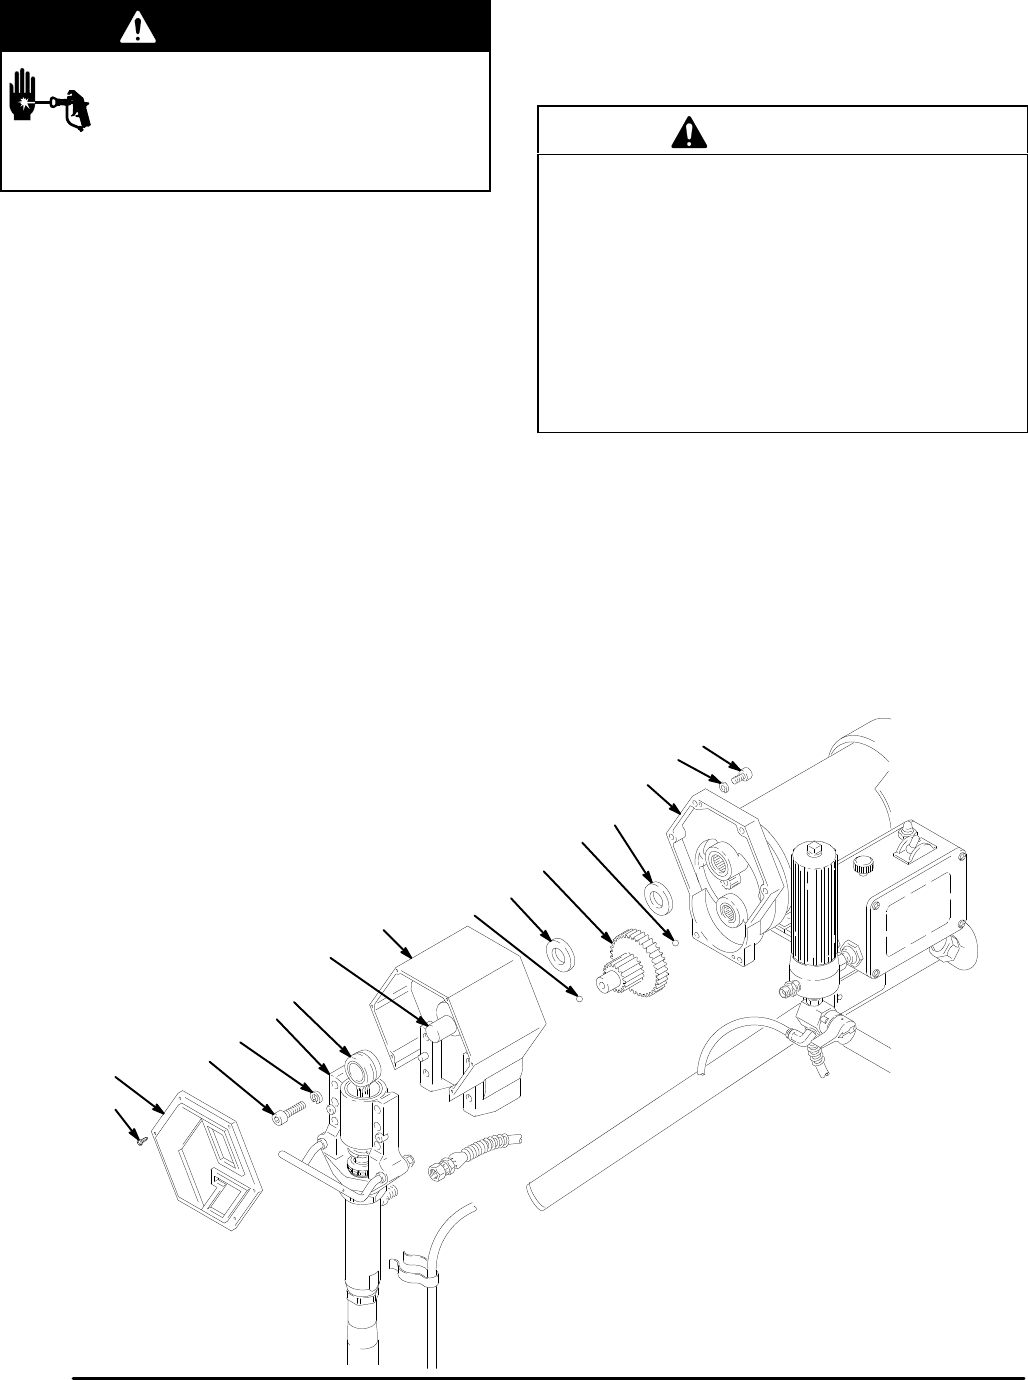
NOTE:
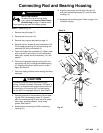
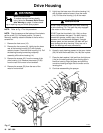
Refer to Fig. 17 for this procedure.
NOTE:
Stop the sprayer at the bottom of its stroke to
get the crank (C) in its lowest position. T
o lower it
manually
, carefully rotate the blades of the fan with a
screwdriver.
1.
Remove the front cover (12).
2.
Remove the four screws (9). Lightly tap the lower
rear of the bearing housing (51) with a plastic
mallet to loosen it from the drive housing (14). Pull
the bearing housing/connecting rod/pump
assembly of
f the drive housing (14).
3.
Remove the screws (42) from the recess of the
drive housing (14). Remove the screws (72,53)
from the rear of the motor’
s front end bell.
4.
Remove the screws (53) from the rear of the
motor’
s front end bell.
5.
Lightly tap the lower rear of the drive housing (14)
with a plastic mallet to loosen it from the motor
(16). Pull the drive housing (14) of
f the motor
.
CAUTION
DO NOT drop the gear cluster (56) when removing
the drive housing (14). The gear may stay engaged
in the motor or drive housing.
DO NOT lose the thrust balls (14c, 16b), or allow
them to fall between the gears. The balls, heavily
covered with grease, usually stay in the shaft
recesses, but could become dislodged. If caught
between gears and not removed, the balls will seri
-
ously damage the drive housing. If they are not in
place, the bearings will wear prematurely
.
6. Liberally apply bearing grease to the gear cluster
(56).
Be sure the thrusts balls (14c,16b) are in place.
7. Place
the dark washer (14b) and then the light one
(14a) on the shaft protruding from the big gear in
the drive housing. Align the gears and push the
new drive housing straight onto the motor and its
locating pins.
8.
Continue reassembling the sprayer
.
01752C
Fig. 17
12
9
10
A
14
14c
14b
56
14a
54
53
16
51
16b
13
C