


04581922_ed4 EN-6
EN
SECTION 3 - OPERATING INSTRUCTIONS
REMOVING AND REPLACING THE BATTERIES
It is recommended that the wrench is turned o before batteries
are removed so that any current data can be backed up (see Auto
Power O function). If this is not done, when the wrench is turned
on it will show memory checksum errors (or a message advising
power was removed incorrectly).
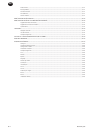
Removing
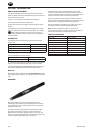
To remove the batteries from the Expert Torque Wrench:
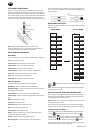
Unscrew the end cap (counter-clockwise) as shown and remove.
Tilt the Expert Torque Wrench slightly to allow the batteries to
slide out.
Replacing
Place Ingersoll Rand battery pack ETW-EBP into the Expert Torque
Wrench as shown, making sure the Positive (+) end of the battery is
facing into the device and the Negative (-) end is towards the cap.
Replace the cap by carefully screwing it clockwise against the
spring pressure, taking care to keep it at a right angle to the Expert
Torque Wrench body to avoid cross-threading.
Note: If the Expert Torque Wrench does not switch on and the LED is
showing a constant amber light, the Expert Torque Wrench will have
to be reset. Press the ESCAPE and keys simultaneously and
hold for a few seconds to perform a hardware reset.
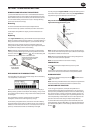
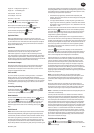
INSERT NEW BATTERIES AS SHOWN.
CHECK POLARITY OF BATTERIES -
MINUS (-) TO END CAP
UNSCREW END CAP TO
ACCESS BATTERY
COMPARTMENT
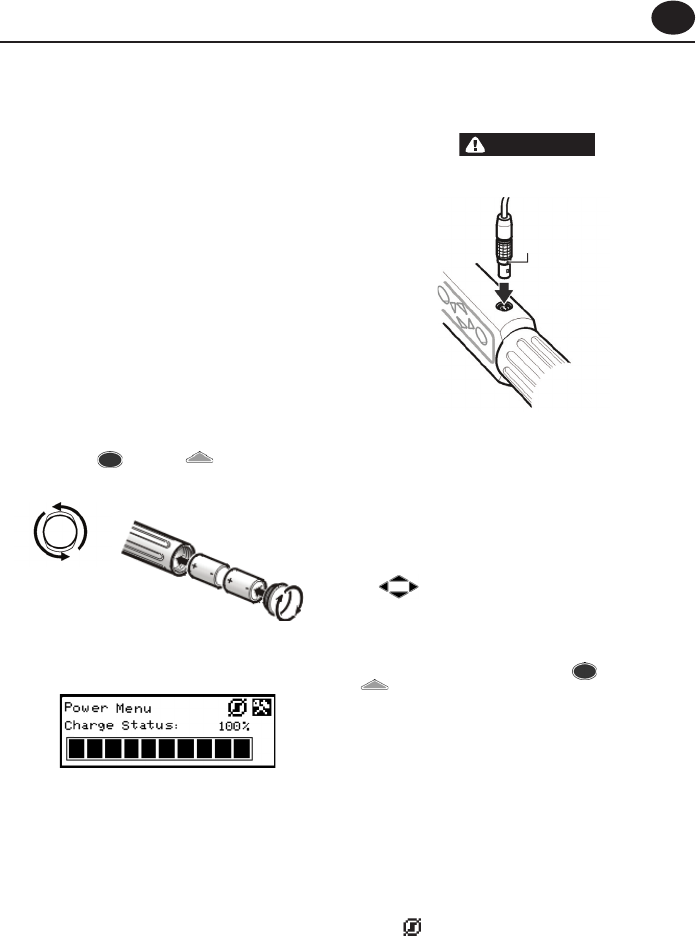
RECHARGING THE ETW-EBP BATTERIES
The Power Menu will show the available charge left on the battery
- see Setup Menu / Power Menu.
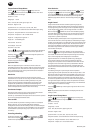
When the menu show 3 bars left (30%), the wrench will display a
ashing battery symbol at the bottom of the display, on any screen.
This indicates that the battery charge is low and the battery should
be recharged.
As a precautionary measure, the wrench will turn o the
backlight to conserve the remaining battery charge.
As the battery charge falls further, the wrench will show a Battery
Urgent message and will then turn o the wrench. If an attempt is
made to turn the wrench on while it is in this state, then it will not
power up. The batteries should be immediately recharged.
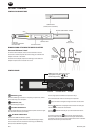
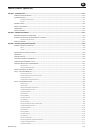
You may charge the Ingersoll Rand rechargeable battery pack in
the wrench with a special cable connecting the Ingersoll Rand
supplied charger to the RS232 port of the wrench.
WARNING
Only use the wrench and charger to recharge the
Ingersoll Rand supplied battery pack.
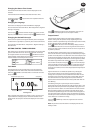
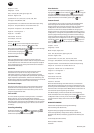
RED DOT
ATTACH CHARGER
LEAD HERE
Note: The Expert Torque Wrench cable has a 5 pin round connector
to the wrench. This means the previous 4 pin cables for earlier Expert
Torque Wrench models cannot be used.
Note: While the rechargeable battery pack is being charged in the
wrench, the wrench cannot be operated.
Hint: Line up the red dots on connector and plug.
POWERING ON
To switch on the Expert Torque Wrench, press any arrow
key.
If the wrench is switched on after it has powered down, it will
return to the menu/screen from which it was powered down.
HARDWARE RESET
To perform a hardware reset, press the red ESCAPE and UP
keys together.
Note: Performing a Hardware Reset resets the Expert Torque Wrench.
You will be warned to save data and perform a software reset.
AUTO POWER OFF FUNCTION
As an energy saving feature, the Expert Torque Wrench is
programmed to power down automatically if it has received no
user input for a predened period (10 mins is the default setting,
but can be set from 1 minute to never o). Pressing any key will
restore the unit to the last display prior to powering o. This is to
avoid the possibility of loss of data due to an interruption to the
operator’s activities while using the Expert Torque Wrench.
To switch o without waiting for the Auto Power O, select the
Power O option from the Main Menu. An alternate method is to
go into Main Setup Menu / Power Settings and select the Power
o icon .