


EN-7 04581922_ed4
EN
ATTACHING A PRINTER OR PC
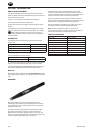
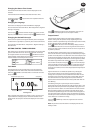
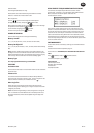
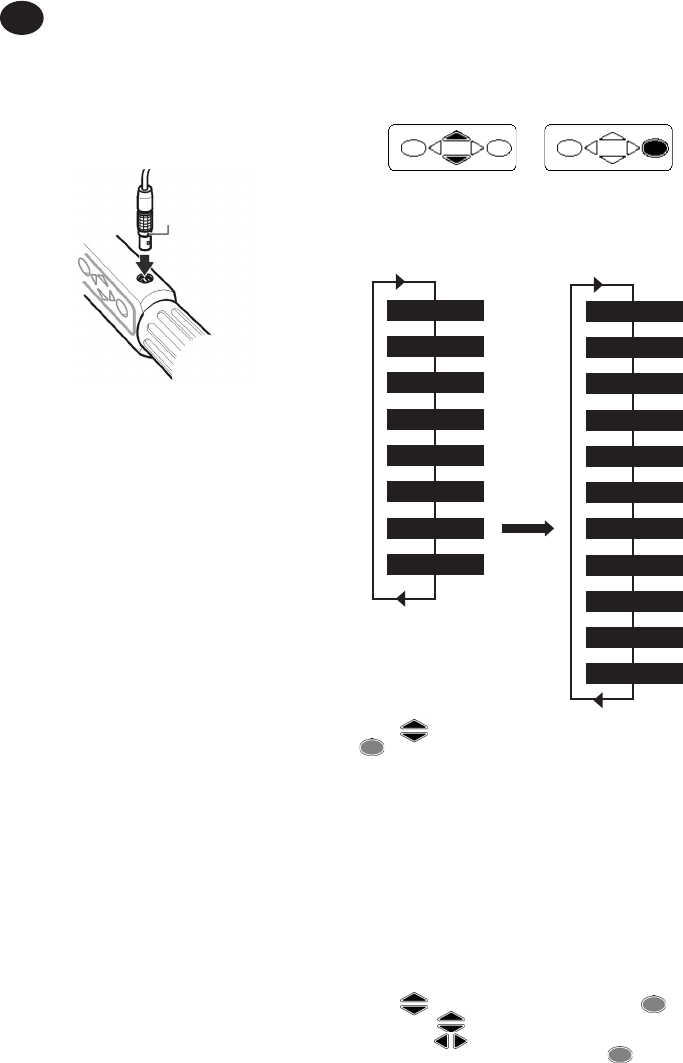
A printer or PC may be connected to the Expert Torque Wrench
using the supplied RS232 cable. Attach the small 5 pin connector
to the Expert Torque Wrench as shown, making sure the red dot on
the connector aligns with the red dot on the Expert Torque Wrench.
The other end of the cable connects to the serial port on a dot
matrix printer such as the Epson LX-300 or to the serial port of a PC.
RED DOT
ATTACH CHARGER
LEAD HERE
Note: The Expert Torque Wrench cable has a 5 pin round
connector to the wrench. This means the previous 4 pin cables for
earlier Expert Torque Wrench models cannot be used.
BASIC OPERATING PRINCIPLES
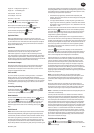
Main Menu
This menu allows the user to choose between the following items:
Track - Enter the Track mode
Torque Control - Enter the Torque control mode
Angle Control - Enter the Angle control mode
Yield Control - Enter the Yield control mode
Custom Control - Program and use custom congurations
PC Comms - Enable Communications via serial port
Setup - Enter the Setup menu (see below)
Power O - Manually Power down the wrench
Main Set Up Menu
This menu allows setup of the following parameters:
Date & Time - Setup the date & time and their formats
Regional Settings - Change the language or decimal convention
for the Expert Torque Wrench
Power Settings - Change the power setting parameters
Printer Setup - Select the number of output columns for printed
data
Buzzer - Turn sound On or O
Password - Set new Password
Software Reset - Perform a software reset
Note: All data and settings will be lost
Flash Program - Manufacturer only
About - Displays product name, version, rated torque, Serial
number, and calibration due date
Features - Displays the list of enabled features.
Max. Angle Time - Change the time limit of slow readings.
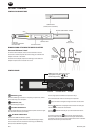
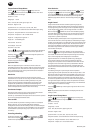
The screen shows only one menu item at a time. To navigate the
menu, use the cursor keys to scroll, and then press ENTER to select
as shown below:
1 2
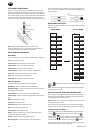
BASIC MENU STRUCTURE
The diagram below shows the basic menu structure of the Expert
Torque Wrench.
Track
Date & Time
Regional Settings
Power Settings
Printer Setup
Buzzer
Password
Software Reset
Flash Program
About
Features
Max Angle Time
Torque Control
Angle Control
Yield Control
Custom Control
PC Comms
Setup
Power Off
MAIN MENU SETUP MENU
Use the keys until the required screen is displayed and press
ENTER.
Note: There is a short beep when wrapping round from end of menu
to beginning or vice versa.
GETTING STARTED - USING FOR THE FIRST TIME
When using the Expert Torque Wrench for the rst time, you will
need to set the time and date. The format of how Date and Time
can be displayed can also be selected.
Note: Once the time is changed from 00:00:00 then the real time clock
will start counting in seconds.
The real time clock and memory have their own battery backup
supply so they will not lose data when the batteries are replaced.
Setting the Time and Date
The Date and Time are set in Main Setup Menu / Date and Time.
Use the keys to scroll to the Time screen and press
ENTER. Use the keys to change the hour digits above the
cursor and the keys to advance along to the minutes and
then the seconds. When the time is correct, press ENTER.
Repeat the process for the Date screen changing the digits in the
same way until the correct date is showing.