11
Chuck and Arbor Removal
1. Unplug machine from the power source.
2. Raise the table until it is about seven inches
below the chuck.
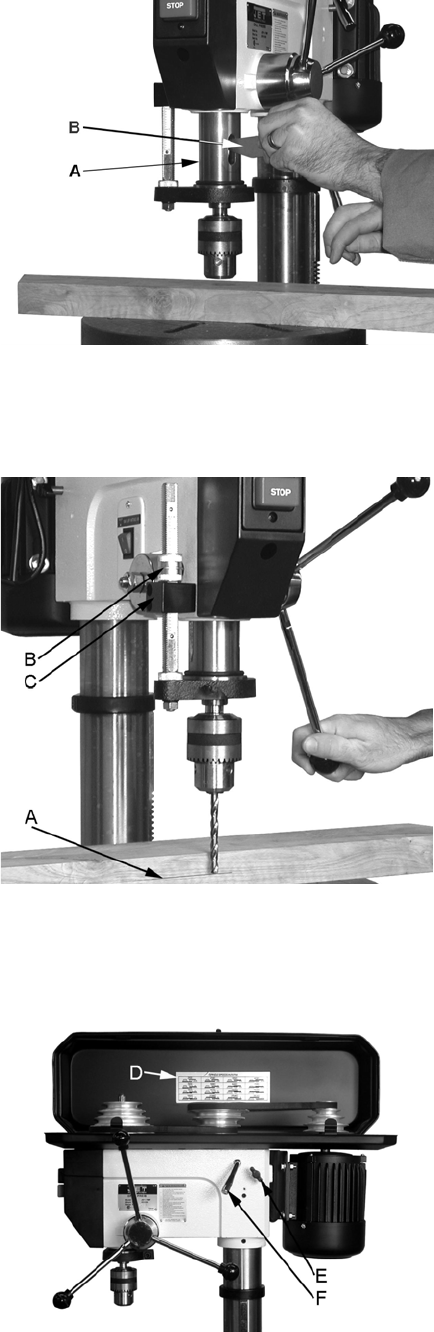
3. Place a piece of scrap wood on the table,
and lower quill (A, Fig. 9) using the downfeed
handle.
4. Rotate spindle to align the keyhole in the
spindle with the keyhole in the quill.
5. Insert the drift key (B, Fig. 9) into the aligned
slots and tap lightly. The chuck and arbor
assembly should fall from the spindle.
Adjustment
Depth Stop Adjustment
To drill multiple holes at the same preset depth,
use the depth stop:
1. Use a pencil to mark the depth the bit will drill
into the workpiece.
2. With the drill bit in the chuck, lower downfeed
handle to advance bit to your mark (A, Fig.
10).
3. With your other hand, advance the lock nuts
(B, Fig. 10) on the depth stop rod until they
are snug to the seat (C, Fig. 10).
4. The drill bit will now advance to this point.
5. To release, advance the nuts counter-
clockwise to the top of the depth stop.
Changing Spindle Speeds
A spindle speed and pulley/belt arrangement chart
is found on the inside of the pulley cover (D,
Fig. 11), also shown in Figure 12. Refer to this
chart whenever changing speeds.
8. To change spindle speeds:
1. Unplug the machine from the power source.
2. Loosen two bar knobs (E, Fig. 11) found on
each side of the head assembly.
3. Rotate the tension adjuster clockwise
(F, Fig. 11) to bring the motor base as close
to the head as possible.
4. For desired speed, change the location of
belts per pulley/belt arrangement chart.
5. Rotate the tension adjuster counterclockwise
(F. Fig. 11) to tension the belts.
6. Tighten two bar knobs (E, Fig. 11). Belts are
properly tensioned when finger and thumb
pressure midway between the two pulleys
causes approximately ½” deflection.
Figure 9
Figure 10
Figure 11


