


SCREWDRIVING
WHEN DRIVING FASTENERS:
• Always start slowly and gradually increase the speed of the Drill.
• Release the trigger when you feel the clutch slip.
• Always keep the driver bit straight to prevent damage to the screw.
• Hold the Drill with both hands to ensure control if the bit should stick or slip.
• To prevent wood from splitting, drill pilot holes into the wood before driving
in the screws.
DRILLING METAL
WHEN DRILLING HARD METALS:
• Apply a lubricant, such as cutting oil, to the tip of the bit.
• Start with a small hole then enlarge to the required size. Make sure the bit is
actually cutting and not spinning in the hole as this will dull the edges of the bit.
• Keep enough pressure on the bit to keep it drilling through the material.
DRILLING MASONRY
WHEN DRILLING MASONRY:
• Masonry can be brittle so be careful not to apply too much pressure and crack
the material.
• Apply enough pressure to keep the bit cutting and not spinning in the hole as this
will dull the edges of the bit.
• Bricks and similar soft materials will require less pressure, concrete will require
much more.
DRILLING WOOD
Use twist bits to drill holes in wood. Make sure the bits are sharp. Pull the bits
out of the hole frequently to clear chips from the flutes as an overburdened bit
may overheat.
HINTS FOR OPTIMUM USE
DRILLING:
• Keep the right amount of pressure in a straight line with the drill bit. Too little and
the bit will spin without cutting, too much and the motor may stall.
16
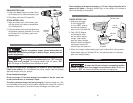
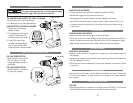
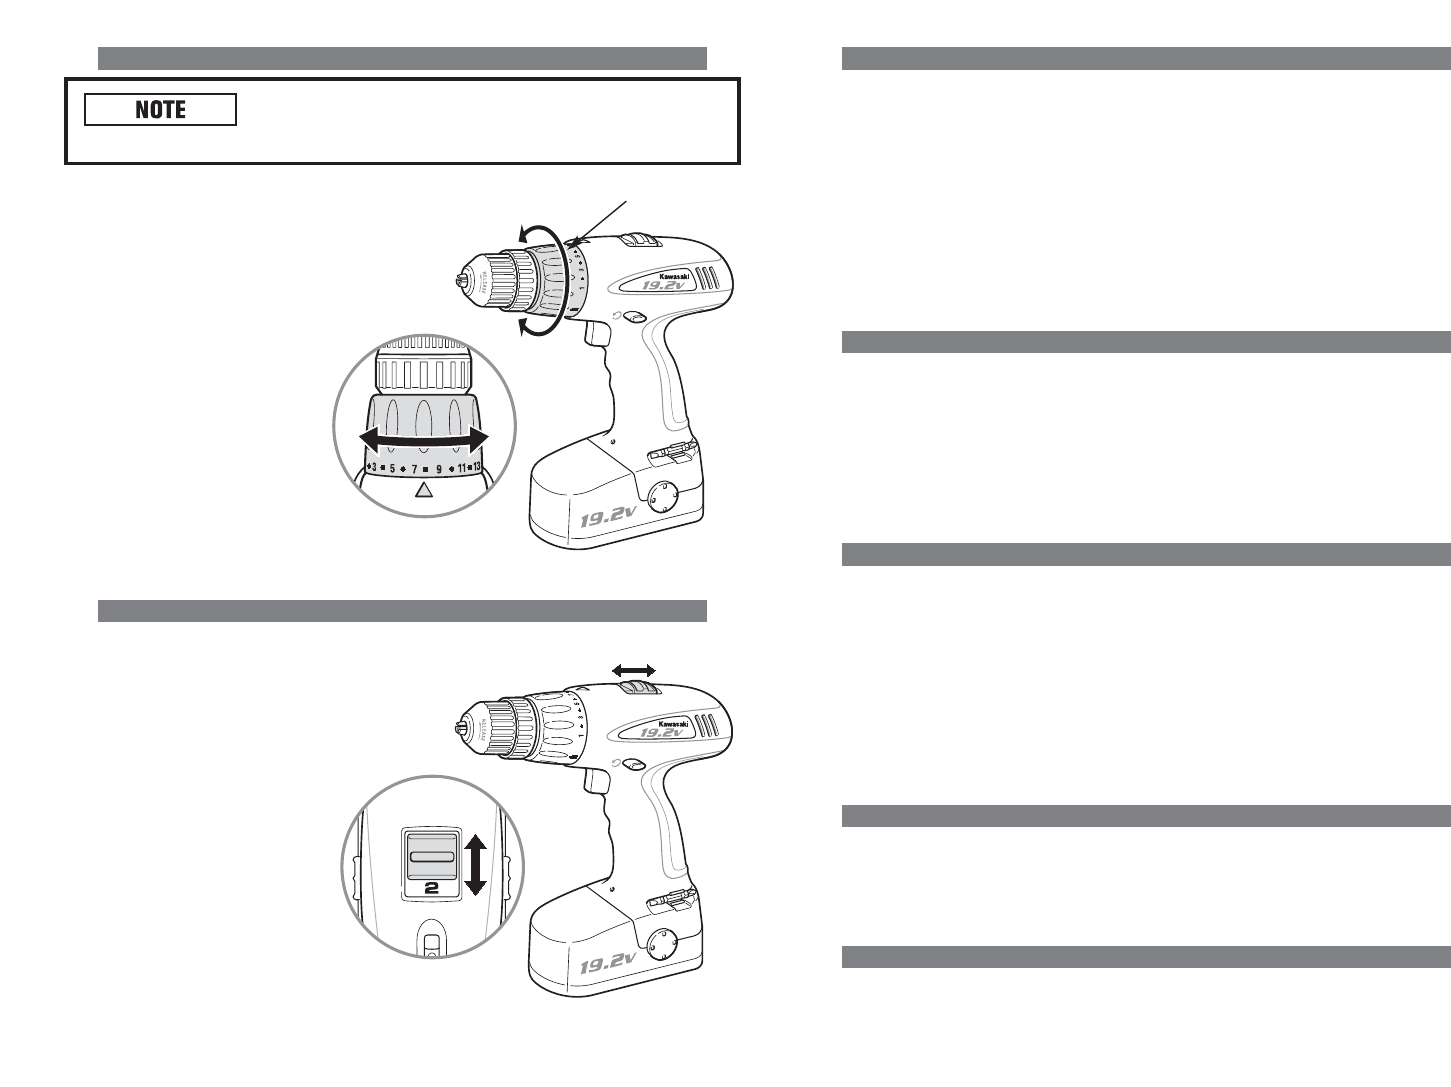
TORQUE SETTINGS
To prevent damaging the tool or driving screw too deep
into work piece, release the trigger when you feel the clutch slip.
THE CONTROL RING ADJUSTS THE LEVEL OF TORQUE:
• For light duty work, use lower settings.
• For heavy duty work, use higher settings.
PROPER SETTING FOR DRIVING SCREWS:
1. Set the ring on the lowest
setting to begin.
2. Try tightening the first screw.
If the drill drives smoothly,
proceed with the next screw.
3. If the Drill’s clutch slips,
increase the torque setting
and try again until the Drill
drives the screw without incident.
HIGH / LOW SPEED (GEAR) SHIFTING
FOR LOW SPEED SETTING:
• Slide the switch on top of the
Drill to Position 1 for high
torque applications and driv-
ing screws.
FOR HIGH SPEED SETTING:
• Slide the switch to Position 2
for light duty projects.
15
CONTROL RING
HIGH SPEEDLOW SPEED