


5
be secured with four screws or bolts to the work bench or
table saw stand using the holes provided in the bottom of
the table saw. When securing the table saw on the work
bench, make sure that there is an opening in the top of
the work bench the same size as the opening in the bot-
tom of the table saw so the sawdust can drop through.
If during operation there is any tendency for the table saw
to tip over, slide or move, the work bench or table saw
stand should be secured to the floor.
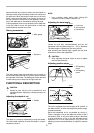
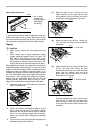
Storing accessories
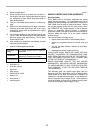
The miter gauge, blade and wrenches can be stored on
the left side of the base and the rip fence can be stored at
the right side of the base. The blade guard to be removed
in dado cutting can be stored at the right hand rear.
FUNCTIONAL DESCRIPTION
CAUTION:
• Always be sure that the tool is switched off and
unplugged before adjusting or checking function on
the tool.
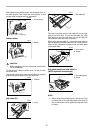
Adjusting the depth of cut
The depth of cut may be adjusted by turning the handle.
Turn the handle clockwise to raise the blade or counter-
clockwise to lower it.
NOTE:
• Use a shallow depth setting when cutting thin
materials in order to obtain a cleaner cut.
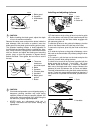
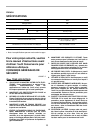
Adjusting the bevel angle
Loosen the lock lever counterclockwise and turn the
handwheel until the desired angle (0° - 45°) is obtained.
The bevel angle is indicated by the arrow pointer.
After obtaining the desired angle, tighten the lock lever
clockwise to secure the adjustment.
CAUTION:
• After adjusting the bevel angle, be sure to tighten
the lock lever securely.
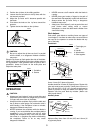
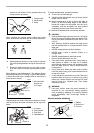
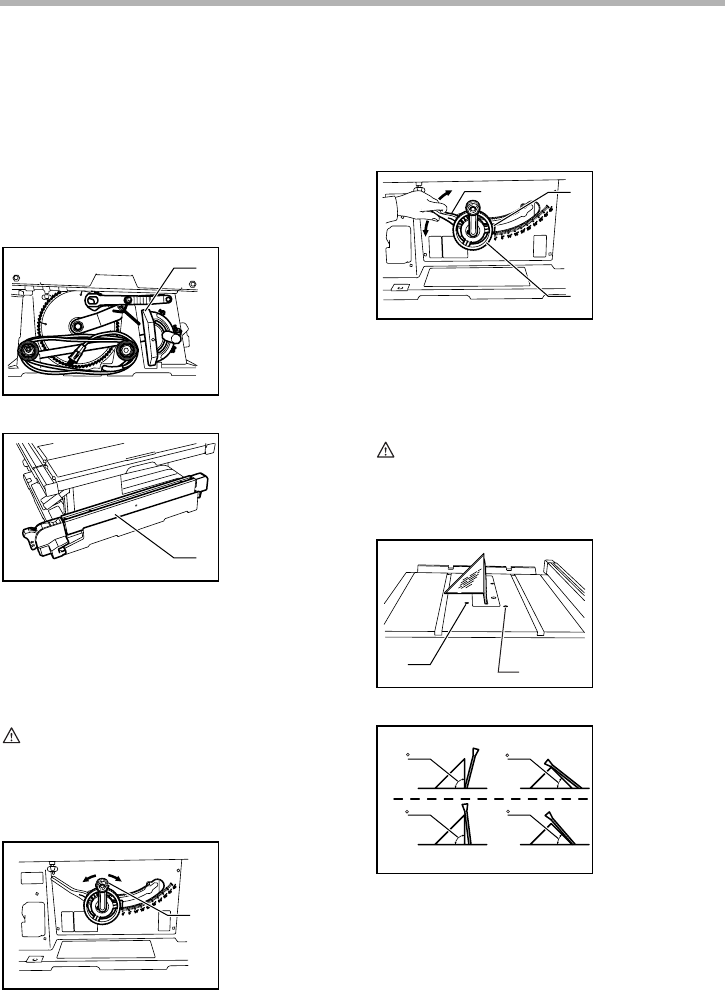
Adjusting positive stops
The tool is equipped with positive stops at 90° and 45° to
the table surface. To check and adjust the positive stops,
proceed as follows:
Move the handwheel as far as possible by turning it.
Place a triangular rule on the table and check to see if
the blade is at 90° or 45° to the table surface. If the blade
is at an angle shown in Fig. A, turn the adjusting screws
clockwise; if it is at an angle shown in Fig. B, turn the
adjusting screws counterclockwise to adjust the positive
stops.
1. Miter gauge
1. Rip fence
1. Handle
1
006152
1
006153
1
006154
1. Lock lever
2. Arrow pointer
3. Handwheel
1. 90°Adjusting
screw
2. 45°Adjusting
screw
1
2
3
006155
1
2
006156
(A)
(B)
90
90
45
45
006157