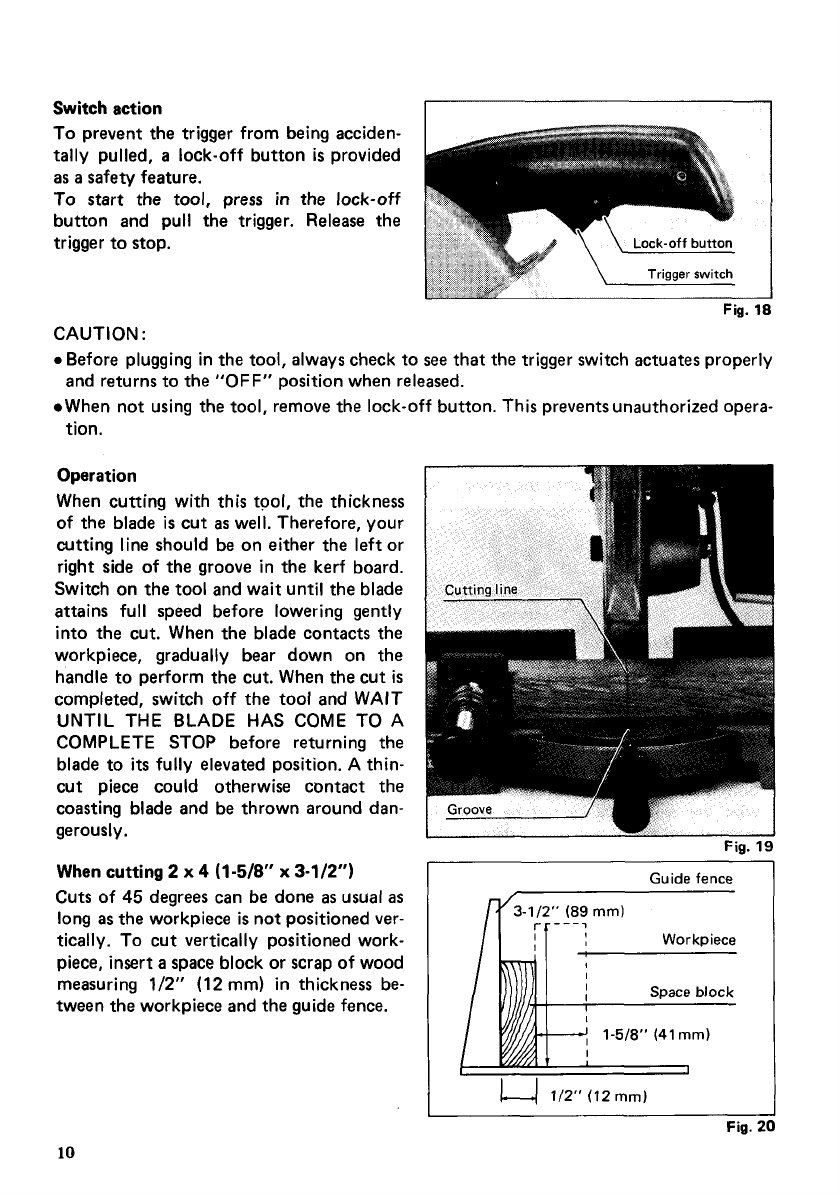
Switch action
To prevent the trigger from being acciden-
tally pulled,
a
lock-off button
is
provided
as
a
safety feature.
To start the tool, press
in
the lock-off
button and pull the trigger.
Release
the
trigger to stop.
Fig.
18
CAUTION
:
0
Before plugging in the tool, always check to
see
that the trigger switch actuates properly
When not using the tool, remove the lock-off button. This prevents unauthorized opera-
and returns to the
"OFF"
position when released.
tion.
Operation
When cutting with this tool, the thickness
of the blade
is
cut
as
well. Therefore, your
cutting line should be on either the left or
right side of the groove in the kerf board.
Switch on the tool and wait until the blade
attains full speed before lowering gently
into the cut. When the blade contacts the
workpiece, gradually bear down on the
handle to perform the cut. When the cut
is
completed, switch off the tool and WAIT
UNTIL THE BLADE HAS COME
TO
A
COMPLETE STOP before returning the
blade to
its
fully elevated position. A thin-
cut piece could otherwise contact the
coasting blade and be thrown around dan-
gerously.
When cutting
2
x
4
(1-518"
x
3-112")
Cuts
of
45
degrees can be done
as
usual
as
long
as
the workpiece
is
not positioned ver-
tically. To cut vertically positioned work-
piece, insert
a
space block or scrap of wood
measuring
1/2"
(12") in thickness be-
tween the workpiece and the guide fence.
Guide
fence
I
I
,-.---->
Workpiece
/I
!I
j
10


