Maintaining maximum cutting capacity
Unplug the tool before any adjustment
is
attempted.
This tool
is
factory adjusted to provide
the max. cutting capacity for
a
255"
(1
0")
saw blade. When the diameter of the
blade has been reduced due to sharpening,
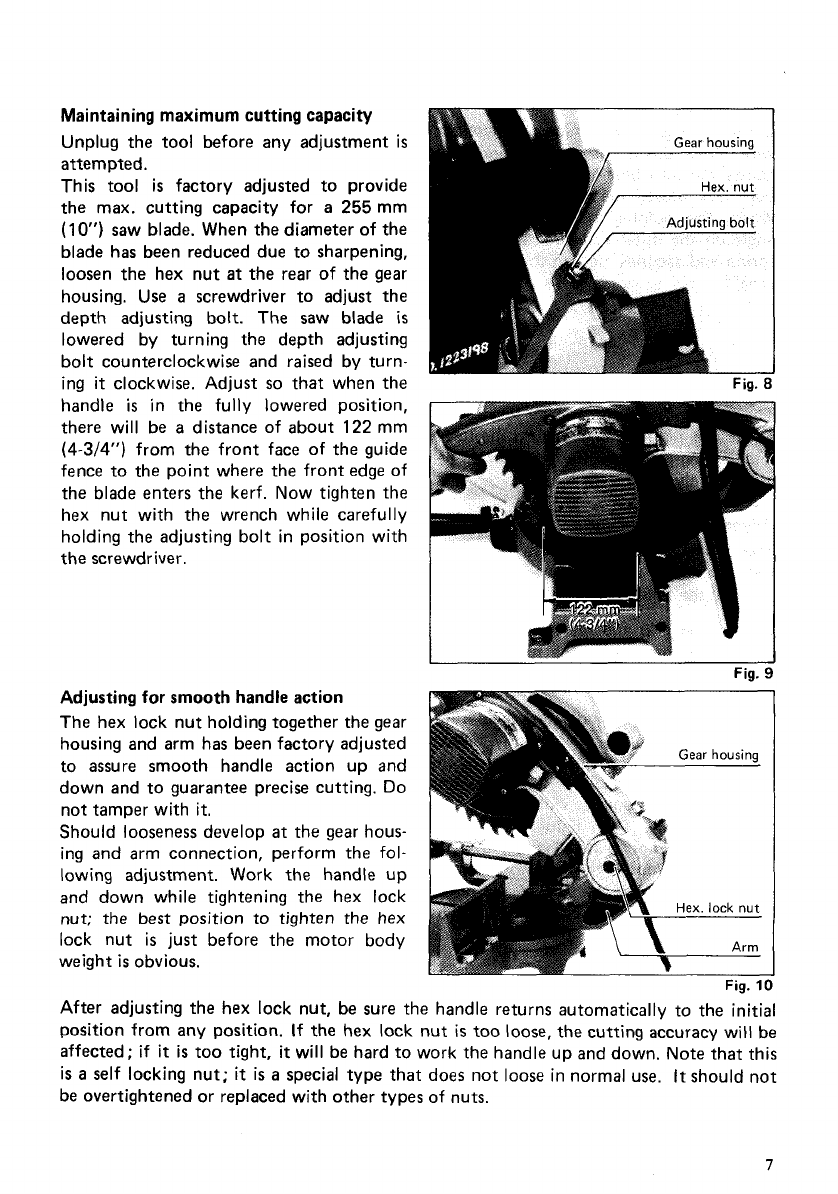
loosen the hex nut
at
the rear of the gear
housing. Use
a
screwdriver to adjust the
depth adjusting bolt. The saw blade
is
lowered by turning the depth adjusting
bolt counterclockwise and raised by turn-
ing
it
clockwise. Adjust
so
that when the
handle
is
in the
fully
lowered position,
there will be
a
distance of about 122 mm
(4-3/4")
from the front face of the guide
fence to the point where the front edge of
the blade enters the kerf. Now tighten the
hex nut with the wrench while carefully
holding the adjusting bolt in position with
the screwdriver.
Fig.
I
Fig.
9
Adjusting
for
smooth handle action
The hex lock nut holding together the gear
housing and arm has been factory adjusted
to assure smooth handle action up and
down and to guarantee precise cutting.
Do
not tamper with
it.
Should looseness develop
at
the gear hous-
ing and arm connection, perform the fol-
lowing adjustment. Work the handle up
and down while tightening the hex lock
nut;
the
best
position to tighten the hex
lock nut
is
just before the motor body
weight
is
obvious.
Fig.
11
After adjusting the hex lock nut, be sure the handle returns automatically to the initial
position from any position. If the hex lock nut
is
too loose, the cutting accuracy will be
affected; if
it
is
too tight,
it
will be hard to work the handle up and down. Note that this
is
a
self locking nut;
it
is
a
special type that does not loose in normal use.
It
should not
be overtightened or replaced with other types of nuts.
7


