


10 11
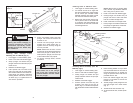
Adjusting Plunger Rod
1. To manually adjust plunger rod, press
in and hold rod release trigger.
2. Grasp plunger rod handle and either
push or pull rod in or out.
3. Release rod release trigger.
NOTE: Keep plunger rod clean of material.
Retracting a plunger that is covered with
material may damage the internal parts of
the tool.
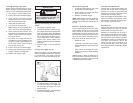
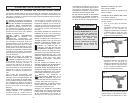
Electronic Overload Protection
The gun is protected by an electronic over-
load protection feature. If too much pres-
sure is exerted on the tube, the motor will
automatically reverse for one second, and
then shut down. This helps to prevent dam-
age to the tool and the caulk tube or pack.
If the motor shuts off, make sure that:
Nozzle tip is cut
Inner seal in the caulk tube is broken
Hardened material is removed from the
nozzle
Caulk tube is not damaged or frozen
Plunger rod is free of caulk/adhesive
materials
Release trigger to allow the electronics to
reset. If the motor continues to shut off, try
another tube of material or take the tool to
a MILWAUKEE Service Center.
Auto-Reverse Mechanism
This tool has an auto-reverse feature that
reverses the plunger when the trigger is
pressed for more than 2 seconds and
released. This feature helps stop excess
material from continuing to flow.
Pulsing the trigger will deactivate the auto-
reverse mechanism and allow for contin-
ued pressure on the tube. This helps main-
tain a slower material feed rate.
Auto-Shut Off
When a caulk tube is empty, the auto-shut
off feature will turn the motor off. Pull the
plunger back and replace the tube.
Caution: Unexplained tool shut-off or
auto-reverse may be due to caulk or adhe-
sive material on the plunger rod. Plunger
rod must remain clean and free of all caulk
and adhesive material. If material does get
on plunger rod mechanism, remove the
plunger rod and clean the material off of
the rod and tool with a brush and solvent
according to the caulk or adhesive material's
manufacturer.
OPERATION
Starting and Stopping and Controlling
Speed
1. Pull trigger to dispense caulk.
2. Increase or decrease pressure on trig-
ger to adjust the speed for proper bead
width and material feed rate. Material
type, temperature and nozzle diameter
will all affect flow rate. When using a
tube or pack with a smaller nozzle di-
ameter use a slower speed or the
material may be forced around the rear
tube seat.
3. Release trigger to stop dispensing
caulk.
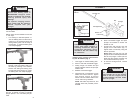
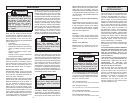
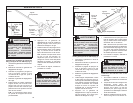
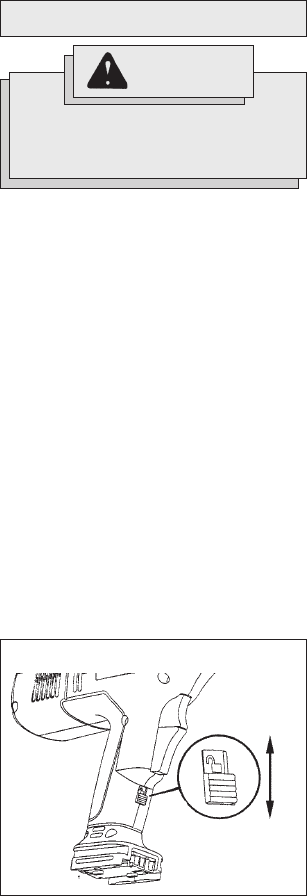
Locking the Trigger (Fig. 6)
Always lock trigger or remove battery pack
before changing accessories or perform-
ing maintenance. Lock trigger when the
tool is not in use and when storing the tool.
1. To lock the trigger, push trigger lock
in the direction shown. The trigger will
not work when the trigger lock in the
locked position.
2. To unlock the trigger, push the trigger
lock in the direction shown.
WARNING!
When tool is not in use, lock trig-
ger to prevent the tool from be-
ing accidentally turned on.
Fig. 6
Locked
Unlocked
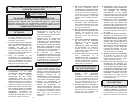
Installing Sausage Type Pack
Always check sausage packs for punc-
tures or damage to the pack before install-
ing. Do not use a damaged or frozen pack.
1. Lock trigger or remove battery pack.
2. Press in and hold rod release trigger.
3. Grasp plunger rod handle and pull
plunger rod back to allow sausage
pack to fit inside barrel tube.
4. Insert pack into barrel tube.
5. Cut off end of sausage pack.
NOTE: Before using a partially filled
pack, remove any hardened material.
6. Insert nozzle supplied with the sau-
sage pack into the nozzle cap (coarse
thread). Thread nozzle cap onto the
front of barrel tube.
7. Cut nozzle at an angle and size per
manufacturer's recommendation to suit
the job. A smaller nozzle diameter re-
quires more force to push the caulk
and reduces battery life.
8. Press in and hold rod release trigger.
9. Push plunger rod handle forward until
plunger is against sausage pack.
10. Release rod release trigger.