


1
1.0 SMART LASER SENSOR SPECIFICATIONS
Laser Specifications:
Classification: Class 3R (per IEC 60825-1 Ed 1.2 2001-8)
Complies with FDA performance standards for laser products except for
deviations pursuant to Laser Notice No. 50, dated July 26, 2001.
Maximum Laser Output: 3mW
Pulse Duration: Continuous
Laser Wavelength: 650 nm
Beam Divergence: < 0.5 mrad
Beam Diameter: 4 x 7 mm typical at 2 meters
Laser Diode Life: 8,000 hours MTBF (1 year warranty)
Operating Range: Up to 65 feet depending on target reflectivity:
1/2” reflective tape (T-5) @3600 RPM: up to 65 ft. (19.8 m) or up to
75° from target
White/Black contrast @3600 RPM: up to 3 ft. (91 cm) or up to 45°
from target
Black mark on dental drill: up to 4 in. (10 cm) at over
260,000 RPM
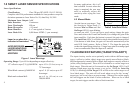
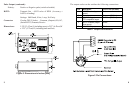
Figure 1 Laser Warnings
AVOID EXPOSURE
LASER RADIATION IS
EMITTED FROM THIS
APERTURE.
Laser is on when this
indicator is illuminated.
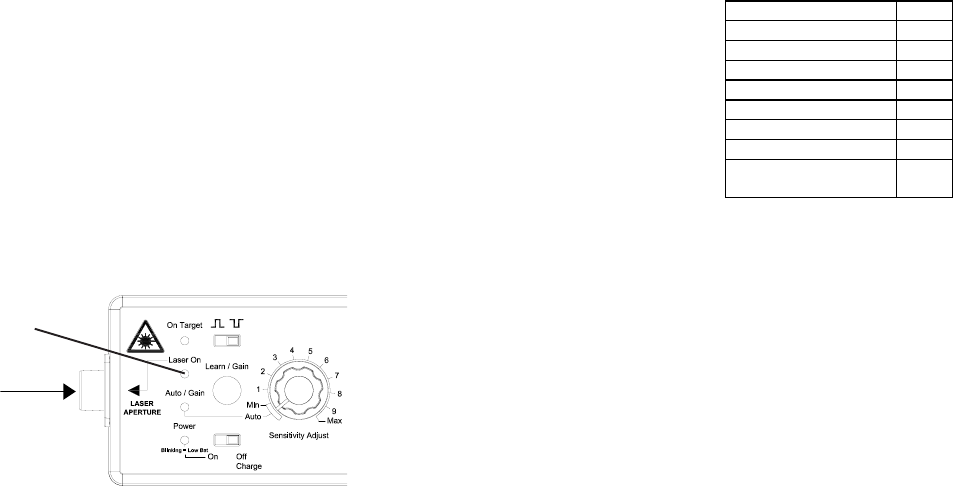
10
In many applications, this is all
that is needed. In cases where the
target is marginal, the user may
need to manually adjust the
sensitivity after trying the Auto
mode.
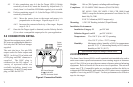
6.2 Manual Mode
Aim the laser at your target. Turn
the Sensitivity Adjust knob (7)
between Min and Max until the
On Target LED (1) starts blinking
or comes on solid. If you can’t get a good setting, change the gain.
Press and release the Learn/Gain button (6) to change the gain of the
input amplifier. Each time the button is pressed, the gain is changed.
The Auto/Gain LED (3) will blink to show what gain has been selected.
If the button is held down, the gain will increase automatically after
each LED ‘blink’ pattern. Refer to Table 2. The larger the gain, the
weaker the signal being picked-up. Using a large gain for a strong signal
is not recommended since the input will saturate.
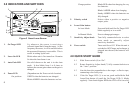
7.0 ADVANCED FEATURE (TARGET POLARITY)
The input circuitry can be set to optimally work with two different target
types: a reflective (white, shiny) target on a mostly non-reflective (black,
dull) background or a non-reflective (black, dull) target or a mostly reflective
(white, shiny) background. These will be referred to as a white target or a
black target. When the unit is first turned on, the On Target LED (1) will
indicate which target type the sensor is set up for. While the Laser On
LED (2) is blinking, the On Target LED will be on for a white target or off
for a black target. The unit will still work when set up for the “wrong”
target type, but it won’t have as great a range. When set for a white target,
the unit triggers on the black to white transition. When set for a black
target, the unit triggers on the white to black transition.
Number of blinks Gain
1 Strong Signal X 1
2 X 2
3 X 4
4 X 5
5 X 8
6 X 10
7 X 16
8 Weak Signal - Move
Closer
X 32
Table 2 Auto/Gain Blinks