


HTXD6i/STXD6i TROWEL • SETUP, ADJUSTMENTS AND CALIBRATIONS — REV. #1 (01/24/14) — PAGE 27
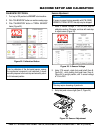
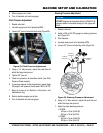
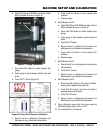
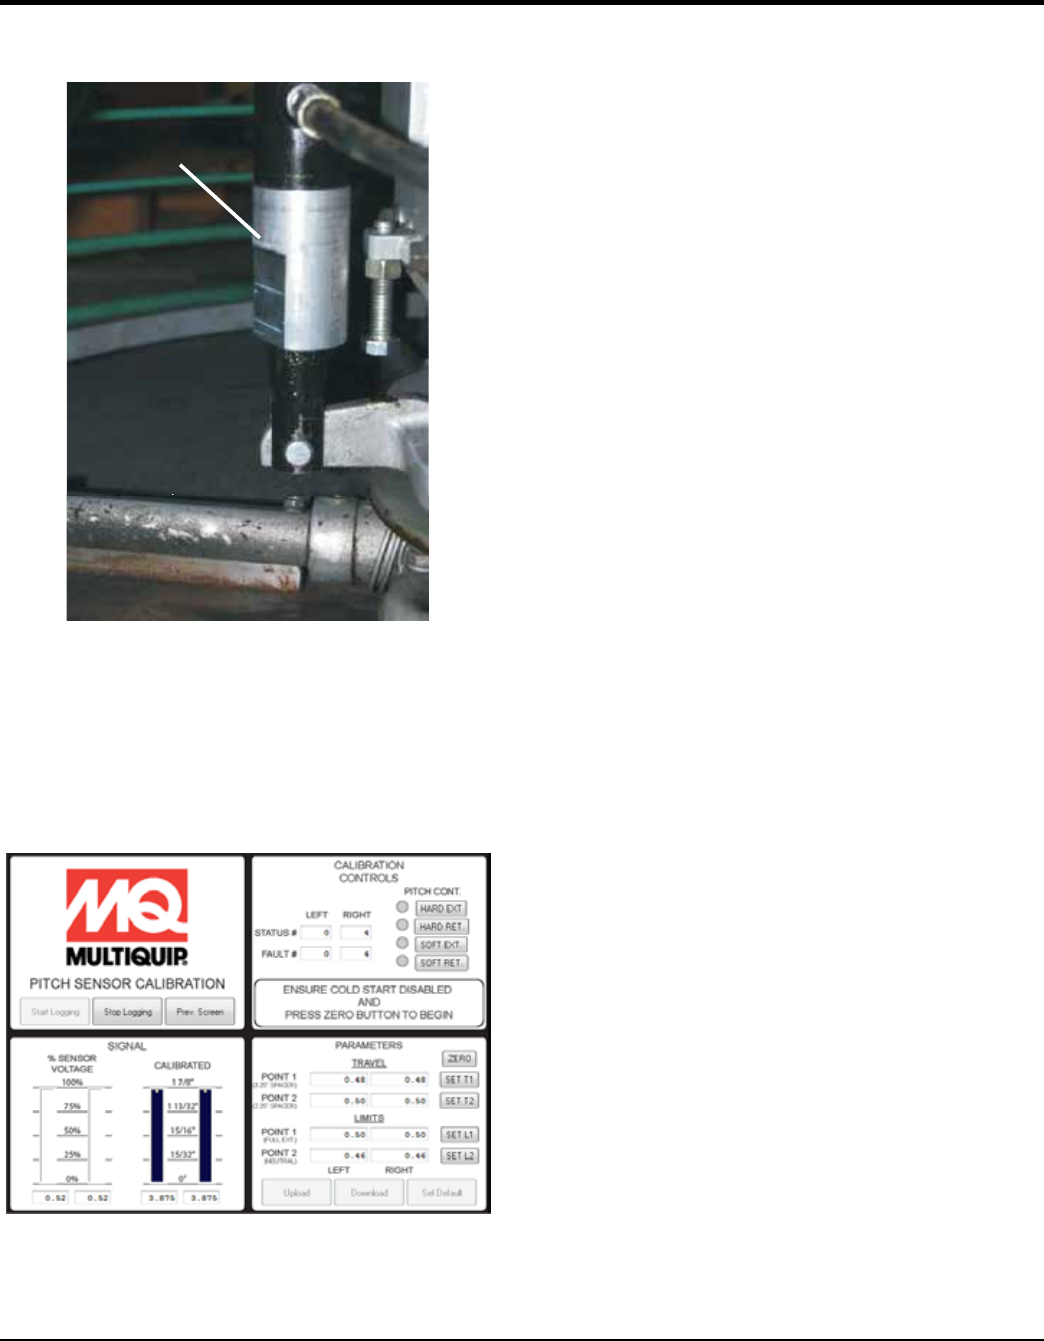
b. Install 3.25” Gauge (P/N 32044) over both Left and
Right Cylinders as shown in Figure 41.
Figure 41. Gauge Installation
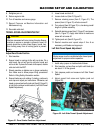
c. Press Hard Ret. button to retract cylinder onto
gauge.
d. Verify gauge is tight between cylinder body and
clevis.
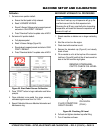
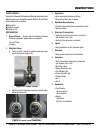
e. Press “Set T1” button (Figure 42).
Figure 42. Start Pitch Sensor Calibration
f. Record values on Machine Information and
Maintenance Log in Machine Setup section.
3.25” GAUGE
MACHINE SETUP AND CALIBRATION
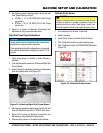
g. Press Hard Ext. Button to fully extend pitch
cylinders.
h. Remove gauge.
6. Set Calibration Point 2.
a. Install 2.25” Gauge P/N 32000 over both Left and
Right Cylinders as shown in Figure 41.
b. Press Hard Ret. Button to retract cylinder onto
gauge.
c. Verify gauge is tight between cylinder body and
clevis.
d. Press “Set T2” Button.
e. Record values on Machine Information and
Maintenance Log in Machine Setup section.
f. Press Hard Ext. Button to fully extend pitch
cylinders.
g. Remove gauge.
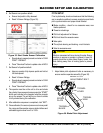
7. Set Calibration Point 3.
a. Ensure Hard Ext. is active and pitch cylinders are
fully extended.
b. Press “Set L1” button.
c. Record values on Machine Information and
Maintenance Log in Machine Setup section.
8. Set Calibration Point 4.
a. Press Hard Ret. button to fully retract cylinders,
ensure yoke is against zero pitch stop.
b. Press Soft Ext. button, and wait until yoke is
pressing against thrust collar.
c. Press “Set L2” button.
d. Record values on Machine Information and
Maintenance Log in Machine Setup section.
9. Once calibrated, move pitch thru range ensuring
calibrated signal moves from 0 to 100%.
10. Turn machine off for 10 seconds.