


-
11
-
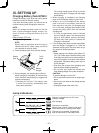
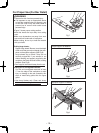
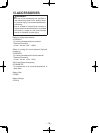
2.Press the switch lock lever down, then squeeze
the power switch to start the motor, and then
release the switch lock lever.
Fig.4
Switch
lock lever
Handle
Front grip
Power
switch
CAUTION:
• Check that the switch lock lever works.
If power switch can be activated without
depressing the switch lock lever, discontinue
use immediately. Take the tool to an author-
ized service center.
• Always hold the handle with one hand and the
front grip with the other. (See Fig.4) Maintain a
firm grip and depress the switch fully.
• The blade should not touch the cutting mate-
rial before you start the motor. Wait until the
blade reaches full speed before starting a cut.
• This tool has no provision to lock the power
switch in the “ON” position, and you must not
attempt to secure it in the “ON” position.
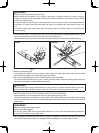
3.Start cutting when the blade reaches full speed.
4.During cutting, keep your cutting line straight.
Move the metal cutter forward at a steady speed,
while looking at the tip of the blade through the
transparent guard.
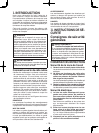
WARNING
• To prevent dangerous kickback, keep the
shoe of the metal cutter flat on the surface of
the material being cut.
• Never force the cutter. Use light and continu-
ous pressure.
5.If the motor starts to feel too warm, stop cutting.
Let the metal cutter cool down before continuing
work.
6.It is always a safe practice to remove the battery
pack after use and before storing the metal cut-
ter.
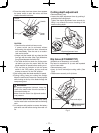
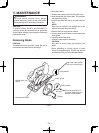
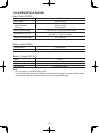
Cutting depth adjustment
•Remove battery pack.
•Loosen the depth adjustment lever by pushing it
and adjust the cutting depth.
Tighten the depth adjustment lever securely by
lifting it up towards the motor housing at the
desired cutting depth.
Depth adjustment lever
Tighten
2
1
Loosen
Fig.5
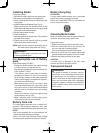
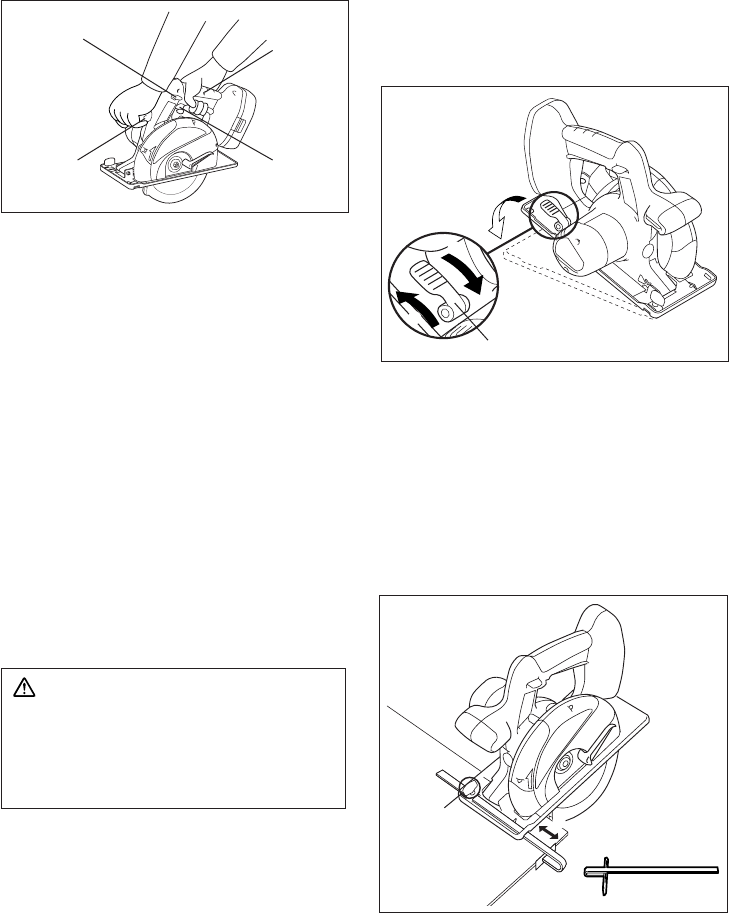
Rip fence (EY3500B7727)
(Available as an accessory, not included)
Rip fence is convenient for rip cuts and repeated
cuts of same width.
•Remove battery pack.
•Insert rip fence and adjust cutting width. (See
Fig.6)
•Fasten screw securely to fix rip fence.
Fasten screw
2
Insert and adjust
1
Rip Fence
Fig. 6