


16
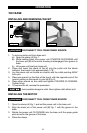
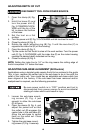
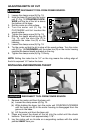
4. Place one wrench on the flats of the chuck with the opposite end of the
the wrench resting on the bench to your left (Fig. 18C).
5. Place the other wrench on the collet and tighten COUNTER-CLOCKWISE
(Fig. 20). Tighten firmly.
6. To remove the bit, reverse the procedure.
Avoid possible damage to collet. Never tighten collet without a bit.
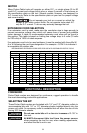
CONNECTING TO POWER SOURCE
Before connecting tool to power source, CHECK TO SEE
THAT THE SWITCH IS IN THE “OFF” POSITION. Also,
check the power circuit to see that it is the same as that
shown on specification plate of the tool.
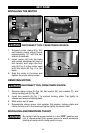
STARTING AND STOPPING THE MOTOR
Before starting the tool, clear the work area of all foreign
objects. Also keep firm grip on tool to resist starting torque.
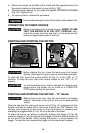
To start the tool, move the rocker switch (A) Fig. 21 to the “ON” or “1”
position. To stop the tool, move the rocker switch to the “OFF” or “O”
position.
To avoid personal injury and/or damage to finished work,
always allow the power unit to come to a COMPLETE
STOP before putting the tool down.
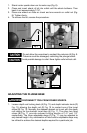
STARTING AND STOPPING THE MOTOR - “D” Handle
Before starting the tool, clear the work area of all foreign
objects. Also keep a firm grip on the tool to resist starting
torque.
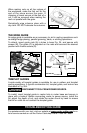
Check to see that the motor unit power cord (A) Fig. 22 is plugged into the
handle, and that the switch (B) on the motor is set to the “ON” position. The
starting and stopping of the motor is then controlled by pressing and
releasing the trigger switch (C) Fig. 20 in the handle of the base.
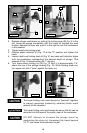
To allow the tool to run without continually pressing the trigger (C) Fig. 22,
press the trigger (C) into the handle and engage the switch locking button (D)
on the side of the handle. While holding the button in, slowly release the
trigger. To stop the tool, squeeze the trigger into the handle and release.
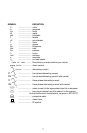
Fig. 21 Fig. 22
A
A
D
C
B