


9
3. The stand can be secured to the floor using
two anchor bolts (not provided) through the
holes inside the bottom of the stand.
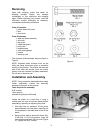
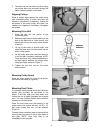
Aligning Pulleys
Place a straight edge against the motor pulley
and cutterhead pulley to make sure they are
aligned. If adjustment is necessary, loosen the
set screws in the motor pulley, and slide it as
needed until alignment is achieved. Re-tighten
set screws.
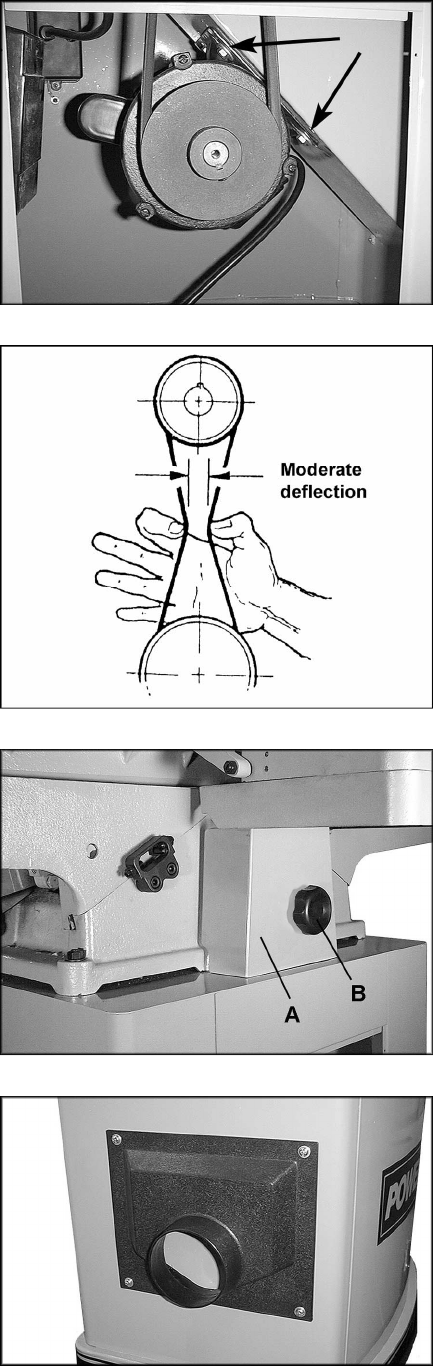
Mounting Drive Belt
1. Place the belt into the groove of the
cutterhead pulley.
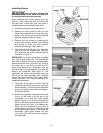
2. Reach through the dust chute opening in the
side of the stand with a 12mm wrench, and
loosen the nuts on the motor mount screws
(Figure 6).
3. Lift up on the motor to provide slack, and
place the lower end of the drive belt into the
motor pulley groove.
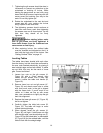
4. Let the motor slide down and push down on
it until the belt is properly tensioned. NOTE:
There should be only moderate deflection in
the belt midway between the pulleys when
using light finger pressure (Figure 7).
5. Tighten the four hex nuts on the motor
mount screws.
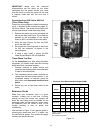
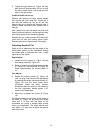
Mounting Pulley Guard
Place the pulley guard (A, Figure 8) as shown,
and secure with knob (B, Figure 8).
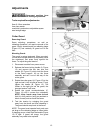
Mounting Dust Chute
It is strongly recommended that a dust collection
system (not provided) be connected to the
jointer. It will help keep your shop clean, and
reduce the risk of health problems due to wood
dust. The dust collector should have sufficient
capacity for this size jointer.
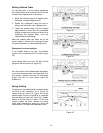
Place the dust chute over the opening in the
jointer stand, and secure with four 1/4-20 x 1/2
pan head screws and four 1/4 flat washers
(Figure 9)
Connect a dust collection hose to the dust chute
on the jointer and secure it with a hose clamp or
duct tape. NOTE: Dryer vent hose is not
acceptable for this purpose.
Figure 6
Figure 7
Figure 8
Figure 9