


10
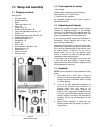
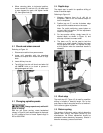
Figure 8
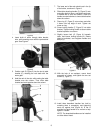
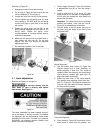
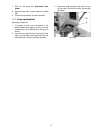
14. Install handwheel (K
1
, Figure 9) on speed
change shaft by aligning slot in handwheel
with spring pin on shaft. Tighten with washer
and crown nut.
15. Install handle (K
2
, Figure 9) into threaded hole
in handwheel. Tighten by using a wrench on
the flat.
Figure 9
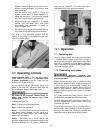
16. Slide fence into t-slots from front edge of table.
To secure fence, push down handles (Figure
10).
Figure 10
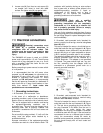
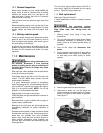
17. Thoroughly clean entire arbor and inside of
chuck (Figure 11) with a soft rag and solvent,
such as mineral spirits. Any grease or residue
in these areas can cause the pieces to
separate, creating a safety hazard and
potential damage to the tool.
(Note: Your chuck and arbor may have come
preassembled. If so, you only need to clean
the exposed arbor at this time.)
Figure 11
18. Slide arbor up into spindle.
19. Firmly push chuck by hand onto taper of arbor.
20. Rotate chuck until the jaws are completely
retracted into the chuck (to prevent damage to
jaws). Use two or three sharp taps from a
rubber mallet, or a hammer and a block of
wood, against bottom of chuck to seat chuck
securely onto arbor.
Do not use a steel hammer
directly against chuck, as this may damage
chuck.
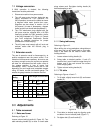
6.5 Table insert leveling
Referring to Figures 12 and 13:
1. Remove two screws beneath table insert (L,
Figure 12).
Figure 12
2. Position fence over table insert to use as a
level (see Figure 13), and tighten it down.