


12
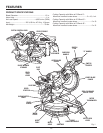
FEATURES
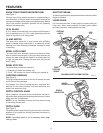
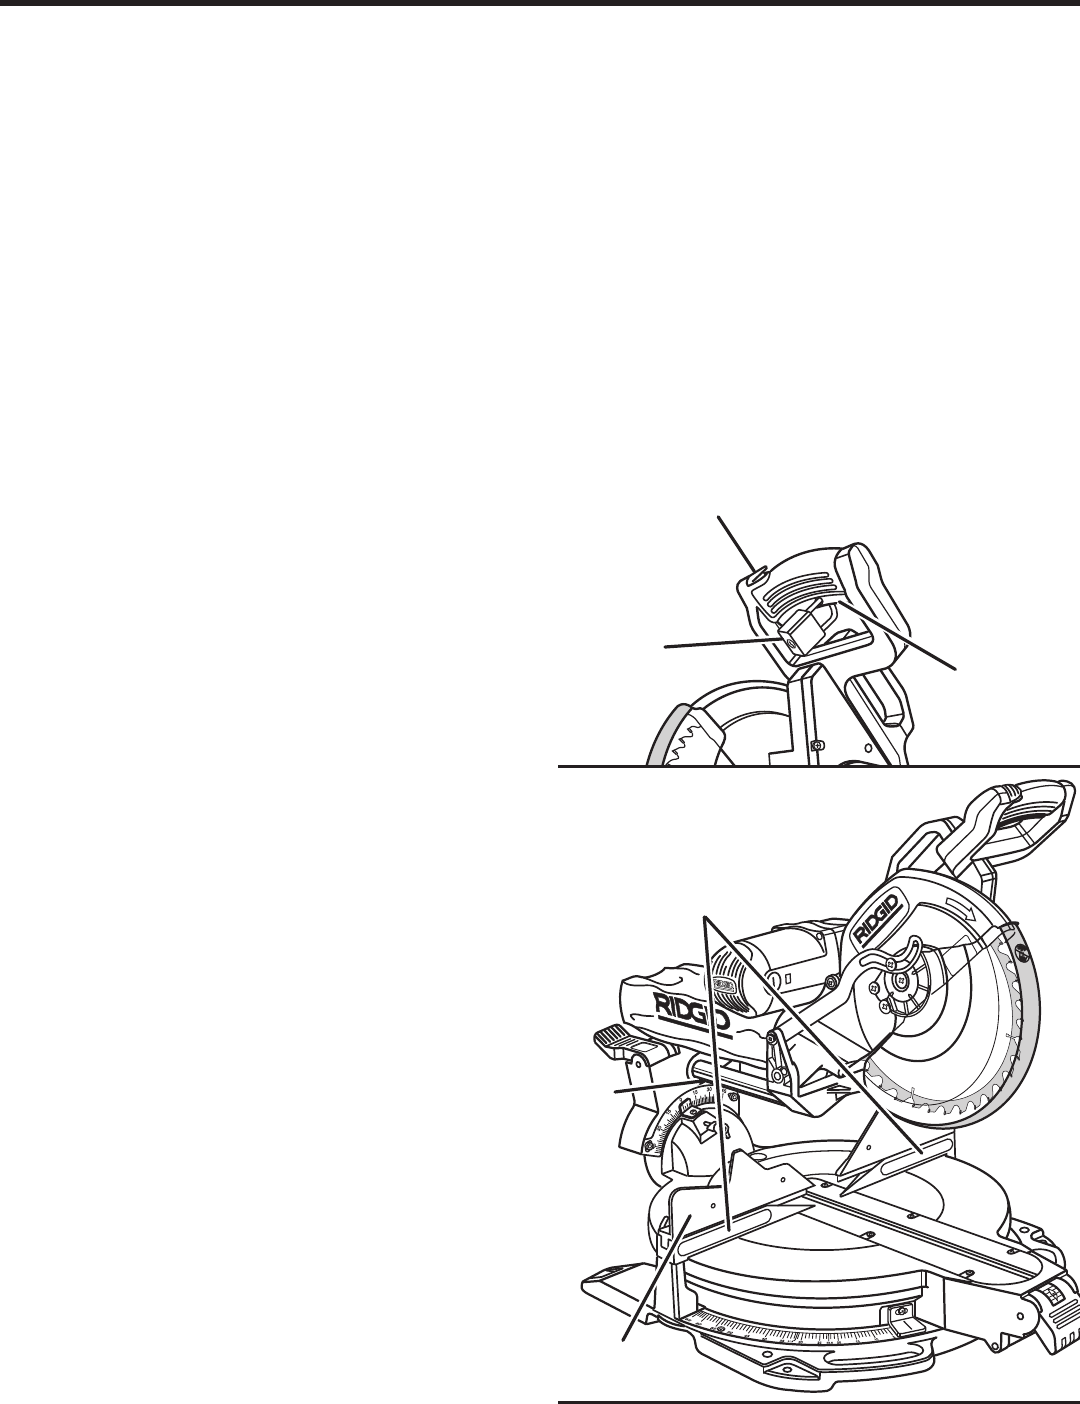
Fig. 5
REPEAT-A-CUT
®
PADLOCK
Fig. 4
SWITCH
TRIGGER
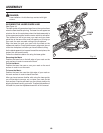
MITER LOCK LEVER
The miter lock lever securely locks the saw at the desired
miter angle.
MITER SCALE
The miter scale has index points provided at 0
°
, 15
°
, 22.5
°
,
31.6
°
, 45
°
, and 60.
°
MITER THUMBWHEEL
The miter thumbwheel, when used with the miter lock lever
lifted (unlocked), can release the miter table from pre-set
index points. With the thumbwheel spun down (and
released), the miter table moves freely to any desired angle.
With thumb on thumbwheel, push down and hold to over-
ride (bypass) index points; release thumbwheel when close
to desired point and move the lock lever into place with a
click. With the thumbwheel spun up, the miter table will stop
at each index point on the miter scale.
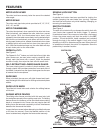
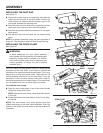
REPEAT-A-CUT
™
See Figure 5.
The Repeat-A-Cut
™
feature on both the left and right side
miter fences can be used when making repetitive cuts.
Simply mark the fence with a pencil, make the desired
number of cut(s), then wipe the mark off with a soft cloth.
SELF-RETRACTING LOWER BLADE GUARD
The lower blade guard is made of shock-resistant, see-
through plastic that provides protection from each side of
the blade. It retracts over the upper blade guard as the saw
is lowered into the workpiece.
SLIDE BAR
When unlocked, the saw arm will glide forward and back-
ward the length of the slide bar for cutting various workpiece
widths.
SLIDE LOCK KNOB
The slide lock knob locks and unlocks the sliding feature
of this tool.
SLIDING MITER FENCES
The sliding miter fences provided with this saw help hold
the workpiece securely when making most cuts. The sliding
feature allows for clearance of the saw blade when making
bevel or compound cuts. Some cuts may require that the
sliding fence be removed completely to avoid interference
between the fence and the blade.
Loosen the fence screw before attempting to slide the fences
or lift them for removal. Once the desired position of the
fence is determined, retighten the fence screw securely.
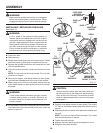
SPINDLE LOCK BUTTON
See Figure 3.
A spindle lock button has been provided for locking the
spindle (keeping the saw blade from turning). Depress
and hold the lock button only while installing, changing, or
removing the saw blade.
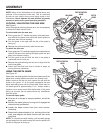
SWITCH TRIGGER
See Figure 4.
The saw will not start until you depress the switch lock with
your thumb then squeeze the switch trigger. To prevent
unauthorized use of the compound miter saw, disconnect
it from the power supply and lock the switch in the OFF
position. To lock the switch, install a padlock (not included)
through the hole in the switch trigger. A lock with a long
shackle up to 9/32 in. diameter may be used. When the lock
is installed and locked, the switch is inoperable. Store the
padlock key in another location.
SLIDING
MITER FENCE
SLIDE
BAR
SWITCH LOCK