


20
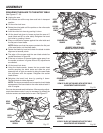
ASSEMBLY
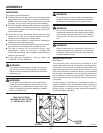
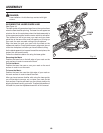
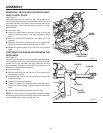
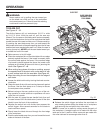
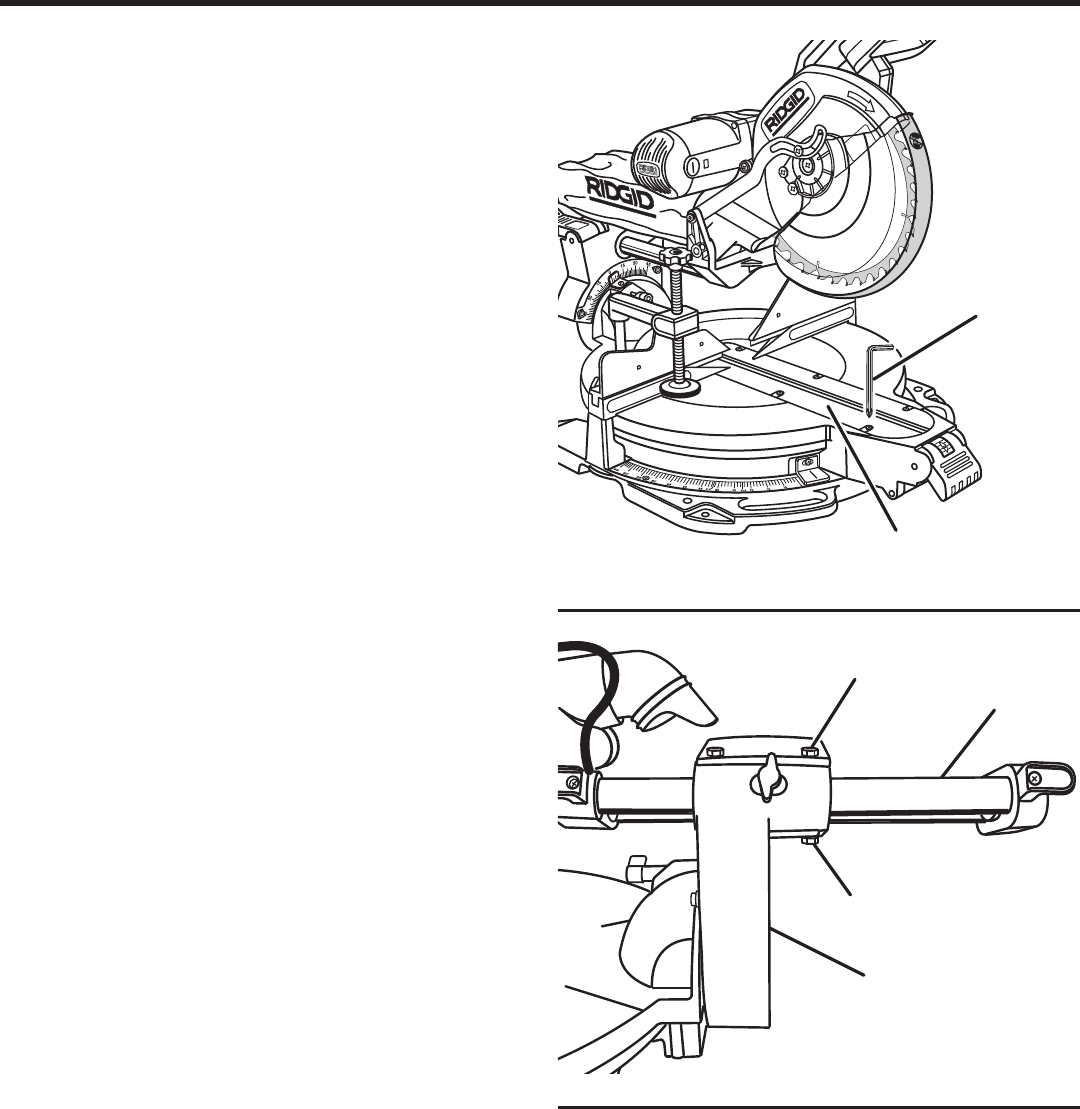
REMOVING / REPLACING THE ZERO CLEAR-
ANCE THROAT PLATE
See Figure 15.
When squaring the saw blade, it may be necessary to
move the throat plate away from the blade. Once the saw’s
alignment has been confirmed, return the throat plate to its
original position. Never operate the saw without a throat
plate installed.
Unplug the saw.
Using the blade wrench provided, loosen the screws
securing the right side of the zero clearance throat
plate.
Slide the throat plate away from the blade as far as
possible.
Retighten the screws, being careful not to overtighten
which can cause the throat plate to bow or bend.
Repeat the above steps for the left side of the throat
plate.
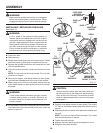
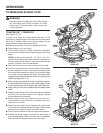
CENTERING THE SAW BLADE BETWEEN THE
SLIDE BARS
See Figure 16.
The saw blade should be centered (approximately) between
the two pieces of the zero clearance throat plate and there
should be no play between the right slide bar and the
pivot assembly. Standing in front of the saw, make a visual
inspection. If adjustment is required:
Unplug the saw.
With the miter at 0˚ and the bevel at 0˚, lock the saw into
the transport position.
Loosen the jam nuts on the two top and two bottom gib
screws as shown.
Loosen the two top gib screws.
Tighten or loosen the lower gib screws as required to
center the blade between the two pieces of the throat
plate.
Once centered, tighten the lower two jam nuts.
�����NOTE: To minimize play in the slide bars, gradually tighten
the two top gib screws while sliding the saw back and forth
over the slide bars. Tighten the top jam nuts.
Fig. 15
Fig. 16
PIVOT
ASSEMBLY
GIB SCREW
SLIDE BAR
ZERO CLEARANCE
THROAT PLATE
BLADE
WRENCH
JAM NUTS
®