


31
OPERATION
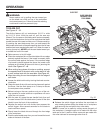
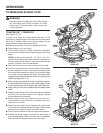
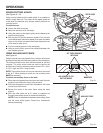
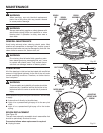
ROUGH CUTTING A DADO
See Figures 42 - 43.
Using a wood chisel and the depth guide, it is possible to
make a rough dado cut. The marks on the depth guide are
to be used for reference only. Always make a practice cut
on scrap wood.
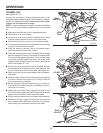
To make the cut:
Unlock the slide lock knob.
Raise the saw arm to its full height.
Using the marks on the depth guide, set the blade to the
correct cutting depth.
With the saw off, pull the saw arm forward. Turn the saw
on (let blade reach maximum speed), then push the blade
down on top of the workpiece then back toward the rear
of the saw to make a cut.
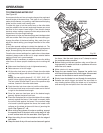
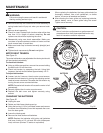
Cut two outside grooves in the workpiece.
Using a wood chisel, remove the material between the
two outside grooves.
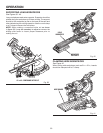
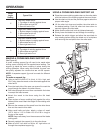
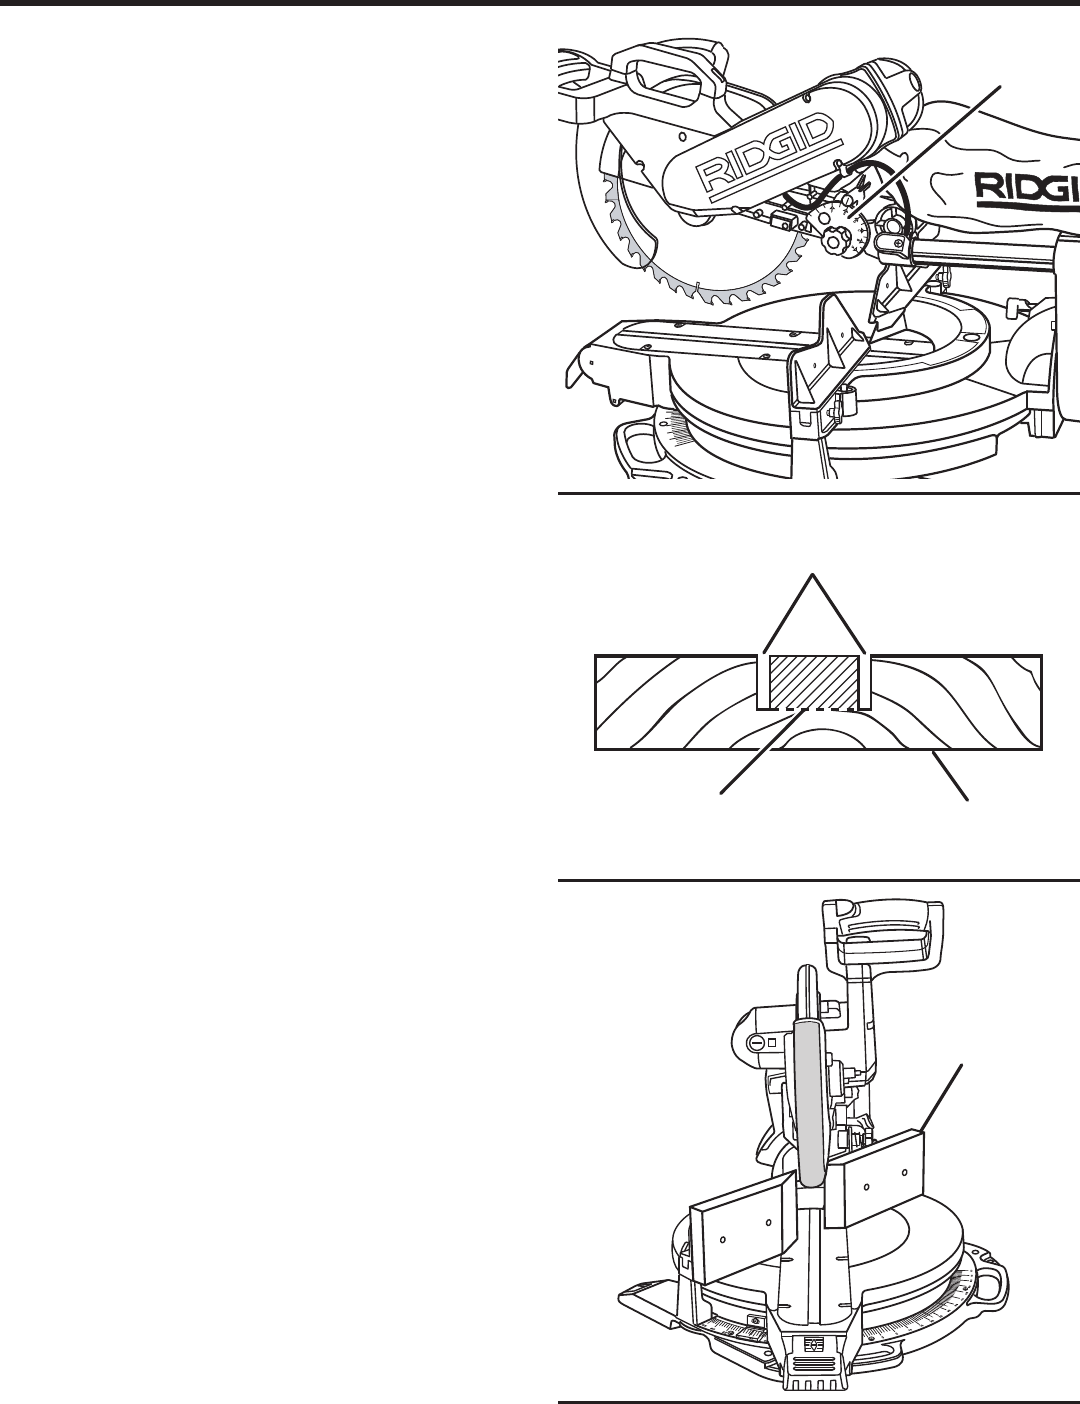
USING AN AUXILIARY FENCE
See Figure 44.
Certain unusual cuts may benefit from a thicker miter fence
(auxiliary fence) due to the size and position of the workpiece.
The holes provided in the miter fence are there for just this
purpose. The miter fence holes are used to secure the
auxiliary fence which requires a piece of wood 1/2 in. thick,
4-1/4 in. high, and 23 in. long to make.
NOTE: The auxiliary fence can only be used when the bevel
is set at 0˚. When making a bevel cut, the auxiliary fence
MUST be removed.
To attach the auxiliary fence to the saw:
Place the wood against the miter fence and mark the hole
location from behind the fence using a pencil.
Drill holes through the wood then countersink the holes
on the front of the wood.
Secure the wood to the miter fence using flat head
screws.
With the miter table set at 0˚, make a complete cut
through the auxiliary fence to create the blade slot.
NOTE: Check for interference between the auxiliary fence
and the lower blade guard. Correct any interference
before proceeding.
Fig. 42
Fig. 43
Fig. 44
DEPTH GUIDE
CUT THESE GROOVES
WITH SAW
USE A CHISEL TO CUT
OUT THE MIDDLE
WORKPIECE
2
2
.
5
3
1
.
6
AUXILIARY FENCE