


20
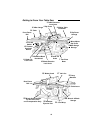
Alignment
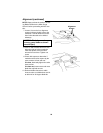
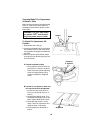
Tools Needed
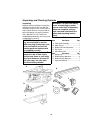
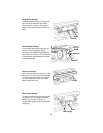
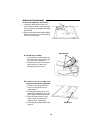
Remove Foam Motor Support
A block of foam was placed under the
motor at the factory for shipping. Lift up
one edge of the saw base and remove the
foam.
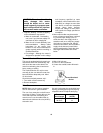
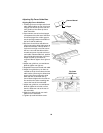
Checking Table Insert
WARNING: To reduce the risk of
injury from accidental start, make
sure switch is “OFF” and plug is
not connected to power source
outlet.
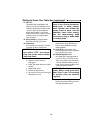
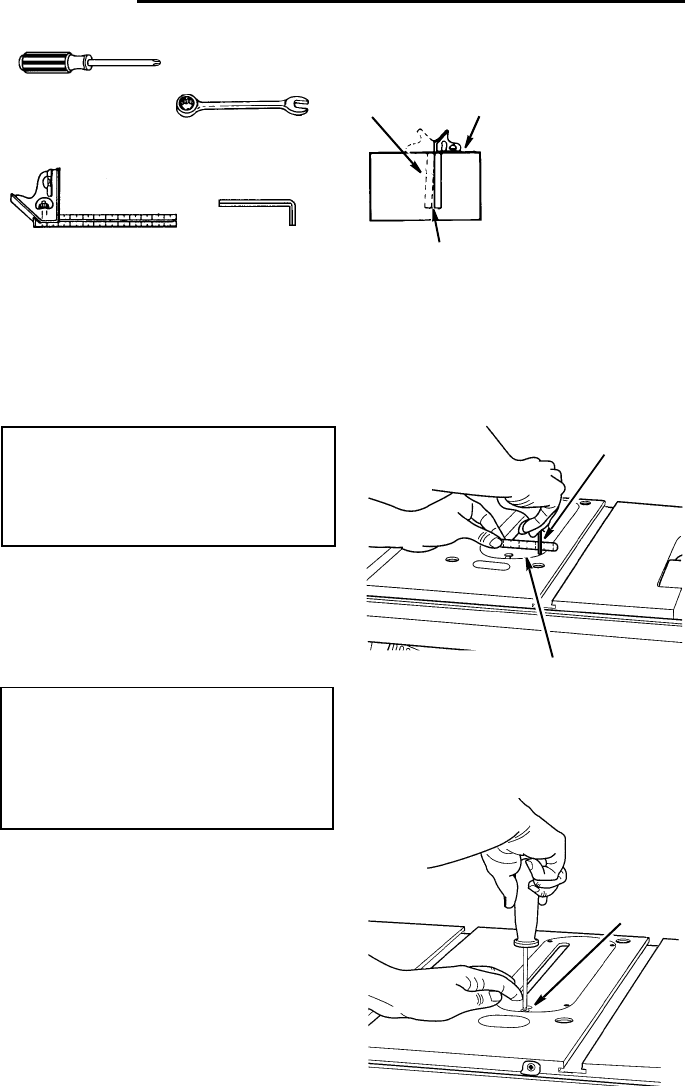
1. Insert should be flush with table top.
Check as shown. Loosen flat head
screw that holds insert and adjust the
four set screws as necessary. Tighten
flat head screw. Do not tighten screw to
the point where it bends the insert.
CAUTION: Insert must be even
with the table surface. Inserts too
high or low can let the workpiece
“snag” or catch on uneven
edges. Workpiece could twist
and kickback.
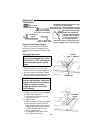
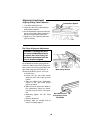
2. To remove insert.
a. Make sure saw is off and unplugged.
b. Loosen flat head screw.
c. Lift insert from front end, and pull
toward front of saw.
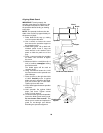
3. To replace insert.
a. Make sure saw is off and unplugged.
b. Place insert into insert opening in
table and push toward rear of saw to
engage spring clip and until keyslot
in insert will drop over flat head
screw. Tighten screw.
c. Do not tighten screw to the point
where it bends the insert.
Combination
Square
Combination Wrenches
3/8, 7/16 In. 1/2 In. 9/16 In.
Phillips Screwdriver
Hex “L” Wrenches
Combination
Square
3/32 In., 5/32 In., 3/16 In.
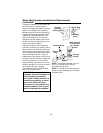
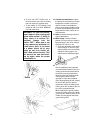
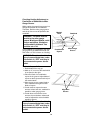
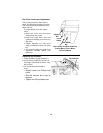
Combination Square must be true. Check
it’s accuracy as shown below.
Draw light line on
Should be no gap or overlap here when
square is flipped over in dotted position.
board along edge
Select the straight edge of
NOTE: The square and
straight edge are used to
3/4” thick board. This edge
must be perfectly straight.
align the saw. They must
be accurate if the saw is
to be aligned properly.
Table Insert
3/32 In.
Hex “L” Wrench
Flat Head
Screw