


29
Aligning Blade Guard
IMPORTANT: To work properly, the
spreader must always be adjusted so the
cut workpiece will pass on either side of
the spreader without binding or skewing
to the side.
NOTE: The spreader is thinner than the
width of the cut (kerf) by approximately six
thicknesses of paper.
1. Raise blade all the way up, making
sure it is square with table.
2. Use a wrench to loosen the screw
that secures the spreader support to
the spreader mount.
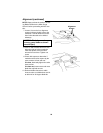
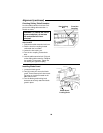
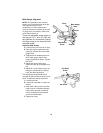
3. Raise blade guard. Lift up both anti-
kickback pawls. Insert a large set
screw wrench in the notches of the
pawls to hold the pawls out of the
way.
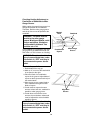
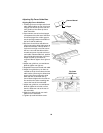
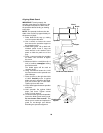
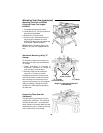
4. Place a square against the spreader
as shown. Use a wrench to tighten
the screw.
5. Make two folds in a small piece (6 x 6
inch) of ordinary newspaper making
three thicknesses.
The folded paper will be used as
“spacing gauge”.
6. Using 7/16 wrench loosen the 1/4-20
hex head screws so the spreader can
slide sideways.
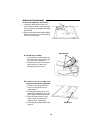
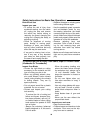
7. Place rip fence on the right hand side
of table. Carefully move it against
blade so that it is parallel to the blade,
and just touches tips of saw teeth.
Tighten rip fence lock lever.
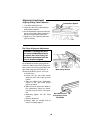
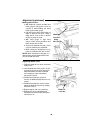
8. Insert folded paper between spreader
and fence.
9. Hold spreader flat against folded
paper and fence. Tighten screws
using 7/16 inch wrench.
10. To remove blade guard and spreader,
loosen the blade guard locking knob.
Do not loosen other screws. This
allows you to remove and replace the
guard for non-through cuts without
disturbing the spreader alignment.
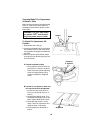
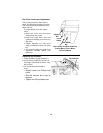
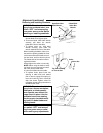
1/4-20 Hex Head Screws
Wood
Blade
Paper
Spreader
Kerf
Folded
Paper
Screw
Combination
Square