


33
Mounting Your Saw
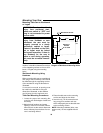
Mounting Table Saw to Workbench
or Legset
WARNING: To reduce the risk of
injury from accidental start,
make sure switch is "OFF" and
plug is not connected to power
source outlet.
WARNING: To reduce the risk of
injury from kickback or saw
movement the saw must be
properly secured to a sturdy
workbench, cabinet or legset.
Casters if provided on the cabi-
net or legset must be locked
during saw operation. If there is
any tendency for the saw to
move or rock during operation,
this must be corrected immedi-
ately.
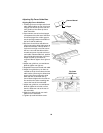
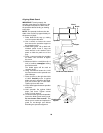
If table saw is to be used in a permanent
location, it should be fastened securely to
a firm supporting surface such as a work-
bench, or legset using the mounting
holes.
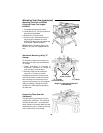
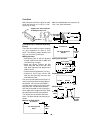
Workbench Mounting Using
Hardware
When mounting table saw to a workbench
and using a vacuum hookup, holes should
be drilled through the supporting surface
of the workbench using the dimensions
illustrated.
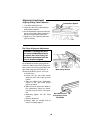
If a vacuum is not used, an opening must
be made in the workbench using the
dimensions illustrated, so the sawdust
can fall away from the saw base area.
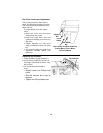
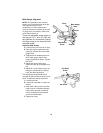
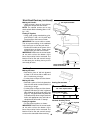
Table Saw Mounting Procedures
1. Locate the proper hole mounting dia-
gram for your desired type of table saw
mounting.
2. Mark the hole locations and cutout
opening if vacuum is not used. Drill the
holes and cut out the area to allow saw-
dust to fall away from the base if a vac-
uum is not being utilized.
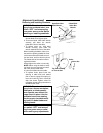
Workbench Surface
Diagram of Workbench Mounting Holes
(Front of Table Saw)
15-5/16"
3/8"
23-3/4"
Opening if
is not used
Vacuum
21-5/16"
3"
16-3/4"
4"
Dia.
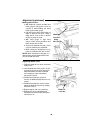
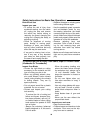
3. Place the table saw on the mounting
surface and align the four holes.
4. Insert four (4) 1/4-20 screws that are
long enough for washers and nuts
which will properly secure the table saw
to the mounting surface.
NOTE: Mounting hardware (bolts, nuts,
washers etc.) are not supplied with the
saw.