


Page 14
ASSEMBLY
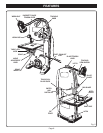
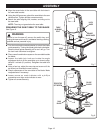
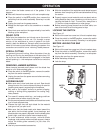
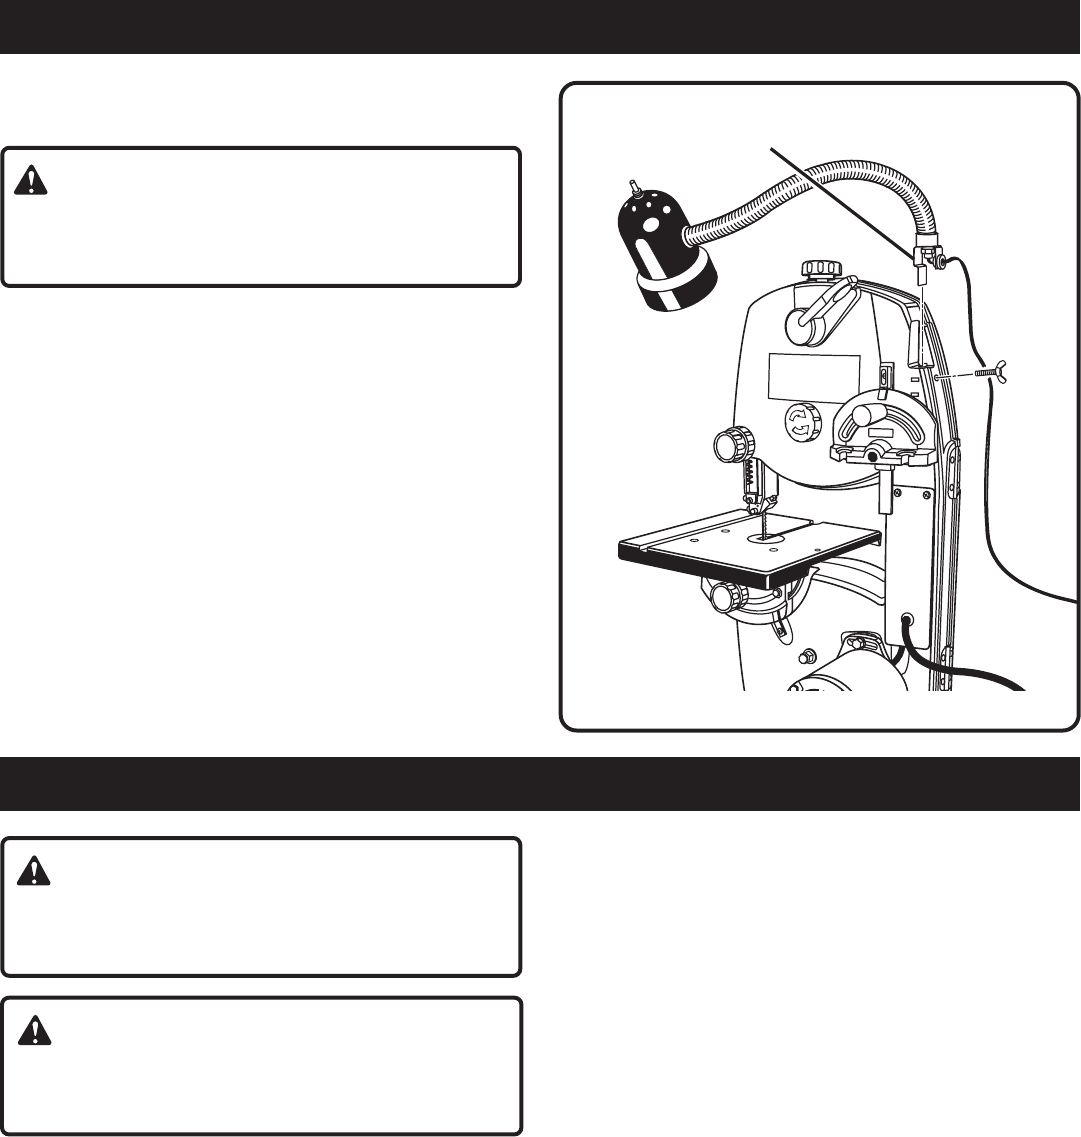
ATTACHING THE WORKLIGHT
See Figure 11.
WARNING:
Failure to turn the saw off, remove the switch key, and
unplug the saw could result in accidental starting causing
possible serious personal injury.
Open the cover of the saw housing.
Slide the worklight bracket into the slot at the back of the
band saw housing and into the slots on the inside of the
band saw.
Securely tighten the wing screw clockwise to hold the
worklight firmly in place.
Close the saw housing cover.
IMPORTANT SAFETY INSTRUCTIONS
This worklight has a polarized plug (one blade wider than the
other) as a feature to reduce the risk of electric shock. This
plug will fit in a polarized outlet onlly one way. If the plug does
not fit fully in the outlet, reverse the plug. If it still does not fit,
contact a qualified electrician. Never use with an extension
cord unless the plug can be fully inserted. Do not alter the
plug.
WORKLIGHT
BRACKET
Fig. 11
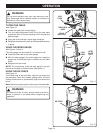
OPERATION
WARNING:
Read and understand all instructions. Failure to follow
all instructions may result in electric shock, fire, and/or
serious personal injury.
WARNING:
To avoid blade contact, adjust the blade guide assembly
to just clear the workpiece. Failure to do so could result
in serious personal injury.
BASIC OPERATION OF THE BAND SAW
A band saw is basically a “curve cutting” machine that
can also be used for straight-line cutting operations like
cross cutting, ripping, mitering, beveling, compound
cutting, and resawing. It is not capable of making inside
or non-through cuts.
This band saw is designed to cut wood and wood
composition products only.
Before starting a cut, watch the saw run. If you experience
excessive vibration or unusual noise, stop immediately.
Turn the saw off, remove the switch key, and unplug the
saw. Do not restart until locating and correcting the
problem.
CUTTING PROCEDURES
Hold the workpiece firmly against the saw table.
Use gentle pressure and both hands when feeding the
work into the blade
.
Do not force the work; allow the
blade to cut.
The smallest diameter circle that can be cut is determined
by blade width. A 1/4 in. (6 mm) wide blade will cut a
minimum diameter of 1-1/2 in. (38 mm); a 1/8 in. (3 mm)
wide blade will cut a minimum diameter of 1/2 in. (13
mm).
Keep your hands away from the blade. Do not hand hold
pieces so small your fingers will go under the blade guard.
Avoid awkward operations and hand positions where a
sudden slip could cause serious injury from contact with
the blade. Never place hands in blade path.
Use extra supports (tables, saw horses, blocks, etc.)
when cutting large, small or awkward workpieces.
Never use a person as a substitute for a table extension
or as additional support for a workpiece that is longer or
wider than the basic saw table.
When cutting irregularly shaped workpieces, plan your
work so it will not pinch the blade. For example, a piece
of molding must lay flat on the saw table. Workpieces
must not twist, rock or slip while being cut.
When backing up the workpiece, the blade may bind in the
kerf (cut). This is usually caused by sawdust clogging the