


12
ASSEMBLY
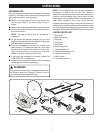
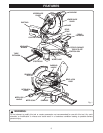
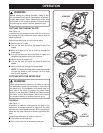
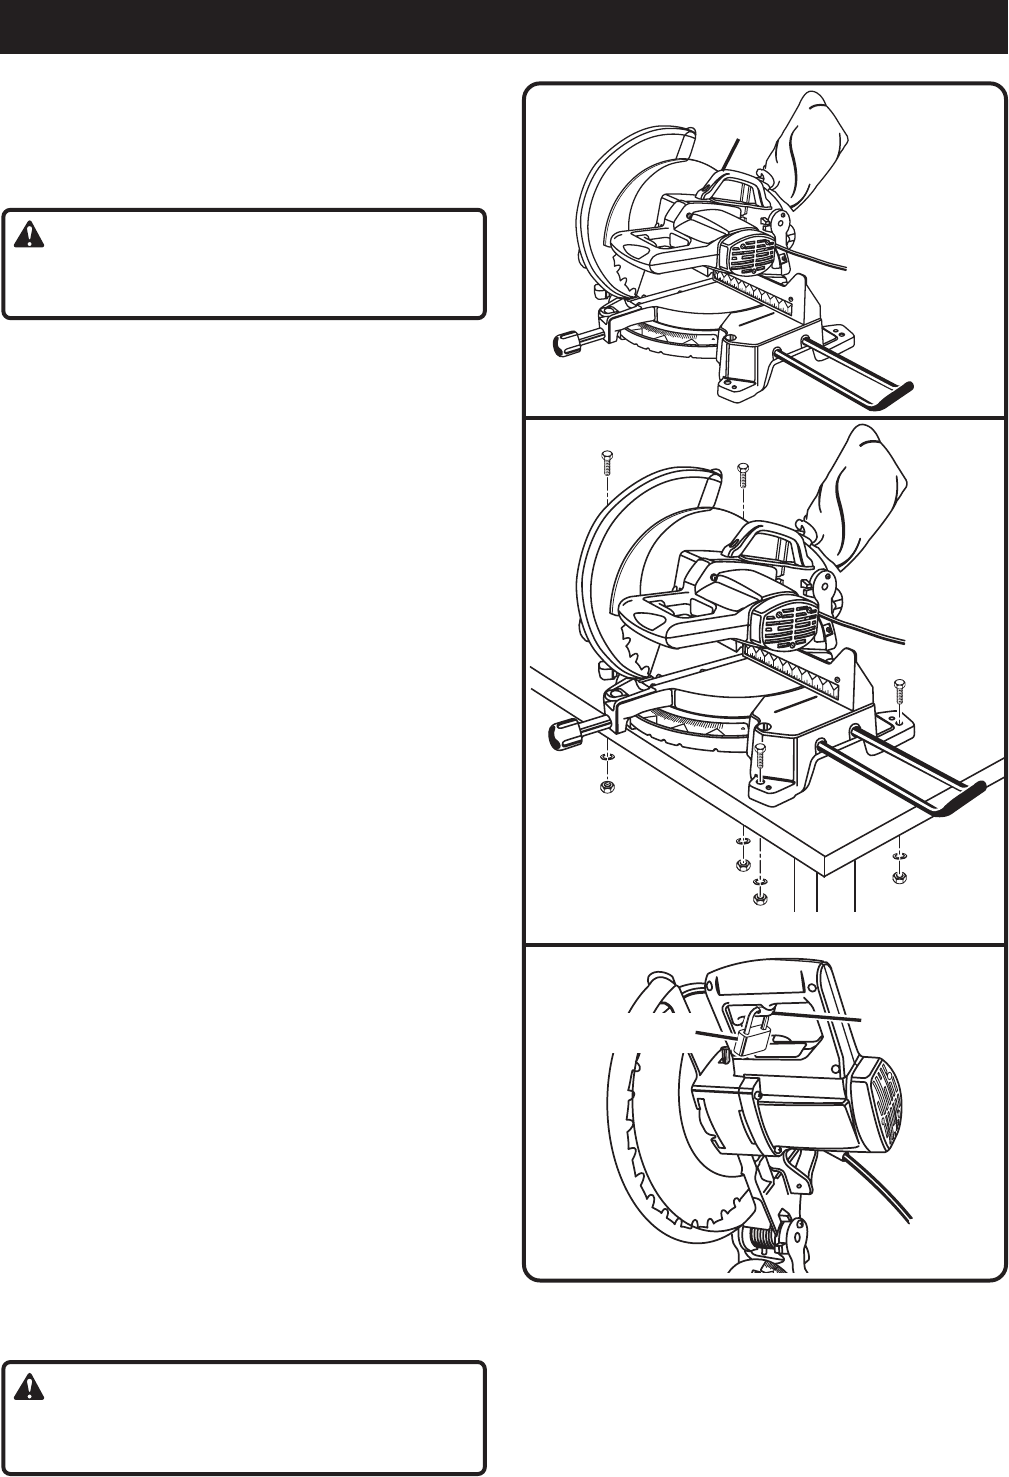
CARRYING THE SAW
See Figure 7.
Follow these directions to carry the saw.
■ Unplug the saw.
WARNING:
Failure to unplug the tool could result in accidental
starting causing serious injury.
■ Pull the saw arm all the way down.
■ Engage the lock pin to hold the saw arm in the
transport position.
■ Stand behind the saw.
■ Lift the saw by the carrying handle.
NOTE: The saw is heavy. Ask for assistance if
necessary.
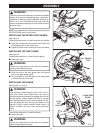
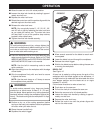
MOUNTING THE SAW TO A WORK
SURFACE
See Figure 8.
Follow these directions to mount the saw to a work
surface.
■ Place the saw on a sturdy work surface, e.g., work
stand, workbench, countertop.
■ Mark the holes in the saw base with a pencil.
■ Remove the saw from the work surface.
■ Drill four holes through the work surface.
■ Place the saw back on the work surface, aligning
the holes in the saw base with the holes in the work
surface.
■ Insert four bolts (not included, 3/8 in. (9.5 mm) ma-
chine bolts recommended) and tighten securely with
lock washers and hex nuts (not included).
■ Check the work surface carefully after you mount
the saw to make sure that no movement can occur
during use. If any tipping, sliding, or walking is noted,
secure the work surface to the floor before operat-
ing the saw.
NOTE: If you plan to transport the saw to different
locations, we recommend that you attach it
permanently to a mounting board that you can easily
clamp to a work surface.
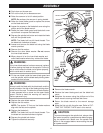
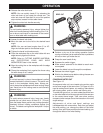
SECURING THE SAW
See Figure 9.
Follow these directions to secure the saw.
■ Unplug the saw.
WARNING:
Failure to unplug the tool could result in accidental
starting causing serious injury.
Fig. 7
Fig. 8
Fig. 9
■ Install a padlock through the hole in the trigger
switch.
NOTE: You may use a padlock with a long shackle
up to 9/32 in. (7 mm) in diameter.
■ Store the padlock key in another location.
CARRYING
HANDLE
TRIGGER
SWITCH
PADLOCK