


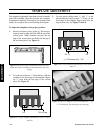


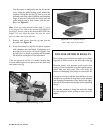
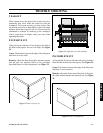

Figure 20 shows a finished drawer
and 2 sides ready to be joined.
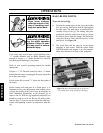
Figure 19 shows the dovetail jig in use.
- 15 - Woodstock Intl., Inc. D2796
OPERATIONS
TIPS FOR OPTIMUM RESULTS
Don’t clamp your work down too tight. Over-clamp-
ing tends to lift the wood on the front side of the jig.
Maintain steady, even pressure on the router when
cutting. Remove materials in several smaller passes,
rather than one large pass. This will lessen the
chances of damaging your project or your router bit.
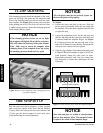
Use pieces of scrap wood the same thickness as your
workpieces to provide an even base for the template
and clamping mechanisms. Place them at the oppo-
site end of the template and clamps before tightening
the jig.
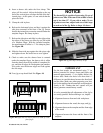
Be sure the template is sitting flat across the length
of your workpiece before routing to ensure even cut
depth.
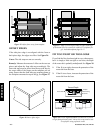
Turn the router on and gently ease the bit into the
work, letting the guide bushing gently contact the
template. Facing the dovetail jig, start at your left
side and work to the right, following each template
finger in and out. Ensure that the router base and
guide bushing stay in firm contact with the tem-
plate. See Figure 19.
Hint: If you are using material thicker than
7
/8
", cut it
in two stages. First, remove the material IN FRONT OF
the fingers. Second, remove the material BETWEEN the
fingers. Use care when the router bit exits the work-
piece to reduce the risk of tear-out.
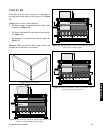
3. Remove both pieces from the jig and join the
dovetails. See Figure 20.
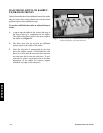
4. It may be necessary to tap the two pieces together
with a hammer and wood block. If alignment is so
poor that the two pieces will not fit together, line
up each piece as much as possible and determine
the direction and degree of fine adjustment.
If the two pieces do not fit, it is usually because they
were not milled square or the pieces were not flush with
each other in the jig.