


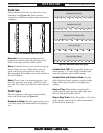

-18-
For Machines Mfg. Since 8/09
Model SB1017
PREPARATION
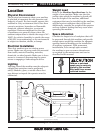
Power Connection
Electrocution or fire
may occur if machine is
ungrounded, incorrectly
connected to power, or
connected to an undersized
circuit. Use a qualified
electrician to ensure a safe
power connection.
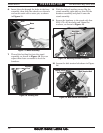
Once your machine is set up and assembled as
previously described in this manual, it is ready to
be connected to the power source.
• Ifyouplantousethemachineat110V,
simply plug it into a receptacle on a 110V
circuit that meets the requirements listed on
Page 10.
• Ifyouplantousethemachineat220V,you
will have to convert the machine for 220V.
Refer to Electrical, beginning on Page 41.
Test Run
After all preparation steps have been completed,
the machine and its safety features must be
tested to ensure correct operation. If you discover
a problem with the operation of the machine or
its safety components, do not operate it further
until you have resolved the problem.
Note: Refer to Troubleshooting on Page 38 for
solutions to common problems that occur with
metal-cutting bandsaws. If you need additional
help, contact our Tech Support at (360) 734-1540.
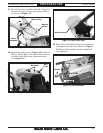
To test run your machine:
1. Read and follow the safety instructions at
the beginning of the manual, take required
safety precautions, and make sure the
machine is set up and adjusted properly
2. Clear away all tools and objects used during
assembly and preparation.
Inspections &
Adjustments
The following list of adjustments were performed
at the factory before your machine was shipped.
If you find that the adjustments are not set
according to the procedures in this manual or
your personal preferences, re-adjust them.
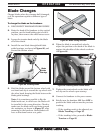
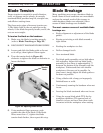
• Blade Tracking .................................Page 35.
• Squaring the Blade ..........................Page 37.
• BladeGuideBearings ......................Page 36.
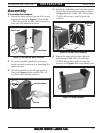
3. Open the downfeed valve and allow the
saw to travel all the way down. If the blade
contacts the machine base or the auto-
OFF tab rests on the toggle switch, adjust
the downfeed stop bolt as described in
Downfeed Stop Bolt, on Page 35.
4. Connect the machine to the power source.
5. Put on safety glasses and secure loose
clothing or long hair.
6. Lift the bandsaw by the handle. Close the
downfeed valve to prevent it from lowering.
7. Start the bandsaw while keeping your finger
near the ON/OFF toggle switch at all times
during the test run. The bandsaw should run
smoothly with little or no vibration.
— If you suspect any problems, immediately
turn the bandsaw OFF, disconnect it from
power, and correct the problem before
continuing.
— If you need any help with your bandsaw
call our Tech Support at (360) 734-1540.
8. Open the downfeed valve to lower the saw
through its full range of motion. When it
reaches the bottom of its travel, it should
turn OFF. If it does not, manually turn it
OFF, disconnect it from power, then proceed
immediately to Auto-Off Tab, on Page 37.