


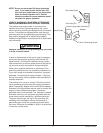

© 1995 Wagner Spray Tech 15 All rights reserved.
NOTE: The inlet valve must be oiled after every job.
This will reduce or eliminate priming prob-
lems the next time the sprayer is used.
4. Thoroughly clean the valve assembly with water or
the appropriate solvent. Use a small brush.
5. If you have properly cleaned the valve and water
drips out of the bottom, the valve is worn and needs
to be replaced. A properly seated valve filled with
water and held vertically will not drip.
6. Install a new or cleaned valve in the pump block and
then fill the valve with light oil or solvent.
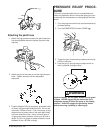
Removing and cleaning the outlet valve
It may be necessary to remove and clean the outlet valve
or to replace parts inside the valve worn out through
normal use.
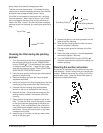
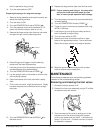
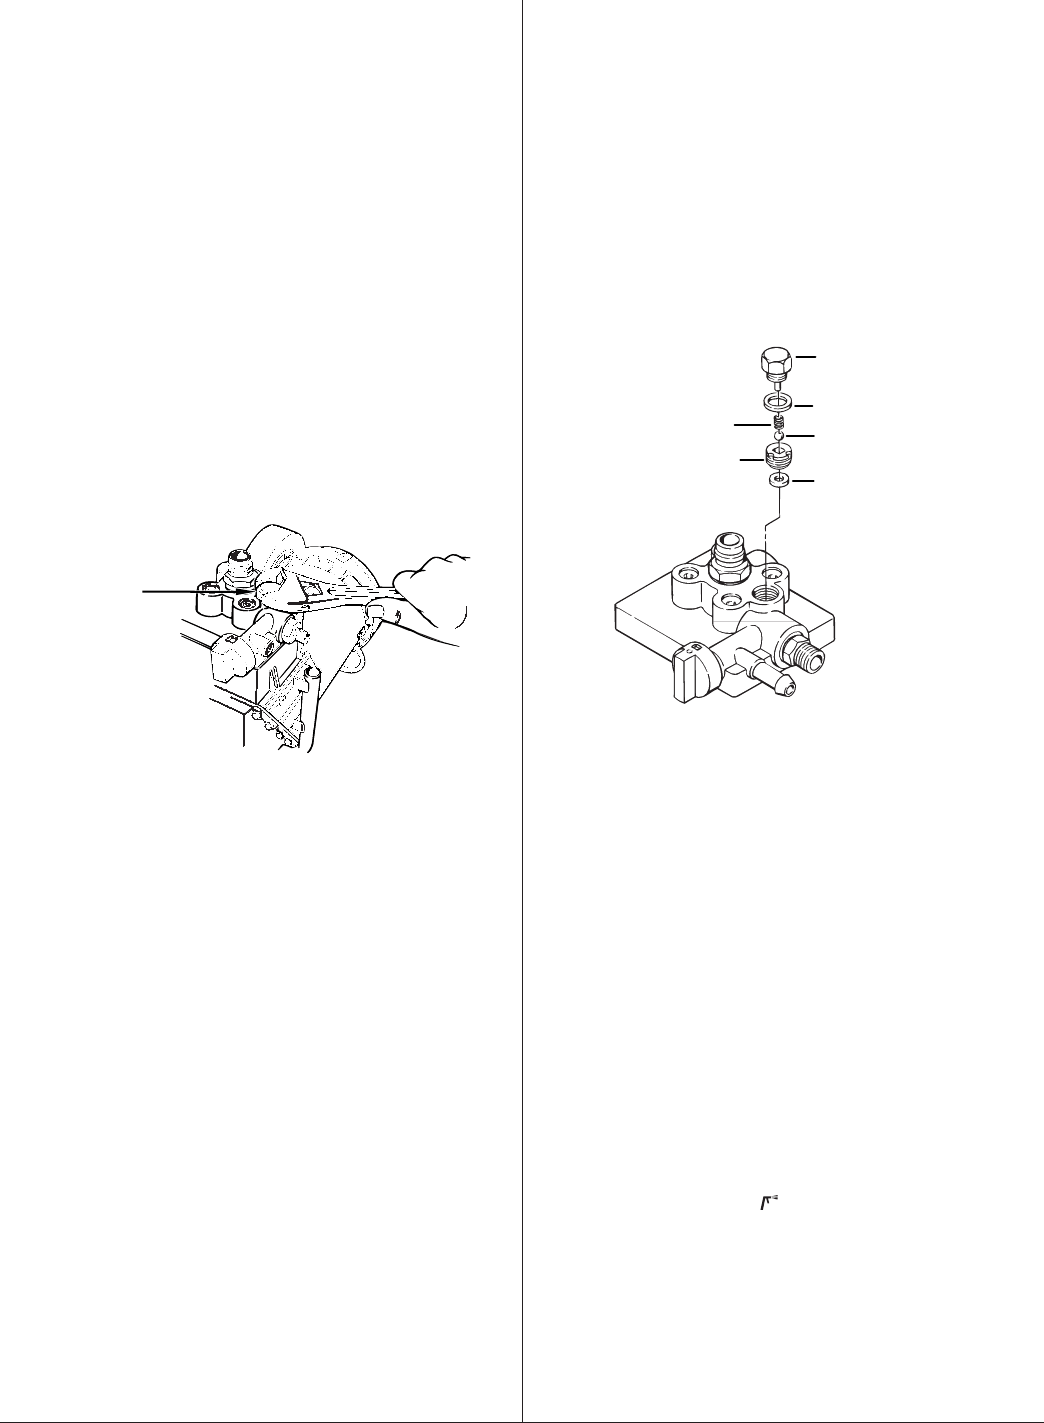
1. Remove the outlet cap with an adjustable wrench.
Outlet Cap
2. Leave the copper washer under the cap in place.
NOTE: If the copper washer falls out, be sure to
replace it with the same side up. The top will
show the imprint of the end cap, while the
bottom should be perfectly flat to match the
seat in the pump casting.
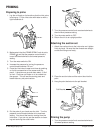
3. Remove and clean the small spring inside the valve
using a wire hook or tweezers. Replace the spring if
it is broken or worn.
NOTE: This spring is manufactured to a very specific
tension. Do not put in an unauthorized
substitute. See the paint pump assembly
parts diagram for the proper replacement part
number.
4. Remove the seat and ball assembly using a six-
millimeter allen wrench.
5. Clean all parts thoroughly. If the ball or seat show
any sign of wear or damage, replace them with new
parts. This carbide ball must seal tightly against its
seat for the valve to function properly.
6. Cover all parts with a thin coat of light oil before
reassembling.
7. Tighten the valve seat securely with the 6 millimeter
hexagonal wrench.
8. Drop in the valve ball.
9. Insert the spring and replace the cap, being sure
that the copper washer is positioned properly and
that the tongue on the cap fits inside the spring.
10. Tighten the cap securely with an adjustable wrench.
Do not overtighten.
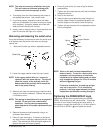
Cap
Ball
Seal
Seat
Spring
Copper Washer
NOTE: Wear on the ball is almost impossible to
detect visually. To test for a worn outlet valve
assembly, turn the pressure control knob
clockwise to its highest setting and run water
only through the sprayer for 10 to 15 minutes
without triggering the gun.
If the valve is defective, the end cap will get
very hot to the touch. If it is functioning
properly, it will stay approximately the same
temperature as the water running through it.
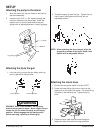
Tightening the PRIME/SPRAY knob
Sometimes the two allen screws holding the PRIME/
SPRAY knob outer cover will vibrate loose. This allows
the cover to turn without changing the valve setting. If
this happens, loosen the screw with a 1/16 allen wrench,
turn the knob to SPRAY ( ) and tighten the screw.