


10
Adjusting Platen Housing
Position
The sanding belt can be operated with the platen
housing horizontal, vertical, or at any angle in
between. Change position of the platen housing as
follows:
WARNING: DISCONNECT ELECTRICAL POWER
TO THE MACHINE BEFORE PERFORMING ANY
MAINTENANCE.
1. Disconnect electrical power.
2. Remove four screws (52) and pulley cover (12).
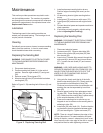
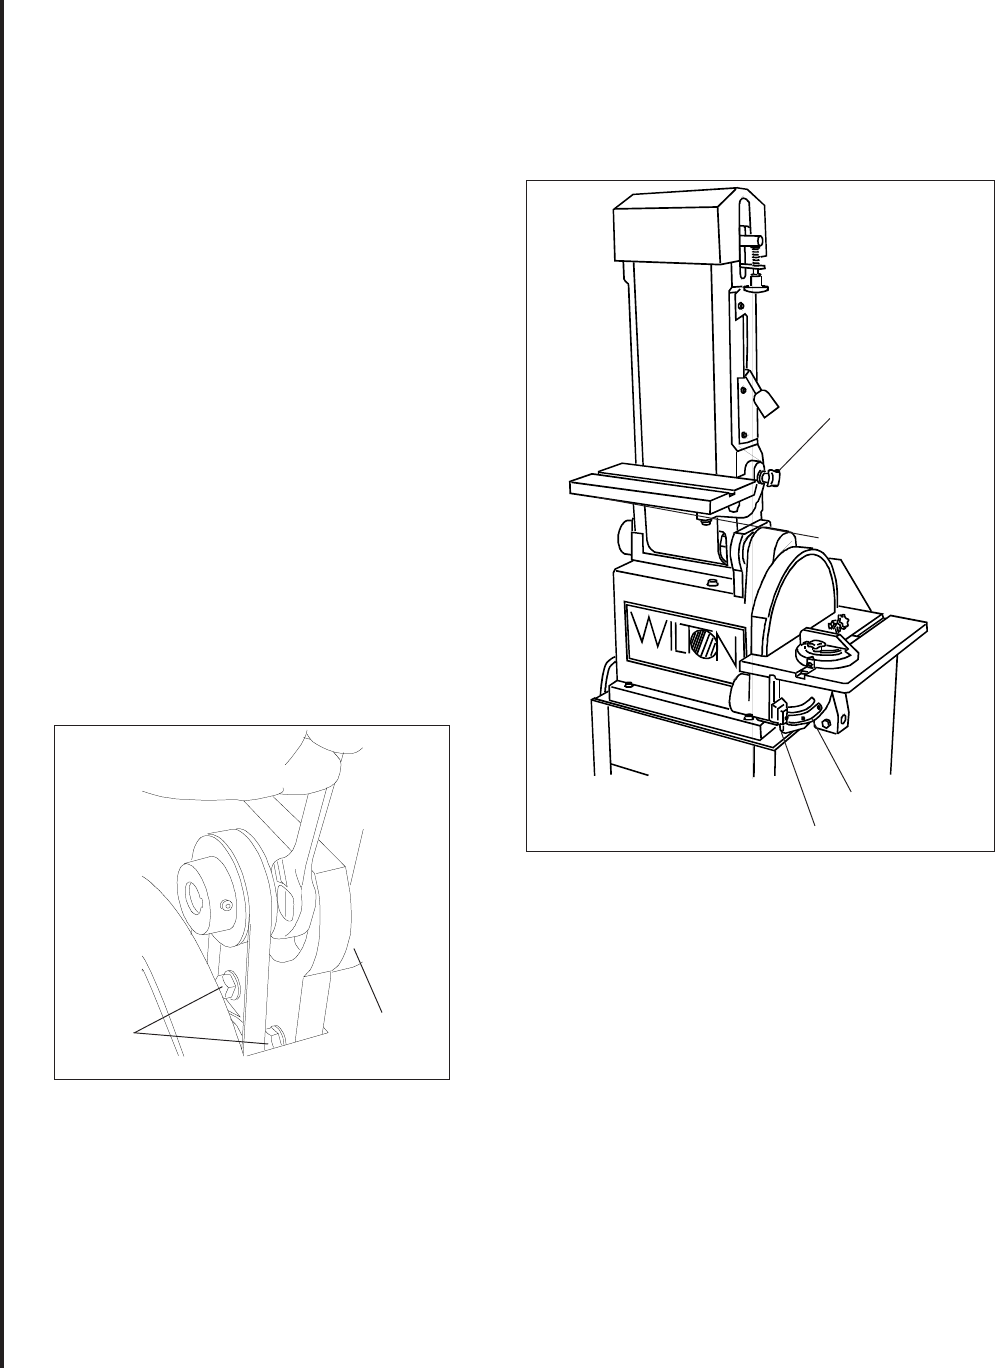
3. Using an open end wrench, loosen two hex
screws (13) (refer to Figure 7).
4. Move the platen housing to the desired position.
When the platen housing is to be placed in the
horizontal position, lower the platen housing onto
stop screw (28) on the machine base.
5. If the stop requires adjustment, loosen jam nut
(29), adjust stop screw (28) to desired position,
and tighten nut (29).
6. Tighten two hex screws (13).
7. Install pulley cover (12) and secure with four
screws (52).
8. Start the machine to check operation.
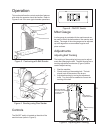
Figure 7. Platen Housing Clamping Screws
Disc Table
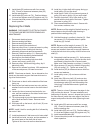
1. To change the disc table angle, loosen the knob
on the left side of the table (refer to Figure 8).
2. Move the table to the desired angle.
3. Tighten the knob to secure the table.
Figure 8. Adjusting Sander Table Angle
Belt Table
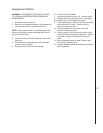
1. To change the belt table angle, loosen the knob
on the right side of the platen housing (refer to
Figure 8).
2. Move the table to the desired angle.
3. Tighten the knob to secure the table.
Adjusting the Sander Tables
The belt and disc sander tables can be adjusted
from 0 to 45 degrees to accommodate the work
piece.
Clamping
Screws
Platen
Housing
Table Clamping Knob
Disc Table Angle Scale
Belt Table
Clamping Knob
Belt Table Angle Scale
(left underside of table)