10-6
Erasing track data
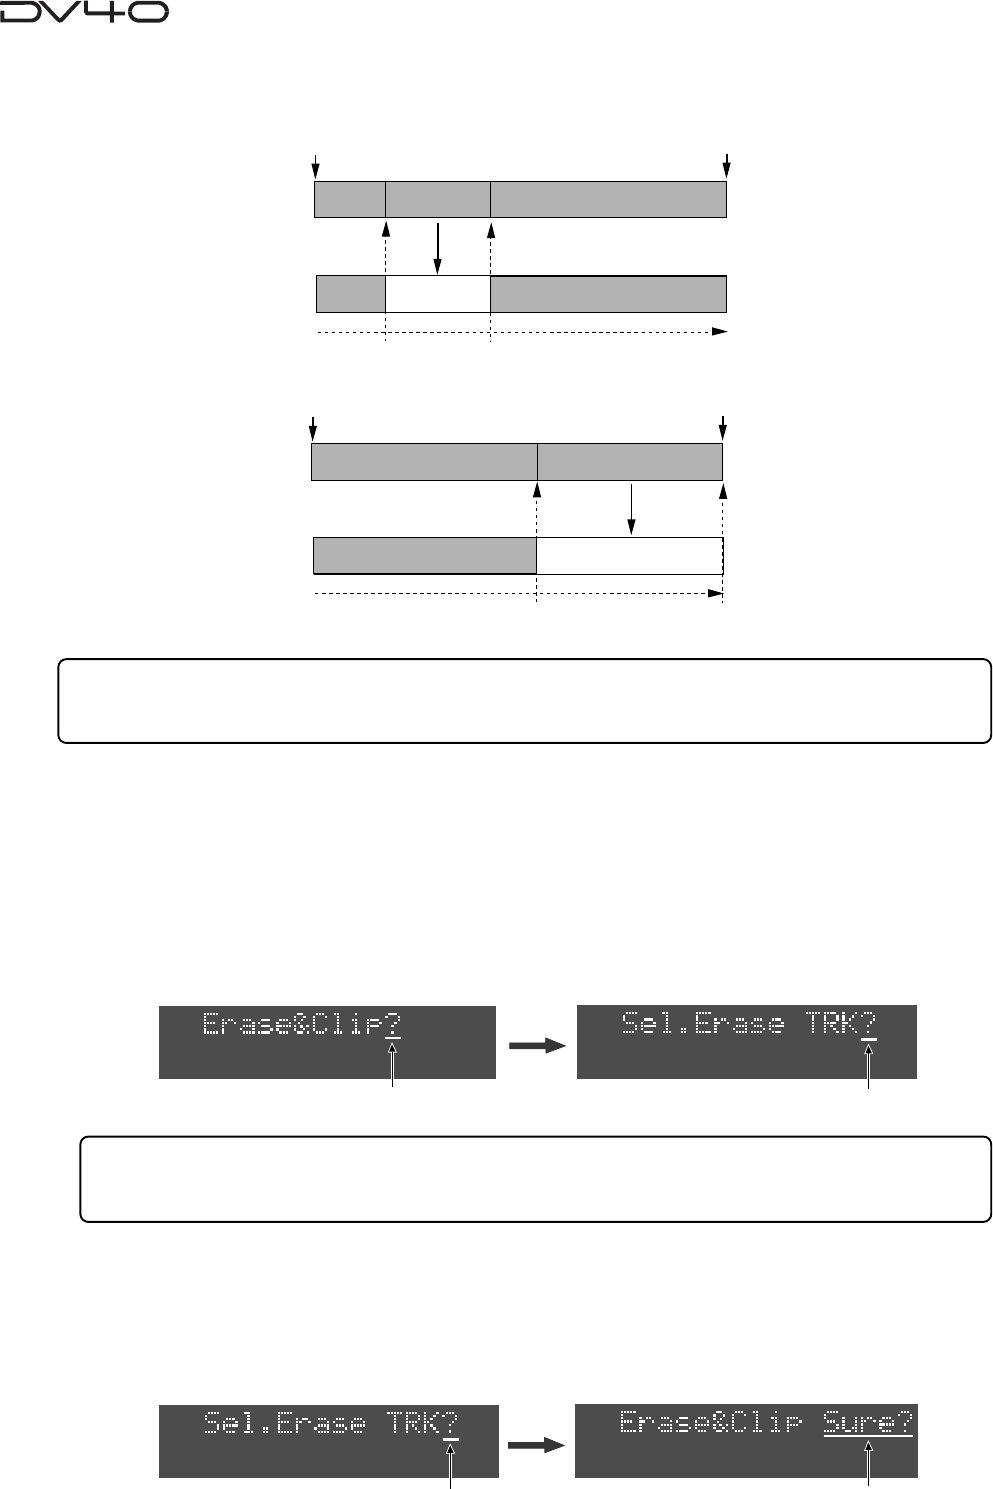
You can erase track data between the "SOURCE IN" and "SOURCE OUT" points.
1. Store the "SOURCE IN" and "SOURCE OUT" points.
See "Chapter 6: Storing time data" for details about how to store these points.
2. If necessary, trim these edit points using the preview function.
See "Chapter 8: Preview function" for details about how to trim edit points.
3. While stopped, press the [AUDIO EDIT] key to show "Erase & Clip?" (or "Erase?" when selecting a
"Tape mode" audio file) on the display, followed by the [ENTER/YES] key.
By pressing the [ENTER/YES] key, "Sel.Erase TRK?" appears on the display.
4. Press the appropriate edit point key(s) ([SOURCE IN], [SOURCE OUT], [DEST IN] or [DEST OUT] keys)
to select the track(s) to be erased, and press the [ENTER/YES] key.
*These edit point keys are used to select tracks 1 through 4 (TR 1 through TR 4), as labeled below the keys.
The selected track number(s) surrounding by a box flash(es) in red.
By pressing the [ENTER/YES] key, "Erase & Clip" (or "Erase" when selecting a "Tape mode" audio file) with
flashing "Sure?" appears on the display.
Flashing
Tips:
The erase operation erases only sound data, therefore, by erasing track data of a specified area between
"ABS 0" and "REC END", the REC END point does not change and the time code is not affected.
Sound data
SOURCE IN
point
SOURCE OUT
point
Silence
ABS 0
REC END
Sound data
SOURCE IN
point
SOURCE OUT
point
Silence
ABS 0
REC END
Tips:
You can select any one or more tracks to be erased available in the file. With a MONO file, only track 1
can be selected.
Flashing
Flashing
Flashing
