15-10
• Showing and setting the IP address
You can check or/and assign the IP address for the
DV40.
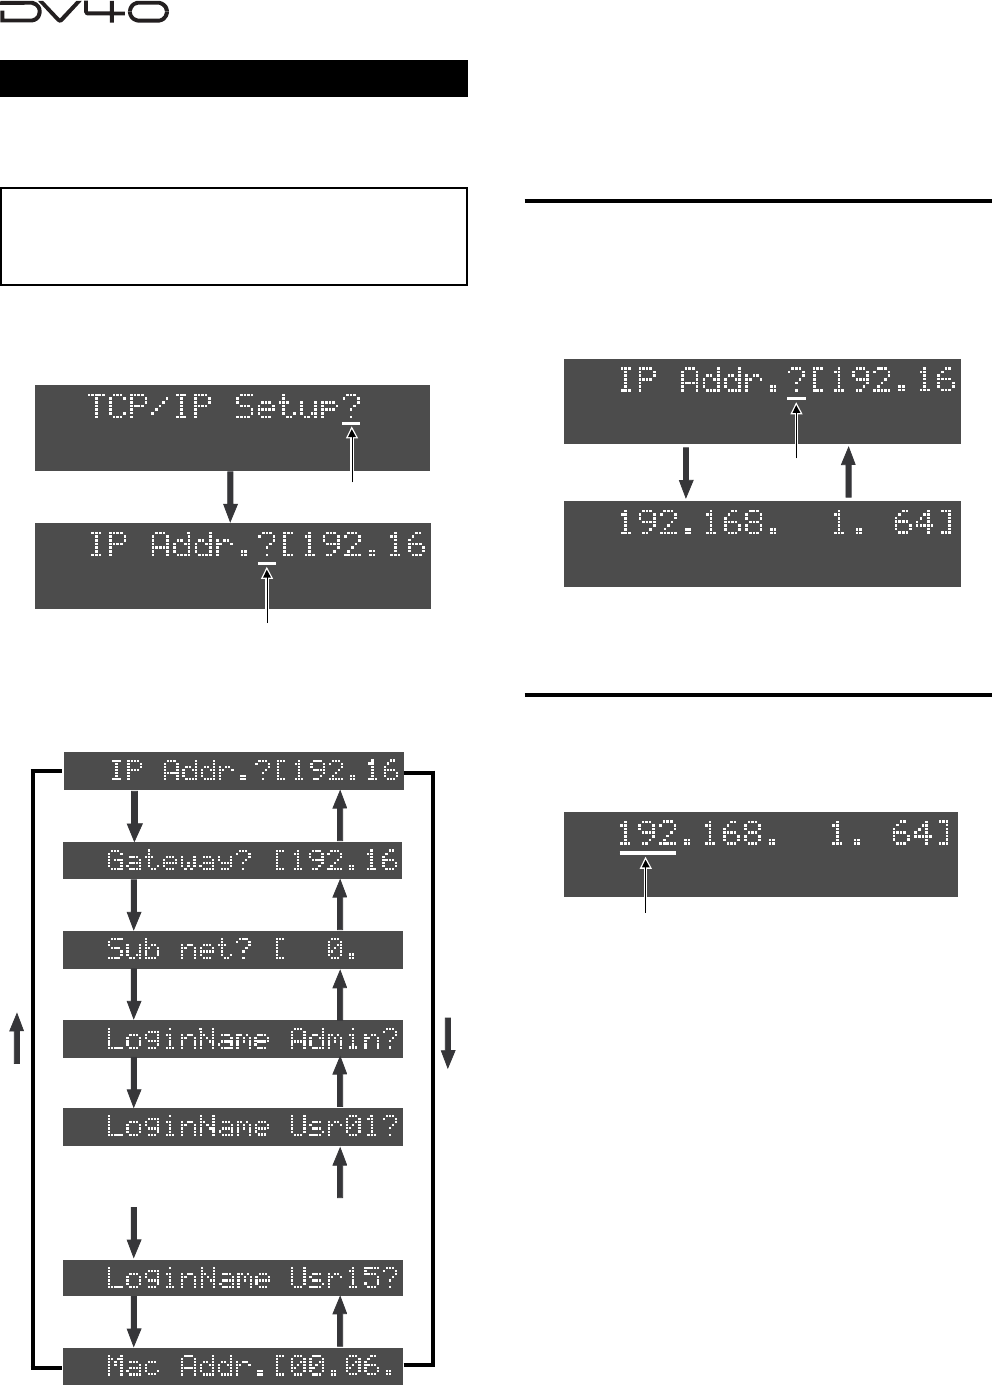
2. Use the [SKIP/CURSOR |<<]/[SKIP/CURSOR >>|]
keys to move the flashing
(editing) point and use the jog dial or numeric keys
to enter a desired value.
3. After entering the desired value, press the
[ENTER/YES] key.
"Wait!" flashes for a while, and the new IP address is set.
4. To exit the Setup mode, press the [EXIT/NO] key
or [STOP] key.
SETUP
Setting the IP address
1. While either of the screen above is shown, press
the [ENTER/YES] key.
The leftmost three-digit value of the current IP address
starts flashing, showing that you can now edit it.
TCP/IP settings
The "TCP/IP Setup?" menu allows you to set param-
eters for transferring audio file data between the
DV40 and your personal computer via the TCP/IP.
You can now use the jog dial to select a sub-menu in
the following order. You can check or/and edit the
setting of each sub-menu.
SETUP
Flashing
Flashing
Flashing
Flashing
SETUP
SETUP
SETUP
<Note>
When changing the TCP/IP setting, turn the DV40
power off then on. Otherwise, the new setting is not
effective.
By selecting the “TCP/IP setup?” menu and pressing
the [ENTER/YES] keys, the IP address setting sub-
menu is shown
SETUP
SETUP
SETUP
SETUP
SETUP
SETUP
SETUP
LoginName User02?
•
•
LoginName User14?
1. Select "IP Addr.?" and press the [SKIP/CURSOR
>>I] key.
The current IP address is shown (the default is
192. 168. 1 .64).
Pressing the [SKIP/CURSOR |<<] or [SKIP/CURSOR >>|] key
alternates the following screens.
Showing the IP address


