


Operating Instructions & Parts Manual
www.chpower.com
8
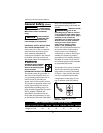
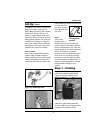
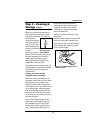
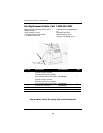
Step 1 – Priming (Cont.)
Control to the Prime position (see
Figure 14). After a
few seconds, the
coating will come
up the suction tube
and then out the
bypass tube.
Initially, there will
be air bubbles in
the paint coming
out of the bypass tube. When you no
longer see bubbles, turn the One
Touch Control to the Spray position
(see Figure 15). If you have any diffi-
culty priming, please see the sugges-
tions in the Troubleshooting chart
beginning on page 13.
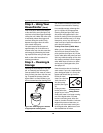
Step 2 – Using Your
HousePainter
Setting The Pressure
A range of pressure
settings on the
HousePainter gives
you the flexibility to
meet any painting
challenge. Use the
lowest pressure set-
ting (see Figure 16)
for thin materials
such as water seals
and polyurethanes.
The highest pres-
sure setting (see
Figure 17) is used
for heavier coatings
like latex paint.
The best way to
determine the proper setting for your
job is to begin with the pressure on
the lowest setting and spray on a prac-
tice surface. Turn the pressure up
gradually and continue to spray test
swatches after each adjustment until
you no longer see ‘tails’ in the spray
pattern (see Figure 18). Using this
method to determine the proper pres-
sure setting will provide the best spray
pattern while minimizing overspray as
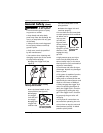
Figure 16 - Icon
showing Lowest
Pressure position
Figure 17 - Icon
showing Highest
Pressure position
Figure 14 - Icon
showing Prime
position
2
Figure 15 - Icon showing Spray posi-
tion
Figure 18 – Good spray pattern
shown in white area of top picture.
Bad spray pattern – ‘tails’ – shown in
white area of bottom picture.