


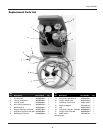

Model WT5000
7
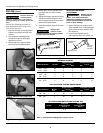
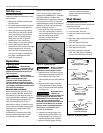
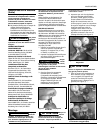
Figure 17 - Correct Cutting Speed
Welding Guidelines
Gas Welding
Gas welding is a method of joining
similar metals by melting with oxy-fuel
flame and allowing the two parts to fuse
together. The use of a filler rod is
recommended in most cases. The filler
rod should match the material being
welded with a diameter equal to the
thickness of the workpiece.
Clean all metal surfaces prior to welding.
Any oil, grease, rust, scale, paint or other
impurities must be removed before
welding.
Before attempting to weld final product,
practice on scrap material.
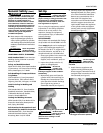
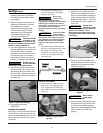
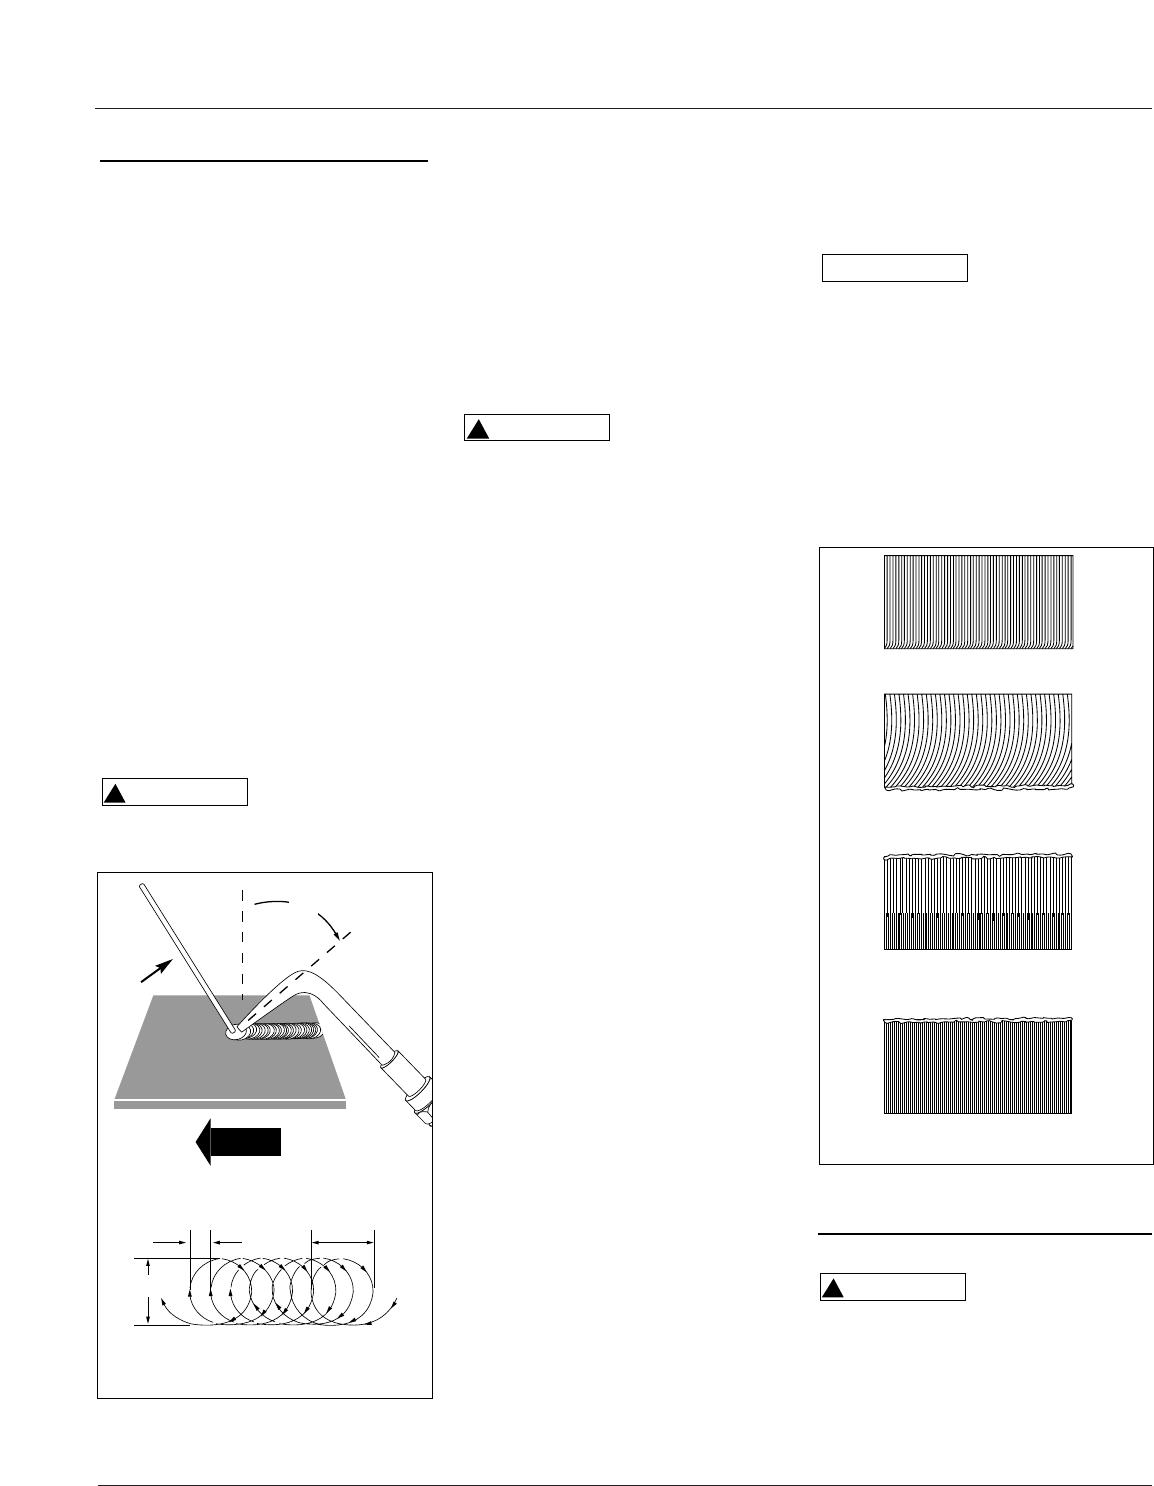
Begin by holding the torch tip
approximately 1/8” above the metal at a
45˚ angle to the surface. Rotate the
flame in a circular motion on the surface
you are welding. The metal will puddle
and flow together. If the puddle does
not form or is shallow, the tip size is too
small. If the metal splatters from the
puddle, the tip size is too large.
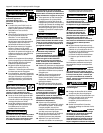
Never use oxygen
to blow off work or
clothing as spark can ignite oxygen
saturated clothing.
!
WARNING
Gas Brazing
Brazing heats the base metals to
temperatures above 700˚F, but below
their melting points. A single or multi-
flame tip may be used. A filler rod bonds
the metals together. Flux is required to
prepare metal for joining. Most metals
can be joined by brazing, however, the
proper filler rod and flux must be used.
Surfaces must be absolutely clean to
ensure sound brazed joints.
Perform all
brazing processes
in a well-ventilated area. Toxic fumes
may be generated by the brazing process.
Refer to the Material Safety Data Sheet
(MSDS) for the brazing rod.
1. If the rod is not flux coated, heat the
tip of the rod and dip into flux. The
flux will adhere to the heated rod.
2. Preheat the metal surface to a dull
red color. Only the outer flame, not
the inner cone, should be applied to
the surface. A porous deposit will
result if surface is too hot.
3. Touch the fluxed rod to the heated
metal. Allow some flux to melt and
react with the base metal.
4. Melt off small amounts of fluxed rod
as you braze. If the rod flows freely
and “tins” (adheres to the heated
base metal), the correct temperature
has been reached. Maintain this
temperature by continually moving
the flame over the metal.
5. Continue to dip the rod into the flux.
Add sufficient rod to the base metal
to build up the bead.
Flame Cutting
Flame cutting is a simple process that can
be quickly mastered. Only steel can be
cut using the flame method. Aluminum,
brass, stainless steel and other porous
metals do not burn in a manner that
allows flame cutting.
1. Light the torch as described in
Operation instructions.
2. Direct the preheat flame to the spot
where cutting is to start. Hold the
inner cone of the heating flame
approximately 1/16” above the
surface. Preheat the metal to a bright
cherry red.
!
CAUTION
3. Depress the cutting oxygen lever
slowly and completely to begin the
cutting action.
4. When the cut begins, move the torch
in the direction of cut.
Moving the torch
too slowly allows
the cut to fuse together. Moving too
quickly will not preheat the metal and
the cut will be lost.
5. Continue to depress the oxygen lever
past the final edge of the metal for a
good cut.
6. Shut down torch following shut
down instructions.
7. Compare cut edge with Figure 17 to
correct subsequent cuts.
NOTICE
Figure 16 - Proper Welding Angle
45˚
Filler
Rod
A. Correct
B. Travel speed too fast
C. Travel speed too slow
D. Preheat too hot
Advance per oval
about 1/16”
About 1/4”
Start
About 1/4”
www.chpower.com
Maintenance
CHECK VALVES
Always use
reverse flow check
valves with this equipment. They reduce
the possibility of mixing gases in the
hoses and regulators. These gases can
explode in the hoses, regulators or
cylinders, resulting in serious injury to
the operator. Test reverse flow check
valves routinely to assure correct
operation.
!
WARNING