


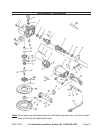
Page 15SKU 41213 For technical questions, please call 1-800-444-3353.
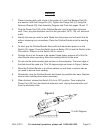
Place a sanding disk, with a hole in the center of it, onto the Backing Pad (46)
and secure it with the Flange Nut (47). Tighten the Flange Nut (47) using the
Spanner Wrench (49). See Assembly Diagram and Parts List pages 16 and 17.
Plug the Power Cord (33) of the Polisher/Sander into the electrical extension
cord. Then, plug the extension cord into the grounded, GFCI, 120 volt, electrical
outlet.
Identify the area you wish to sand. Make sure the power cord will reach that far
without stressing any connections. Place the Polisher/Sander onto the sanding
area.
To start, grip the Polisher/Sander rmly with both hands and press in on the
Switch (24) trigger. Press the Switch Lock-on Button (22) to lock the Switch in the
ON position. Press in on the Switch (24) to unlock it.
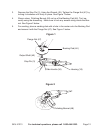
Position the unit on the area to be sanded. Keep heavy pressure off of the Pol-
isher/Sander when operating. Allow the sanding disk to do the work.
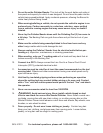
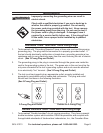
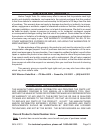
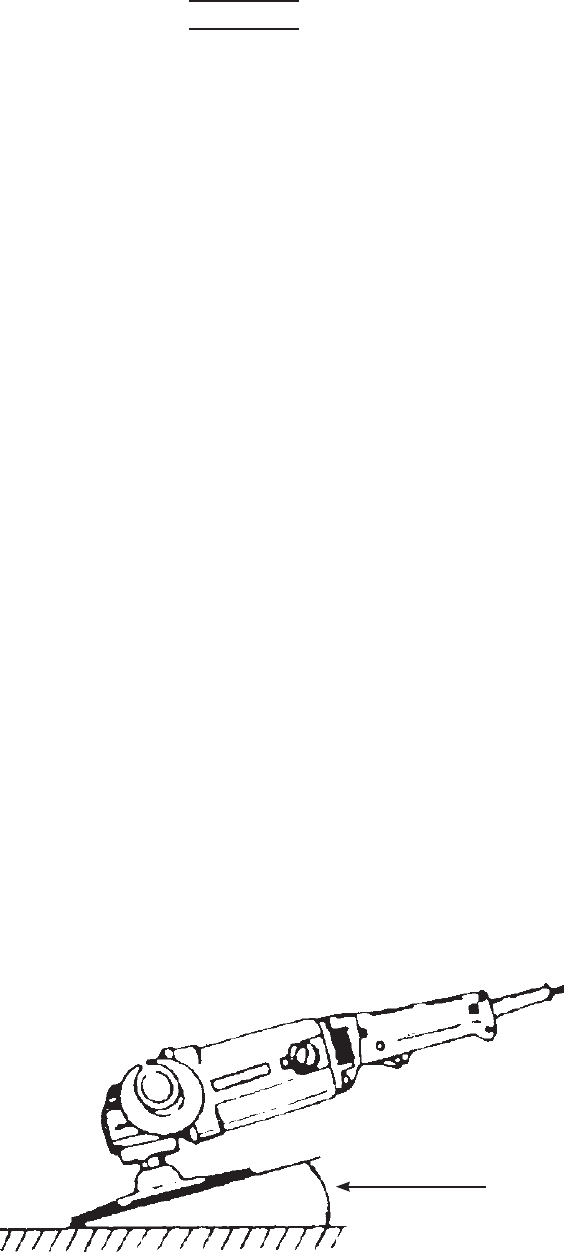
Do not use the entire sanding disk surface on the workpeice. The inner edge of
the disk should be used at a 15 to 25 degree angle as shown in Figure 3 below.
Move the Polisher/Sander in a uniform pattern up and down or side to side as
you sand to ensure even sanding.
Periodically, stop the Polisher/Sander and check for possible disc wear. Replace
used or worn sanding discs when necessary.
When nished, release the Switch (24) to its OFF position. Then unplug the
Power Cord (33) from the electrical extension cord. Unplug the extension cord
from the electrical outlet.
1.
2.
3.
4.
5.
6.
7.
8.
9.
Sanding
15 to 25 Degrees
Figure 2