


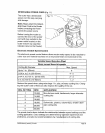


ELECTRONIC FEEDBACK CIRCUITRY
The router's electronic feedback circuitry monitors and adjusts power to main-
tain the desired RPM for consistent performance andlcontrol, providing constant
speed under load for a quality finish in all materials
PLACING THE ROUTER ONTO THE WORKPIECE AND STARTING THE CUT
_k WARNING: Before operating your router follow all safety instructions in
this manual. Failure to do so could result in serious personal injury.
NOTE: Making test cuts is essential with most routing applications. Even
with careful set-ups you won't know exactly how the cut will go until you
try it out. A test cut will give you a feel for the set-_p, the router's speed,
the depth of cut and how the cutting bit reacts to!he work piece. Much of
muting is a trial-and-error process of making var=0us adjustments, fol-
lowed by test cuts as you become familiar with all iof your router's op-
erational abilities. To avoid ruining good material, make your test cuts on
scrap materials.
How you place your router onto a work piece to start the cut depends on the type
of routing you are going to perform: Edge Routing or In_rnal Routing.
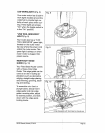
EDGE ROUTING OR INTERNAL ROUTING
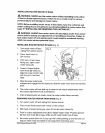
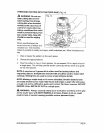
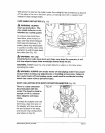
For ease of operation and to maintain proper control, your router has two
handles, one on each side of the router base. When ofSerating the router, always
hold it firmly with both hands (Fig, 12)o
Turn the router "On," let the
router motor build to its full
speed, then gradually feed
the cutting bit into the work
piece. ALWAYS be alert and
watch what you are doing.
NEVER operate the router
when you are fatigued.
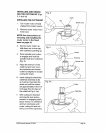
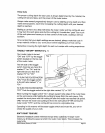
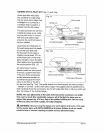
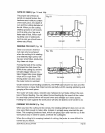
EDGE ROUTING (Fig. 12)
,
Edge Guide
,,
With depth-of-cut set,
place router on edge of
work piece, making sure
the cutter does not con-
tact the work piece..
.
4o
28190 Man uaLRevis ed_07-0409
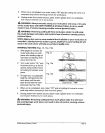
Edging with Fixed Base
Have an edge guide (board or metal straightedge) _lamped in place to help
guide router's base when making your edge cut. ,
i
Turn the router "On," and let the router motor build _to its full speed,
To begin your cut, gradually feed the cutting bit into t_e edge of the work piece.
Page 24