


20
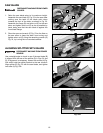
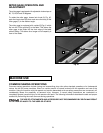
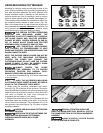
Fig. 38
A
B
D
C
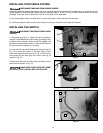
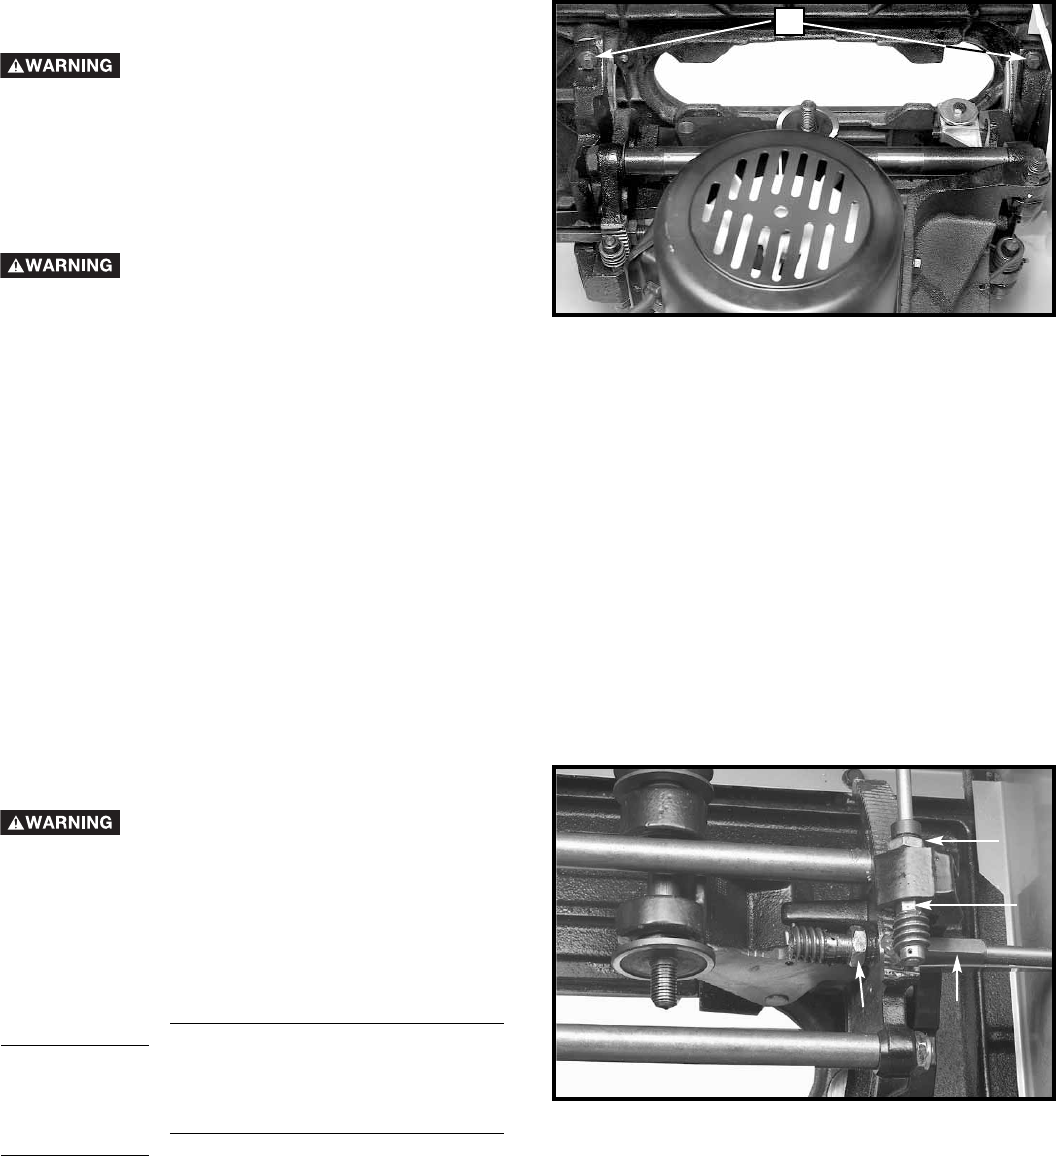
BACKLASH ADJUSTMENTS
DISCONNECT MACHINE FROM
POWER SOURCE.
After a period of extended use, if any play is detected in
the blade raising or blade tilting mechanisms, remove
the blade and make the following adjustments:
ADJUSTING BLADE RAISING MECHANISM - Loosen
locknut (A) Fig. 38, and turn eccentric sleeve (B) until all
play is removed. Tighten locknut (A) while holding
sleeve in place.
ADJUSTING BLADE TILTING MECHANISM - Loosen
locknut (C) Fig. 38, and turn eccentric sleeve (D) until all
play is removed. Tighten locknut (C) while holding
sleeve in place.
BLADE ALIGNMENT IS FACTORY SET
AND SHOULD NOT NEED
ADJUSTMENT. ADJUSTING BLADE ALIGNMENT IN
THE FIELD IS A DIFFICULT AND TIME-CONSUMING
PROCEDURE. ALL SAW BLADES HAVE SOME RUN-
OUT. THEREFORE, RE-ADJUSTING BLADE
ALIGNMENT SHOULD ONLY BE ATTEMPTED IF IT
BECOMES NECESSARY. (SEE CHECKING BLADE
ALIGNMENT.)
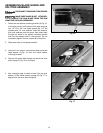
DISCONNECT MACHINE FROM
POWER SOURCE.
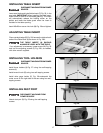
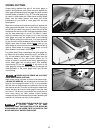
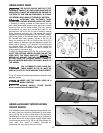
1. Lower blade. Remove blade guard and table insert.
With a 1/2″ wrench, slightly loosen the 4 front and
rear trunnion mounting bolts. NOTE: Two trunnion
mounting bolts (E) Fig. 37 are shown as looking up
inside side of saw.
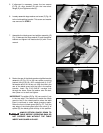
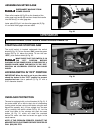
2. Move the trunnion assembly in the desired direction.
Tap gently with rubber mallet if necessary.
3. To check blade alignment, follow section
“CHECKING BLADE ALIGNMENT” procedure until
proper alignment is achieved. Tighten 4 trunnion
bolts (E) Fig. 37.
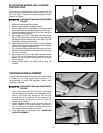
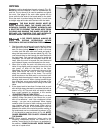
4. Check blade alignment again after tightening bolts to
confirm alignment. If alignment is off, loosen the 4
trunnion bolts (E) and repeat the above steps until
proper alignment is achieved with bolts fully
tightened.
5. Install table insert, blade guard, and lower blade
before reconnecting power source.
Fig. 37
E
ADJUSTING BLADE ALIGNMENT