


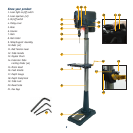


14
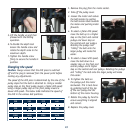
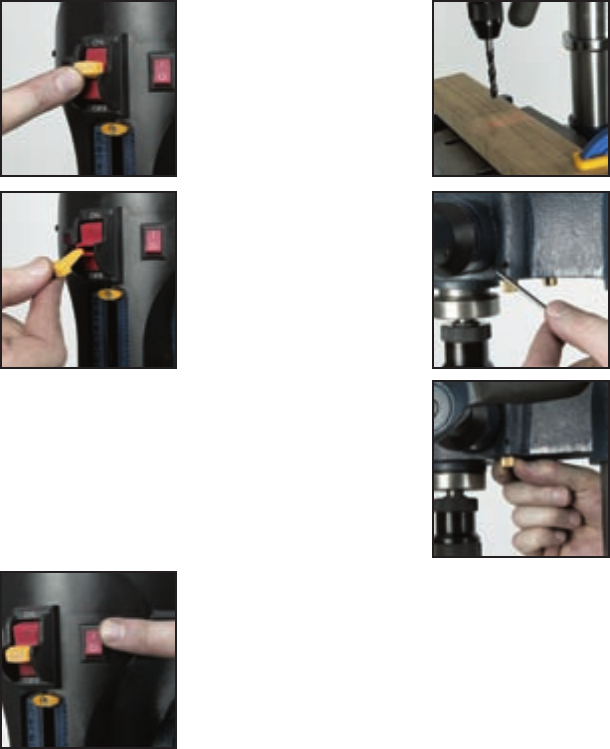
Turning on and off
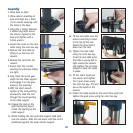
1. To start the drill press insert
the switch disabling insert
and move the switch up to
the ‘ON’ position.
2. Move the switch down to the
‘OFF’ position to turn the drill
press off.
3. Remove the switch disabling
insert to prevent unauthorised
use and store it in a secure
location out of reach of
children.
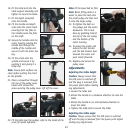
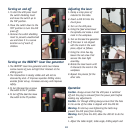
Turning on the REDEYE® laser line generator
1. The REDEYE® laser line generator emits two intense
narrow beams of pure red light that intersect at the
drilling point.
2. The intersection is clearly visible and will not be
obscured by dust. It improves operator drilling vision,
enables faster set-up, increases accuracy and improves
safety.
3. To turn the laser line on move
the switch to the ‘I’ position.
4. To turn off the laser line move
the switch to the ‘O’ position.
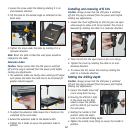
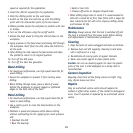
Adjusting the laser
1. Clamp a scrap piece of
material to the table.
2. Insert a drill bit into the
chuck jaws.
3. Turn on the drill press.
4. Using the feed wheel lower
the spindle and make a small
mark in the workpiece.
5. Turn on the laser line generator.
6. If the laser is not aligned
with the mark in the work
piece, adjust as follows.
7. Using the 3mm hex key
loosen the set screw that
secures the laser light
assembly.
8. Rotate the laser beam until
it intersects the mark in the
workpiece.
9. Repeat the process for the
other side.
Operation
Caution. Always ensure that the drill press is switched
off and the plug is removed from the power point before
making any adjustments.
Caution. For through drilling always ensure that the hole
in the centre of the table is aligned with the drill bit.
Warning. On start-up over-tightening the belts may
prevent the drill press from starting.
Warning. Don’t force the drill, allow the drill bit to do the
work.
1. Adjust the table height, table angle, drilling depth and