


Motor Brush Replacement
14 309977H
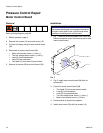
Motor Brush Replacement
Motor Brush Removal
Replace brushes worn to less than 1/2 in. Check both
sides. Order Brush Repair Kit 243642 for 220-240 Vac
motors and 243215 for 100-120 Vac motors with exter-
nal capacitor.
1. Read General Repair Information; page 6.
2. Relieve pressure; page 6.
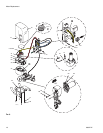
3. Fig. 6. Remove six screws (12) and motor cover
(18).
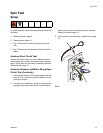
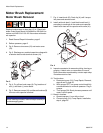
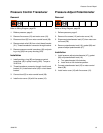
4. Fig. 3. Discharge any residual capacitor voltage with
a resistive load across terminal screws (41).
FIG.3
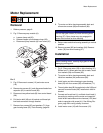
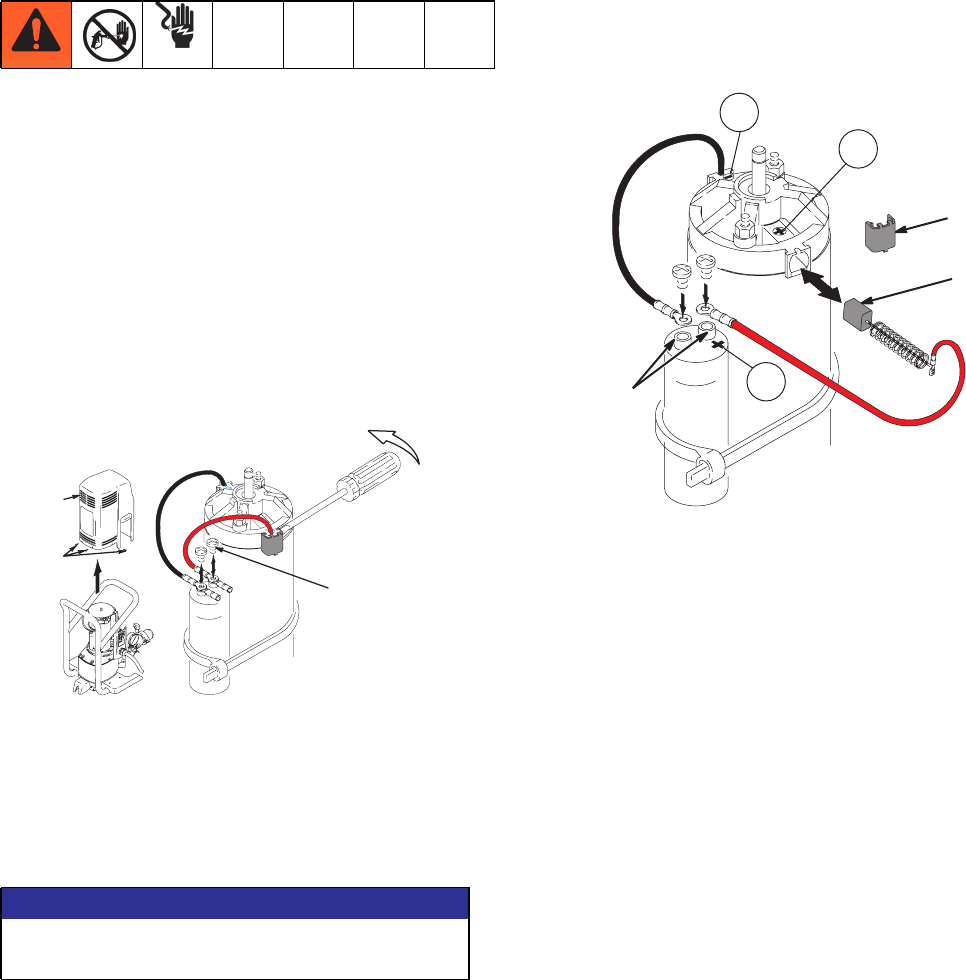
5. Fig. 4. Pry off two brush caps (A). Tag locations of
red (+) and black (-) motor leads.
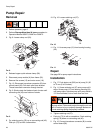
6. Fig. 5. Remove screws (41) and discard brushes (B)
for motor with capacitor attached.
7. Fig. 4. Insert brush (B). Push clip (A) until it snaps
into place and secures brush.
8. Install red brush lead (+) and black brush lead (-)
according to markings on the motor and capacitor.
Install brush lead end to capacitor with screw (41).
FIG.4
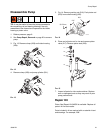
9. Inspect commutator for excessive pitting, burning or
gouging. A black color on commutator is normal.
Have commutator resurfaced by a motor repair shop
if brushes wear too fast.
10. Test brushes.
a. Disconnect pump (31); Pump Repair, Removal,
steps 8 and 9, page 20.
b. With sprayer OFF, turn pump control knob fully
counterclockwise to minimum pressure. Plug in
sprayer.
c. Turn sprayer ON. Slowly increase pressure until
motor is at full speed.
11. Break in brushes.
a. Operate sprayer 1 hour with no load.
b. Connect pump (31); Pump Repair, Installation,
step 4, page 20.
NOTICE
When installing brushes, follow all steps carefully to
avoid damaging parts.
&
WLD
$
%
WLD
&