


8308-341
Setup
and Shutdown
Removing and Installing the Fluid Nozzle
Follow
this procedure whenever you remove and install
a fluid nozzle. See page 4 to select a nozzle or
needle/nozzle/air cap kit.
1.
Follow the
Pressure Relief Procedure
on
page 7.
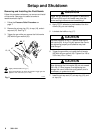
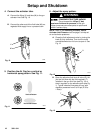
2.
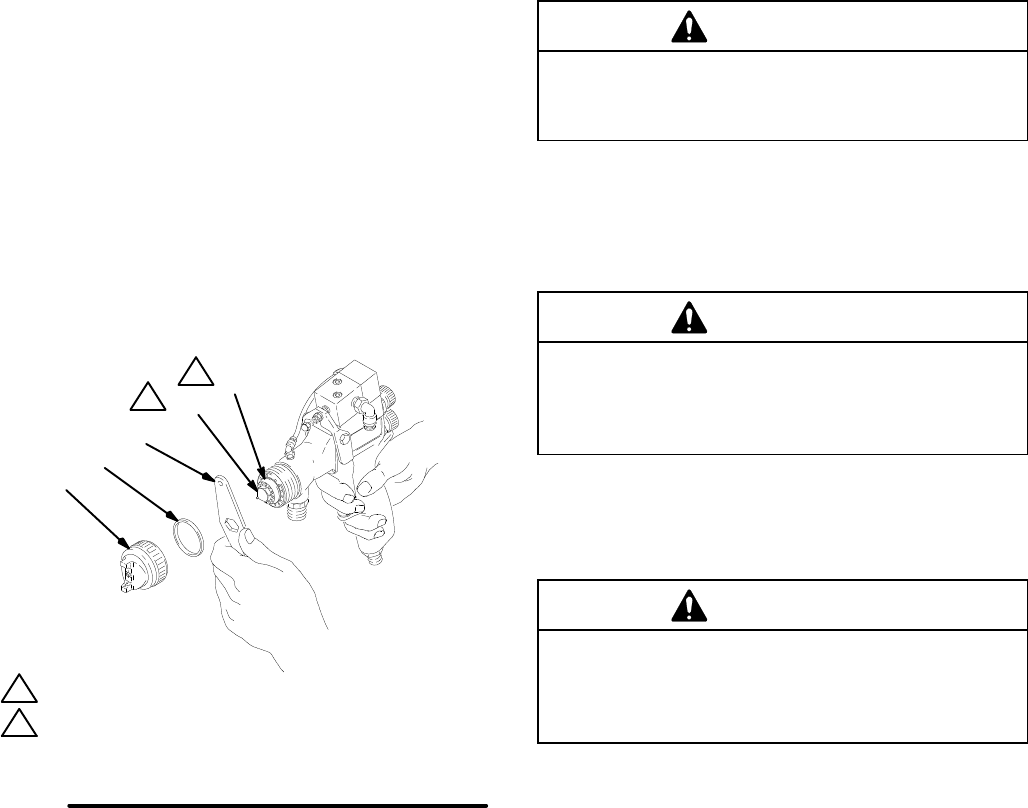
Remove the air cap ring (12), air cap (19), and air
cap seal (47). See Fig. 5.
3. T
rigger the gun while you remove the fluid nozzle
(20) with the gun wrench (35).
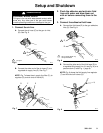
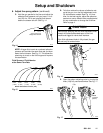
Fig. 5
02757A
35
20
12, 19
47
17
Lightly
lubricate baf
fle o-ring (17)
Apply
PTFE
adhesive to nozzle (20) threads. T
rigger gun and
tighten
to 125–150 in-lbs (14–17 N
Sm)
2
1
1
2
CAUTION
Trigger
the gun whenever you tighten or remove the
fluid nozzle (20) to pull the needle away from the
nozzle seating surface and avoid scratching it.
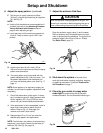
4.
Apply PTFE
r
adhesive to the threads of the fluid
nozzle (20) you are installing.
5.
Lubricate the baf
fle o-ring (17).
CAUTION
Lubricate the baf
fle o-ring (17) before installing the
fluid nozzle (20). A dry o-ring will prevent the nozzle
from tightening properly and adhesive may leak
inside the gun.
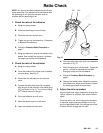
6. T
rigger the gun while you install the fluid nozzle
(20) with the gun wrench (35). T
ighten it to 125 to
150 in-lbs (14 to 17 N
Sm).
CAUTION
When tightening the fluid nozzle (20), do not
exceed
150 in-lbs (17 N
S
m) torque. Over-tightening can
damage the nozzle, af
fect the spray pattern, and is
unnecessary to guarantee a seal.
7.
Install the air cap seal (47), air cap ring (12), and
air cap (19).