G0500/G1018/G1018HW 8" Jointers -17-
Wiring Connection
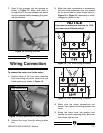
To connect the motor cord to the motor:
1. Remove three of the four motor mounting
bolts and swing the motor toward the rear
stand opening, as shown in Figure 13.
Figure 13. Motor positioned for easy access.
3. Make the motor connections in accordance
with the wiring schematics that are located
on the motor label or those shown below in
Figure 14 or Figure 15, depending on which
voltage you decide to use.
Figure 12. Installing grommet.
7. Snap fit the grommet into the opening as
shown in Figure 12. Make sure there is
enough slack in the wire between the switch
and the grommet before snapping the grom-
met into position.
Wiring Junction Box
Figure 14. 110V motor wiring schematic.
Figure 15. 220V motor wiring schematic.
2. Remove the cover from the wiring junction
box.
4. Make sure the wiring connections are
secure, then replace the wiring junction box
cover.
5. Swing the motor back into position and
replace the motor mounting bolts, but leave
them finger tight for now.
NOTICE
If you plan to rewire your machine for 110V,
you must use a different switch!


