-24-
G0500/G1018/G1018HW 8" Jointers
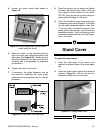
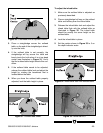
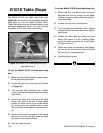
The Model G1018 has table stop bolts (see
Figure 34) that can be set to repeatedly bring the
table back to 0 on the depth indicator scale.
These table stop bolts are located directly under
both table adjustment levers. If you do not have
the Model G1018, skip these instructions.
G1018 Table Stops
Figure 34. Model G1018 table stop bolt (only
one side shown).
To set the Model G1018 outfeed table stop
bolt:
1. Make sure the outfeed table has been adjust-
ed as previously described.
2. Loosen the jam nut on the stop bolt, shown
in Figure 34.
3. Turn the stop bolt clockwise until it makes
contact with the table base behind the adjust-
ment block.
4. Loosen the table lock and move the table
down, then move it up until it stops. Make
certain the table returns to its correct height
by verifying that the outfeed table is even
with one of the knife blades at top dead cen-
ter.
5. Adjust and check as necessary, then tighten
the jam nut on the stop bolt when the table
will return to its correct position.
6. Lock the table in place.
To set the Model G1018 infeed table stop bolt:
1. Make sure that the infeed table has been
adjusted and that the pointer on the depth
indicator scale has been calibrated as previ-
ously described.
2. Loosen the jam nut on the stop bolt.
3. Turn the stop bolt clockwise until it makes
contact with the table base behind the adjust-
ment block.
4. Loosen the table lock and move the table
down, then return it to the 0 setting. Make
certain the table returns to the 0 point while
using the stop bolt.
5. Adjust and check as necessary, then tighten
the jam nut on the stop bolt when the table
will return to its correct position.
6. Lock the table in place.
Stop Bolt
Jam Nut


