


-1 4 -
-14-
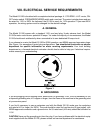
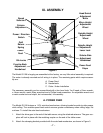
H. HEAD ROTATION
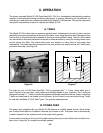
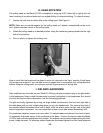
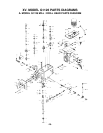
The milling head on the Model G1126 is designed to swing up to 90° either left or right at the mill
head, enabling it to perform tasks such as angled drilling or horizontal slotting. To rotate the head:
1. Loosen the lock nuts on either side of the milling head. See Figure 11.
NOTE: Make sure to provide support for the milling head so it doesn’t unexpectedly rotate on its
own. Always maintain control of the milling head.
2. Rotate the milling head to its desired position, using the reference guides provided on the right
side of the machine.
3. Once in place, re-tighten the locking nuts.
Figure 11
Keep in mind that the head must be dialed in when it’s returned to the “zero” position if high levels
of accuracy are required. If you are able to use an angled vise to accomplish your milling operation
without tilting the milling head, you will save yourself a good amount of set-up time.
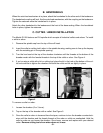
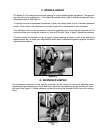
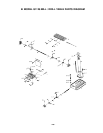
I. GIB AND LEADSCREW
After sustained use, the table on your Model G1126 may develop excessive play in the gibs and/or
in the leadscrews. Keep in mind that some play is normal, particularly in the leadscrews. But, should
you find the need to make adjustments, use the following guidelines:
The gibs are easily tightened by turning the large slotted screwheads in the front and right side of
the table base until you feel a slight drag when you turn the handwheels. The screw at the front of
the machine affects movement from front to back, while the screw under the right side of the table
affects longitudinal movement. You can loosen the screws if your table seems excessively stiff.
The leadscrew adjusters require a bit more effort. To adjust leadscrew tightness from front to back,
it’s necessary to provide access to the underside of the base. A hole in the bench under the Model
G1126’s base will make adjustment fairly simple. The adjuster can be found midway along the lead-
screw, inside the base. To eliminate excess leadscrew movement tighten the Allen head setscrew