


H7583 Tenoning Jig
-9-
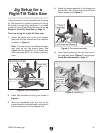
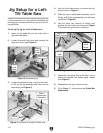
Figure 2. Partial assembly.
In this procedure you will assemble the tenoning
jig. The guide bar is initially in position on the jig
for jig use on a right-tilting table saw. If you need
to use the jig on a left-tilting table saw, go to Jig
Setup for
a Left-Tilt Table Saw on Page 10.
To set up the jig for a right tilt table saw:
1. Attach the clamp arm to the work support
plate with the cap screws and lock washers
as shown in
Figure 2.
Note: The cap screws are different lengths
and must go into the correct holes. See
Figure 2 for the long (M10-1.5 x 25mm), and
short cap screw (M10-1.5 x 20mm) hole loca
-
tions.
Jig Setup for a
Right-Tilt Table Saw
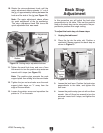
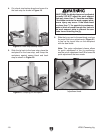
Figure 4. Installed jig.
5. Insert the jig guide bar into the miter slot in
the table-saw table (
Figure 4), and perform
Guide Bar Adjustment on Page 11
.
Guide Bar
Inserted
Into the
Miter Slot
Work Support Plate
Clamp
Assembly
Clamp Arm
Short Cap Screw
Long Cap Screw
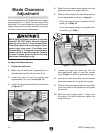
2. Install both handles into the jig as shown in
Figure 2.
3. Slide the handwheel onto the end of the
clamp assembly threaded shaft and secure it
with the setscrew in the handwheel hub.
4. Attach the clamp assembly to the clamp arm
with an M8-1.25 x 50 cap screw and the 8mm
fender washer (see
Figure 3).
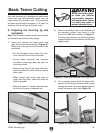
Figure 3. Completed assembly.
M8-1.25 x 50 Cap Screw
and Oversized Washer