


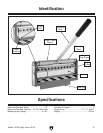
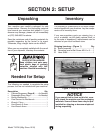

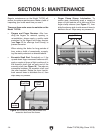

Model T10726 (Mfg. Since 12/12)
-11-
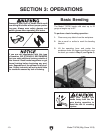
4. Slowly lower the operating lever until the
bend in the workpiece reaches the desired
angle (see Figure 7 for an example).
Note: Make sure the finger points are directly
over the finger receiver groove as you lower
the lever.
5. Lift the operating lever to raise the fingers,
remove the bent workpiece, then lower the
fingers back into the finger receiver.
Figure 7. Example of a 90° bend.
If a pan or box is desired, refer to the next
subsection to position the fingers for this
operation.
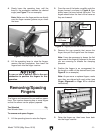
2. From the rear of the brake, carefully push the
fingers forward, as shown in Figure 8, then
slowly lower the lever behind the brake. The
fingers should clear the front of the frame as
they are lowered.
Removing /Spacing
Fingers
The fingers can be spaced for pan and box opera-
tions. This involves removing one or more fingers
so that the others can be properly spaced.
Tool Needed Qty
Hex Wrench 6mm .............................................. 1
To remove and space fingers:
1. Lift the operating lever to raise the fingers.
3. Remove the cap screw(s) that secure the
finger, then pull the fingers from the clamps.
Note: It may be necessary to loosen the first
cap screw on the finger(s) adjacent to the one
you are removing to release the clamping
pressure.
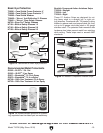
4. Position the fingers in an arrangement for
the length or width of the desired bend (see
Figure 9 for an example).
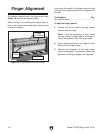
Note: As you move or replace fingers, make
sure they are aligned with each other (see
Finger Alignment on Page 16 for detailed
instructions).
5. Raise the fingers up, then lower them back
into the finger receiver.
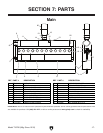
Figure 8. Fingers positioned forward of frame.
Fingers Forward
of Frame
Finger Cap
Screw
Figure 9. Example of finger spacing.
Finger Clamp