


Dolphin® 7200 User’s Guide 3 - 7
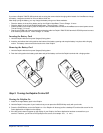
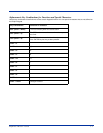
Laser Engine
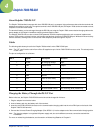
The Dolphin 7200 is currently available with four scanning options:
• Standard range
• Long range
• High density scanning
• No scan engine
The laser engine converts reflected light into a digital pattern that represents the bar code data. A clear window covers the laser
engine to protect it from dust and dirt.
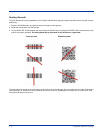
Image Engine
The Dolphin 7200 2D terminal is available with the following imaging options:
• Standard image engine: scans 2 to 9 in. (5 to 23 cm)
• High-Density: scans 2 to 4 in. (5 to 12 cm)
• LX image engine: scans 2 to 15 in. (5 to 38 cm) on low density bar codes
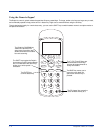
Lanyard Eyelet for Optional Wrist Strap
This feature allows a strap to be attached to the Dolphin terminal so that it can be conveniently secured around the wrist or
hooked on to a belt. Not available on the Dolphin 7200 2D or the Dolphin 7200 RS-232 terminals.
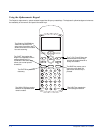
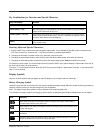
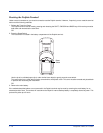
Battery Well
The battery well is a recessed area on the back of the Dolphin that holds the 3.6V battery pack.
Reset Switch
The Reset Switch is located inside the Dolphin terminal and is accessible through a small opening within the battery well. To
reset the Dolphin, remove the label covering the opening and press the reset switch with a small blunt object such as a paper clip.
Note: Under normal circumstances, you should never need to reset your Dolphin terminal.
Infrared Communications Port
The Infrared Communications Port allows the Dolphin to communicate through the Dolphin HomeBase to a host serial device.
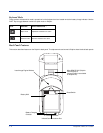
Battery Charging Contacts
When the Dolphin is placed in the main well of the Dolphin HomeBase, the Dolphin's battery pack is charged through these
contacts.