


Page 9SKU 44914
Adjusting Cutting Depth
You can set the depth of cut using the scale marked on the side of the Trimmer.
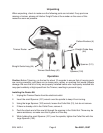
1. Install the router bit as previously described.
2. Loosen the thumbscrew securing the clear plastic Base (32) to the Motor Housing (29).
Slide the holder downward so the router bit is retracted within the Base.
3. Place the Base on a flat surface, and slide the Trimmer down in the Base until the tip of
the bit contacts the work surface. Tighten the thumbscrew Knob (49).
4. The scale on the housing now shows the starting position. This starting position will
vary, depending on the bit used.
5. Add the desired depth of cut to the starting position. For example, if the starting
position is 25 mm, and the desired depth of cut is 10 mm, the correct adjustment on the
scale is 35 mm.
6. Loosen the thumbscrew Knob, and raise the holder until the scale shows the correct
reading; in this example 35 mm. Tighten the thumbscrew Knob. You are now ready to
cut.
Note: It is always wise to make a test cut to assure that the Trimmer is adjusted properly before
beginning to cut the final workpiece.
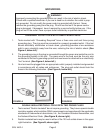
Using the Straight Guide
The Straight Guide is used to make cuts parallel to the edge of a workpiece, or following a
guide clamped onto the workpiece.
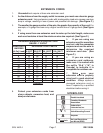
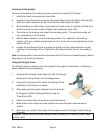
1. Assemble the Straight Guide Assy. (44) with the Straight
Guide (442) facing inward, and the flanges down.
2. Using the Thumbscrew (39), attach the Straight Guide
Assembly to the Trimmer, as shown.
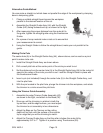
3. After measuring the proper distance from the router bit
to the guard, tighten the Straight Guide using the
Thumb Nut (445).
4. Adjust the cutting depth as previously described above.
5. Make a test cut on a piece of scrap material to ensure that your measurement is
correct.
6. Make your cut parallel to the edge of the workpiece with the Straight Guide following
the edge.
(442)
(39)
(445)
Caution: Always secure the object being routed by clamping, or holding inavise. Never
hold by hand.