


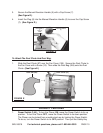
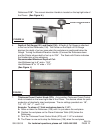
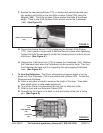

F. Reverse the two planing Knives (173), or replace with new Knives and care-
fully position each Knife on the two Knife Location Collars (185) using the
Magnets (288). The Knife Location Collars position the Knife at the proper
height. There is one Knife Location Collar at each end of the Cutterhead
(184). (See Figure O.)
KNIFE LOCATION COLLAR
(185)
G. Secure the planing Knives (173) by tightening the fourteen Knife Screws
(172). Use a piece of scrap wood to hold the Knives in place while tightening.
Tighten the Knife Screws equally so that the clamping force is uniform across
the Knives. (See Figure N.)
H. Depress the Cutterhead Lock (175) to release the Cutterhead (184). Release
the Cutterhead Lock when the Cutterhead can be turned by hand. Then turn
the Cutterhead by hand until it is stopped by the self-engaging Cutterhead
Lock. (See Figure M.)
4. To level the Rollercase: The Planer will produce an uneven depth of cut (ta-
pered cut) if the Rollercase (136) is not parallel with its Base (222). To level the
Rollercase with the Base:
A. Plane a test piece of wood to measure the height of the taper. Then deter-
mine which corner or side needs adjustment.
B. Turn off the Planer and disconnect the unit from its electrical outlet.
C. Fold the front and rear Extension Tables (223).
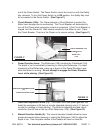
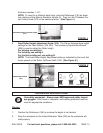
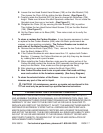
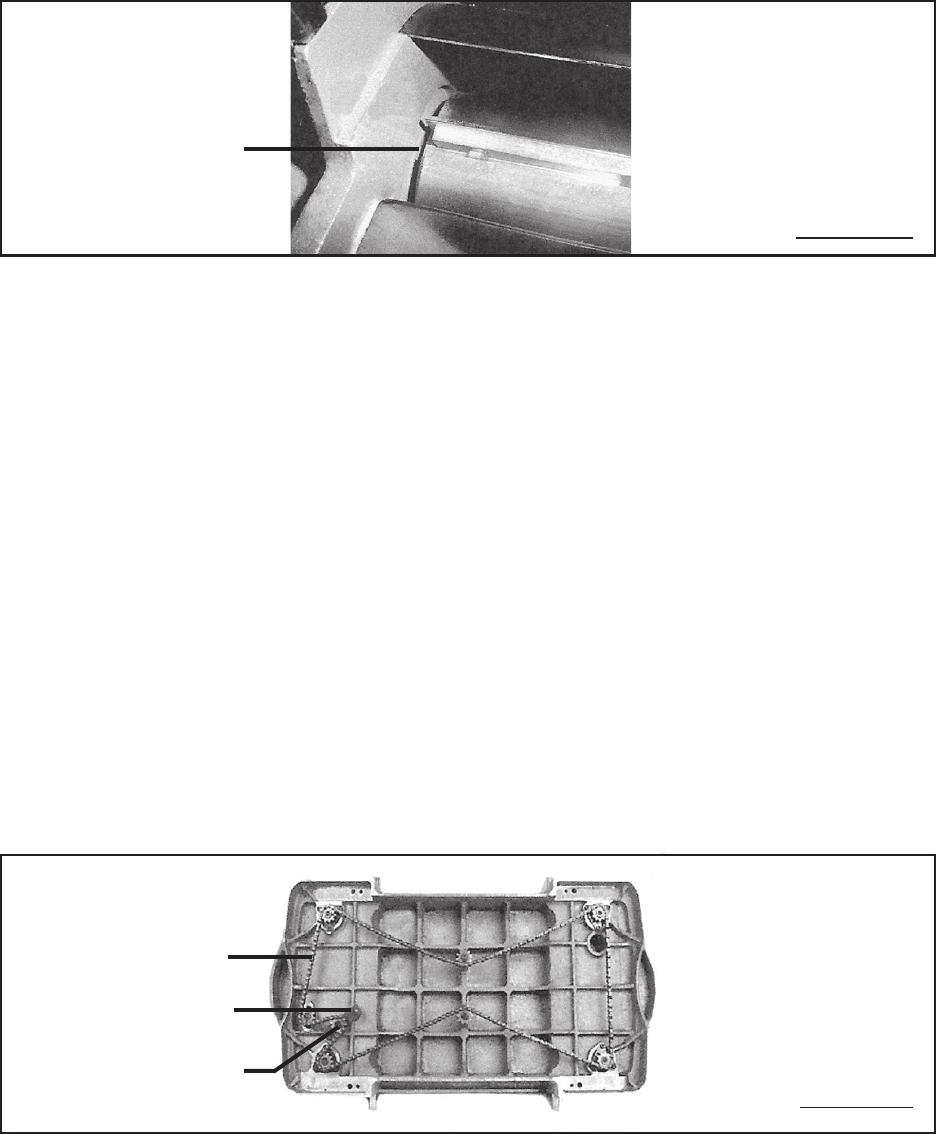
D. Carefully lay the Planer on its back, so that the bottom of the unit is facing
you. (See Figure P.)
FIGURE O
FIGURE P
IDLER BRACKET
(156)
CHAIN
(52)
SPROCKET
(201)
SKU 95518 For technical questions, please call 1-800-444-3353 PAGE 16