


— 16 —
English
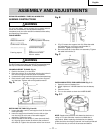
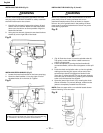
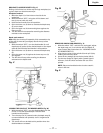
ON / OFF SWITCH PANEL (Fig. S)
The “ON / OFF” switch has a removable, yellow plastic
key. With the key removed from the switch, unauthorized
and hazardous use by children and others is minimized.
1. To turn the drill press “ON”, insert the key (2) into the
slot of the switch (1), and move the switch upward to
the “ON” position.
2. To turn the drill press “OFF”, move the switch
downward.
3. To lock the switch in the “OFF” position, grasp the
yellow key of the toggle switch and pull it out.
4. With the switch key removed, the switch will not
operate to power the drill press on.
5. If the switch key is removed while the drill press is
running, it can be turned “OFF” but cannot be
restarted without inserting the switch key.
6. To turn the worklight “ON”, press the rocker switch (3)
to the on position.
7. Never leave the drill press unattended. Turn the light
switch and power switch “OFF” and wait until it
comes to a complete stop, and remove the safety key
to prevent unauthorized starts.
Fig. S
3
MAX
LAMP
AMPOULE
80W
MAX
LIGHT
LUMIERE
2
1
WARNING
ALWAYS lock the switch “OFF” when the drill press is not
in use. Remove the key and keep it in a safe place. In the
event of a power failure, blown fuse, or tripped circuit
breaker, turn the switch “OFF” and remove the key,
preventing an accidental startup when power comes on.
WARNING
Laser is radiated when laser guide is turned on. Avoid
direct eye exposure. Always un-plug drill pres from power
source before making any adjustment.
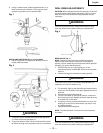
LASER ON/OFF SWITCH (Fig. Q-1)
To turn the laser On or Off, press the rocker switch (3).
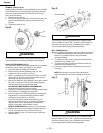
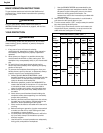
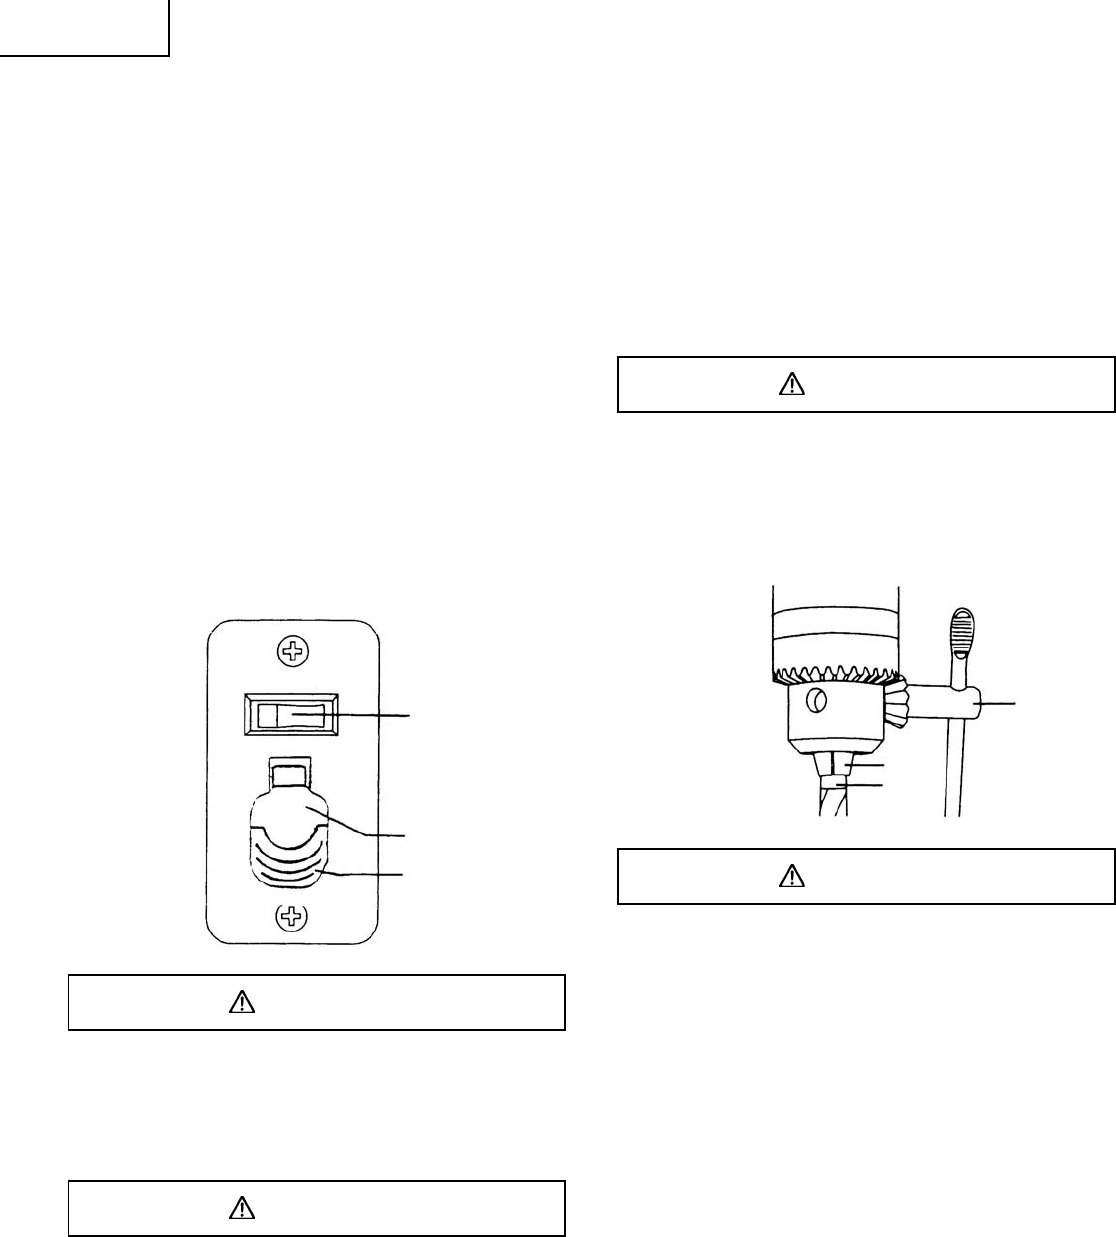
INSTALLING A DRILL BIT IN THE CHUCK (Fig. T)
1. With the switch “OFF” and the yellow switch key
removed, open the chuck jaws (1) using the chuck key
(2). Turn the chuck key counterclockwise to open the
chuck jaws (1).
2. Insert the drill bit (3) into the chuck far enough to
obtain maximum gripping by the jaws, but not far
enough to touch the spiral grooves (flutes) of the drill
bit when the jaws are tightened.
3. Make sure that the drill is centered in the chuck.
4. Turn the chuck key clockwise to tighten the jaws.
WARNING
To avoid injury or accident by the chuck key ejecting
forcibly from the chuck when the power is turned “ON”,
use only the self-ejecting chuck key supplied with this drill
press. ALWAYS recheck and remove the chuck key before
turning the power “ON”.
Fig. T
2
1
3
WARNING
To prevent the workpiece or backup material from being
torn from your hands while drilling, you MUST position
the workpiece against the LEFT side of the column. If the
workpiece or the backup material is not long enough to
reach the column, clamp them to the table, or use the
fence provided with the drill press to brace the workpiece.
Failure to secure the workpiece could result in personal
injury.