23
English
“C” clamp
7. Compound Mitering
This is compound of bevel cross cutting and mitering. It is infrequently used. Follow the instruction for
both bevel cross cutting and mitering.
8. Work Helpers
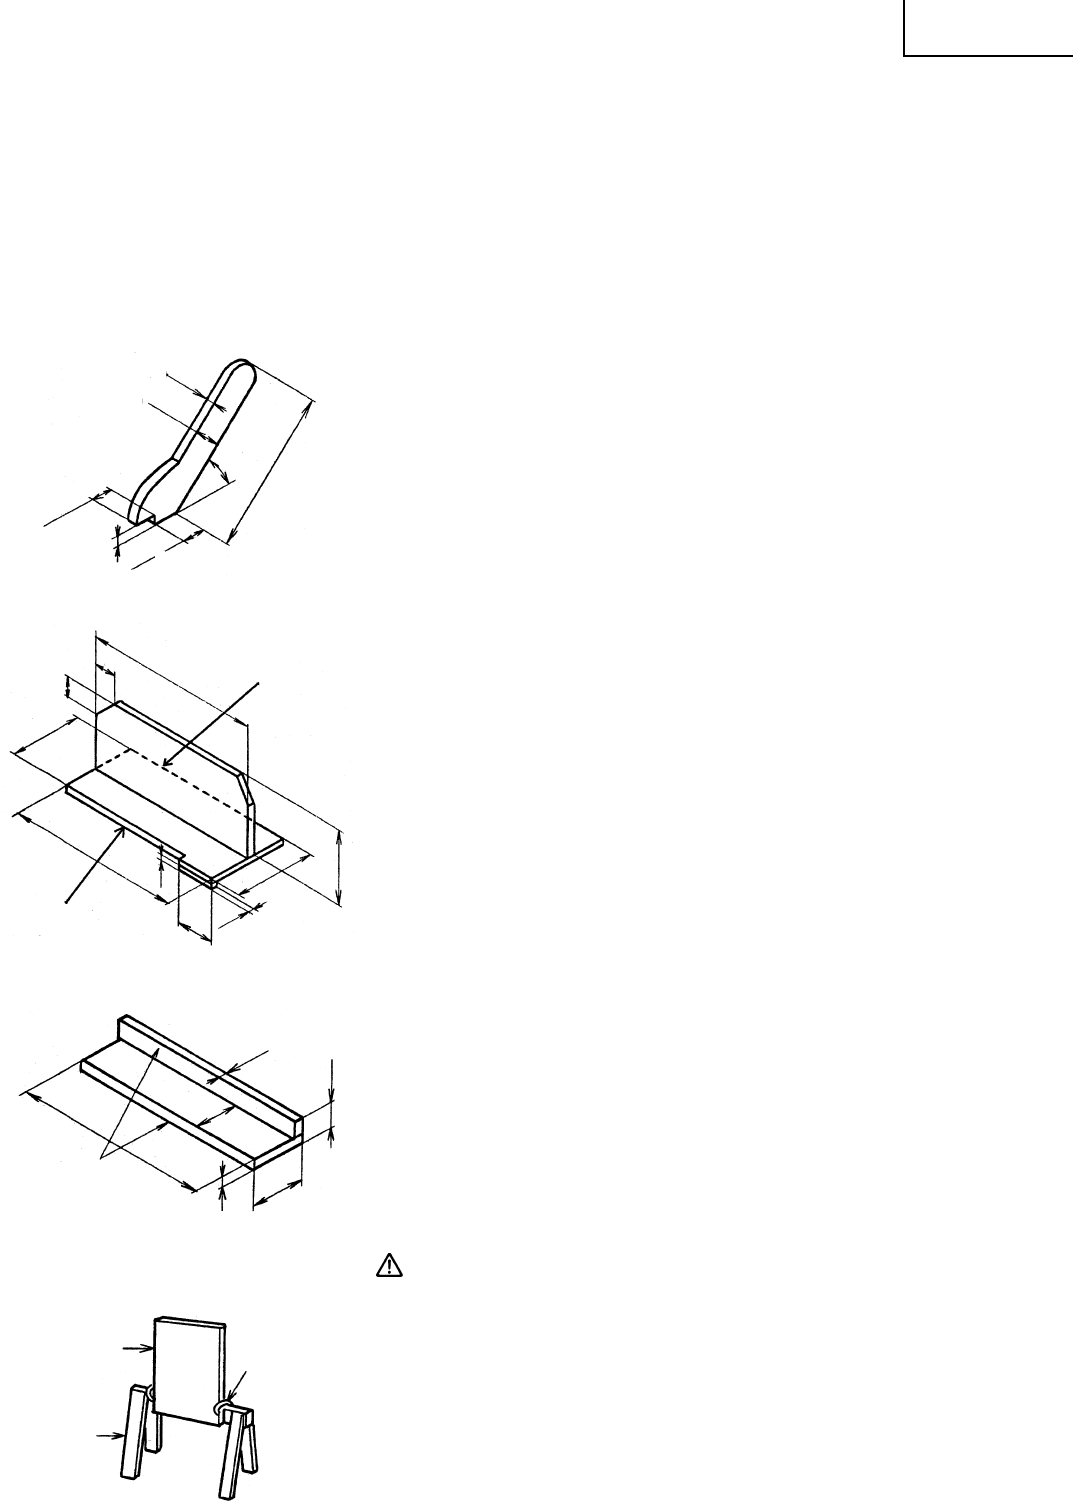
For certain operations, work helpers such as a push stick, push block, auxiliary fence, work support or
the like should be used.
These helpers can be made by yourself using this table saw.
Refer to following figures which shows typical work helpers dimensions.
(1) Push Stick
When the width of rip 2" (50 mm) to 6" (152 mm) wide, use a
push stick to feed the workpiece.
A push stick is available as an optional accessory (refer to
page 10). A push stick can be easily made from a piece of 3/4"
(19 mm) thick plywood.
(2) Push Block
When the width of rip is less than 2" (50 mm) wide, use a
push block.
q Use a piece of 3/8" (9.5 mm) and 3/4" (19 mm) thick
plywood.
w Glue the small piece of wood 3/8" (9.5 mm) × 3/8" (19 mm)
× 2-1/2" (63.5 mm).
e Provide a grip in the center of the plywood and fix together
with glue and wood screws.
r A and B edges must be parallel.
(3) Auxiliary Fence
When the width of rip is less than 2" (50 mm) the push stick
cannot be used because the saw blade guard (see Fig. 23) will
interfer with a push stick, use an auxiliary fence and push
stick.
q Use a piece of 3/8" (9.5 mm) and 3/4" (19 mm) thick
plywood.
w Fasten both together with glue and wood screws.
CAUTION: The push block is used with the auxiliary fence.
The 4-3/4" (121 mm) dimension must be the
same on both.
(4) Work Support
q Clamp a piece of plywood to a sawhorse with “C” clamps.
w Adjust the height of the plywood to level it with the height
of the table surface.
Fig. 29
3/4"
1-1/4"
1/2"
1-1/4"
1-1/4"
45°
12"
Fig. 30
12"
12"
3/8"
4-3/4"
1"
1"
B
A
2-1/2"
3/8"
5-1/8"
5"
Fig. 31
This face and this
edge must be
parallel.
3/4"
4-3/4"
20"
2"
3/4"
5-1/2"
Fig. 32
Plywood
Saw Horse


