


12
Assembling the Saw to the Stand
Do not plug the table saw into
the power source until all assembly has been
completed! Failure to comply may cause
serious injury!
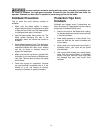
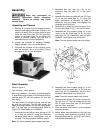
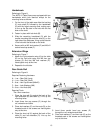
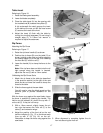
1. Turn the stand upside down and place onto the
table saw (Figure 3)
Note: The side with the JET logo (A) is the
front side of the stand and will be on the same
side as the Warning label (B) on the table saw.
Line up the holes in the top plates of the stand
with the holes in the table saw (C) so that the
front of the stand is flush with the front of the
saw. The sides of the stand should also be
flush with the sides of the saw.
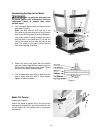
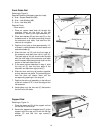
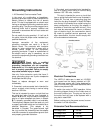
2. Attach the saw to the stand with four M8x20
hex cap screws, eight M8 flat washers and four
M8 hex nuts using Figure 4 as a guide. Tighten
the saw to the stand hardware firmly.
3. Turn the table saw right side up. Make sure the
saw is sitting level and with a 12mm wrench
tighten all stand hardware.
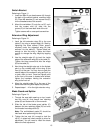
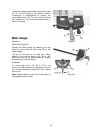
Blade Tilt Pointer
Referring to Figure 5:
Secure the blade tilt pointer (B) on the front of the
saw onto the bracket (C) next to the shaft (D) with
an M4 screw (A) and tighten with a cross-point
screwdriver.
Figure 3
Figure 4
Figure 5